

You're standing at the embroidery machine with a plush towel in the hoop, a delicate lace file on the screen, and a roll of water soluble stabilizer nearby. The question isn't whether to use WSS. It's which job the stabilizer needs to perform: keep stitches above a towel's loops, support a sheer fabric from underneath, or hold an entire lace design until the film disappears.
The right choice prevents shifted lettering, stiff residue, warped lace, and wasted thread. This guide explains how to use water soluble stabilizer for embroidery, including how to choose the role, hoop each project, set up the machine, and rinse the finished work. A suitable embroidery machine, sharp or ballpoint needles, embroidery thread, the correct stabilizer weight, and a test scrap all matter as much as the film itself.
Table of Contents
- What Water Soluble Stabilizer Really Does
- Picking the Right Role for Water Soluble Stabilizer
- Hooping, Layering, and Stitching With Confidence
- Soaking and Rinsing So Nothing Is Left Behind
- Fixing the Problems Every WSS User Meets
- Three Projects That Show WSS at Its Best
- Your Next Stitch and Where to Find It
What Water Soluble Stabilizer Really Does
A transparent sheet at the embroidery machine can serve three different purposes: control a high-pile surface, support delicate fabric, or hold stitches for a freestanding design. Water soluble stabilizer (WSS) provides temporary support while the needle builds the design, then breaks down in water. Modern WSS films range from lightweight topping to heavier sheets for dense freestanding embroidery, so the stabilizer's weight must match the job.
Unlike tear-away backing, WSS is removed by dissolving rather than tearing from the reverse side. Unlike cut-away backing, it is not designed to remain permanently beneath the embroidery. After rinsing, it can leave the project without a permanent stabilizer, which suits lace, patches, towels, and other work where lasting backing would be visible or unwanted. The guide to embroidery stabilizer basics provides broader context on temporary and permanent stabilizer choices.
The three forms a stitcher encounters
The format usually indicates the intended role:
- Clear film topping goes over terry cloth, fleece, felt, and other high-pile fabrics. It smooths the stitching surface so satin columns and lettering remain visible instead of sinking into the nap.
- Mesh-backed wash-away backing goes beneath sheer fabric, delicate weaves, or lightweight knits. It supports the ground without leaving a permanent layer that can show through or change the fabric's hand.
- Thick freestanding sheets support dense lace stitching without fabric underneath. Once the design is complete, dissolving the sheet leaves the stitched thread structure.
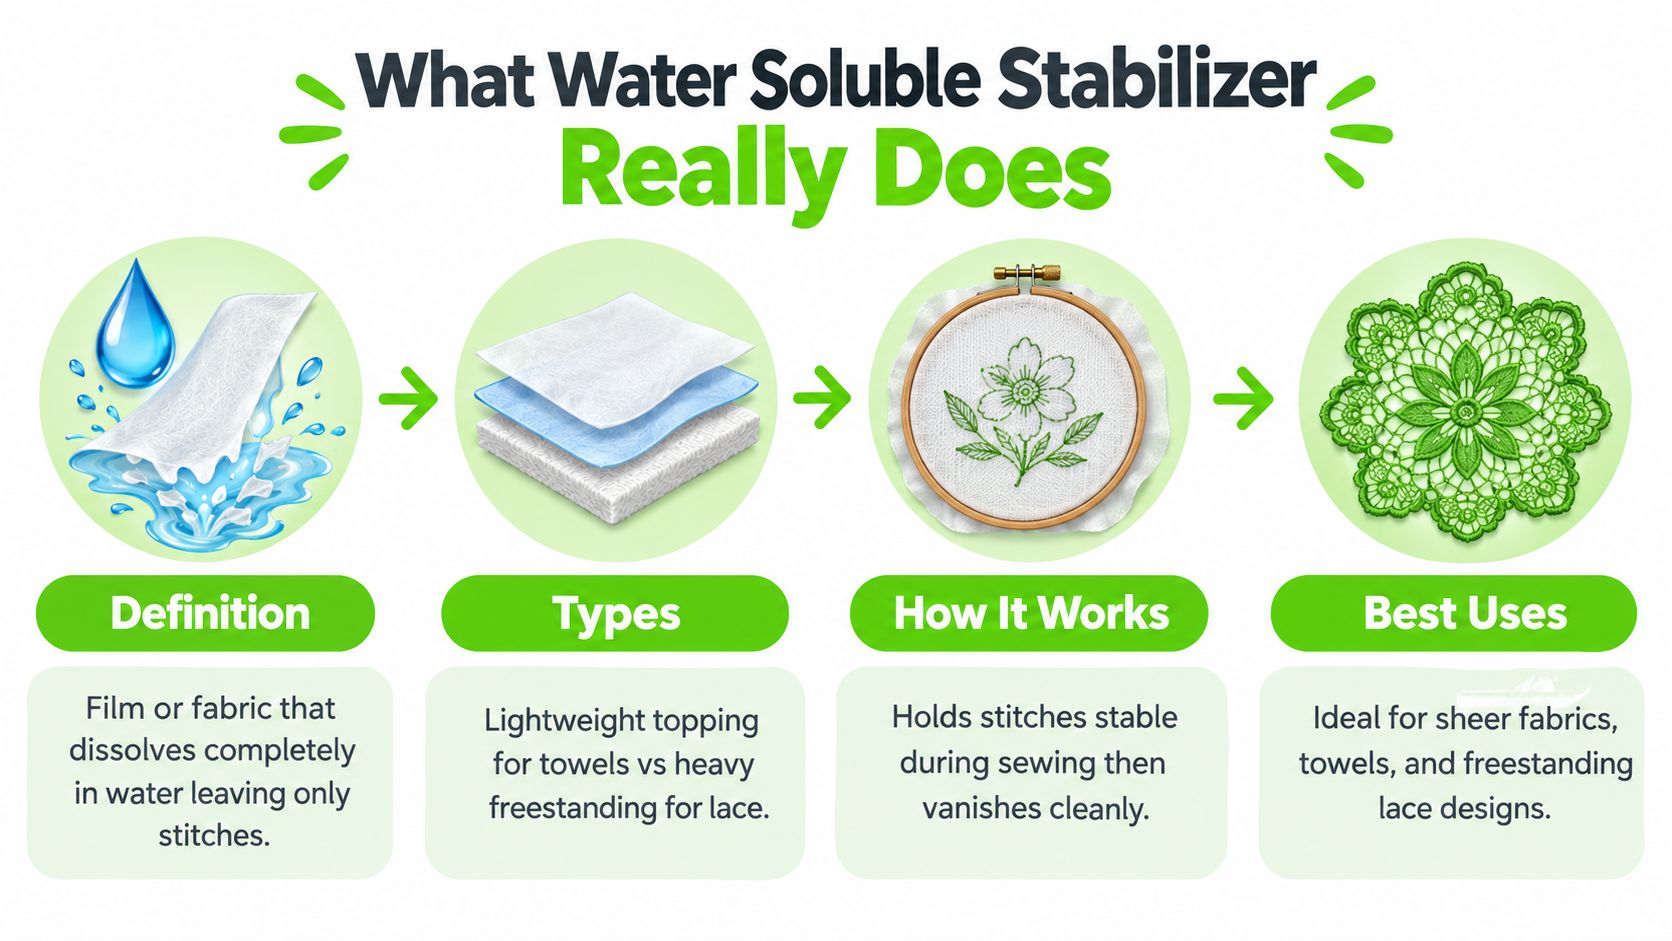
Start by assigning the film a role before choosing a sheet, needle, or machine setting. A lightweight topping is handled differently from a heavy freestanding sheet, and neither replaces a permanent base stabilizer when a knit or other fabric needs lasting structure. The embroidery machine, hoop, needle, thread, and settings still affect registration and stitch quality. B-Sew Inn's stabilizer guidance helps connect the material choice with the wider stabilizer setup.
WSS dissolves in water, but removal is not automatic. Stiffness usually indicates an unsuitable weight, incomplete rinsing, or residue that dried inside dense satin columns and small lace openings. Rinse gently and thoroughly, using enough water to reach the spaces between stitches without stretching the finished work.
Picking the Right Role for Water Soluble Stabilizer
The easiest way to choose WSS is to decide where it belongs before the fabric reaches the hoop. Does the film need to sit on top, underneath, or alone?
| WSS Role | Typical Weight | Best For |
|---|---|---|
| Topping | Lightweight clear film | Terry towels, velour, fleece, felt, and other high-pile fabrics |
| Backing | Lightweight mesh wash-away | Sheer fabrics, delicate weaves, and lightweight knits |
| Freestanding support | Heavy-gauge film or sheets | Lace motifs, doilies, edgings, patches, and designs with no fabric ground |
Topping controls the surface
A towel monogram usually needs a thin topping, not a heavy freestanding sheet. The film rests over the loops and keeps the embroidery thread on the surface, where the satin columns can form clean edges. A simple monogram generally needs one sheet of lightweight topping, while the towel still receives an appropriate backing underneath for fabric stability.
Topping isn't a substitute for a well-supported towel. If the fabric shifts inside the hoop, the film can't correct the registration problem. A suitable embroidery hoop, stable base, embroidery needle, and correctly sized design still matter.
Backing supports fragile ground fabric
Wash-away backing belongs beneath the fabric when a permanent stabilizer would remain visible or interfere with the finished hand. Sheer curtain fabric, organza, and lightweight knits benefit from support underneath, especially when the design has open areas and the stabilizer must disappear completely.
A sewist might otherwise choose tear-away. Tear-away can be appropriate for many stable fabrics, but it isn't the same solution for sheer or delicate projects. The comparison of tear-away stabilizer uses helps clarify when a removable backing is preferable to a wash-away one.
Freestanding support carries the lace
Freestanding lace has no fabric ground to reinforce the stitches. Heavy WSS must provide the temporary foundation, and dense satin-stitch lace often needs two layers of heavy WSS. The layers should be strong enough to resist needle perforation and design movement throughout the file.
The decision is practical: use topping when the problem is fabric nap, backing when the ground fabric needs temporary support, and heavy WSS when the embroidery itself must become the finished object. Weight should follow stitch density, not appearance alone.
Hooping, Layering, and Stitching With Confidence
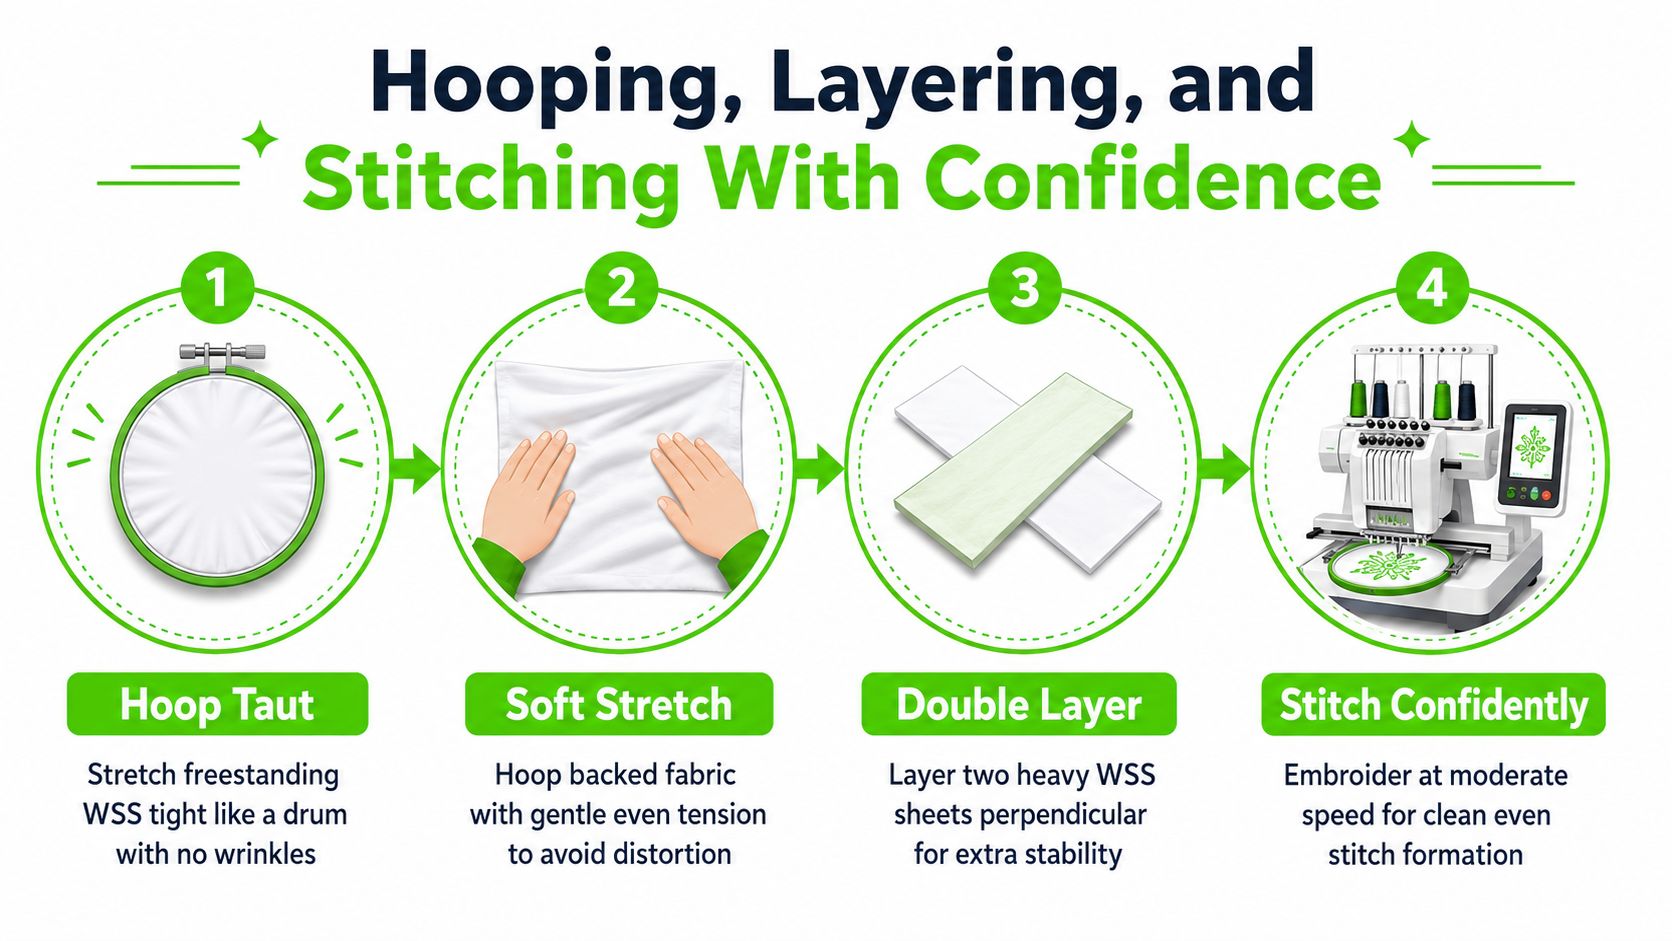
Good WSS results begin with controlled tension. Freestanding film should be hooped taut like a drum, with no wrinkles or loose pockets. Fabric-backed work needs a softer, even stretch. Pulling the fabric aggressively can distort the grain and create puckering after the design releases from the hoop.
A larger piece of film makes setup easier on slippery or stretchy materials. When the hoop can't grip the film securely, a perimeter baste or a suitable temporary adhesive can keep the layer from shifting beneath the needle. Adhesive WSS versions also help with precise placement because the design can be positioned directly before the embroidery begins.
Build the layers for the design
For dense freestanding lace, place two heavy WSS sheets perpendicular to each other. Crossing the grain helps prevent the needle from pulling both sheets off-grain in the same direction, particularly beneath dense satin columns. A single lightweight topping over terry is a different setup. It should float smoothly over the surface rather than being stretched tightly as if it were freestanding support.
Before committing to the final item, stitch the design on a scrap or a small test piece. The test reveals whether the selected needle, thread, stabilizer weight, hoop tension, and design density are cooperating. It's far less expensive to discover a registration or residue problem on a sample than on a finished towel or lace panel.
Match the needle and machine setup
A 75/11 sharp needle works well for many stable fabrics and film-based projects. A ballpoint needle may be more appropriate for knits because its rounded tip moves between fibers rather than cutting them as directly. The final choice should follow the fabric, thread, and machine manufacturer's guidance.
For a dense lace test, a moderate top tension around 1.5 to 2 and a slower speed around 400 to 600 stitches per minute can produce cleaner perforations and reduce unnecessary stress on the film. These settings aren't universal commands. Thread type, design density, needle condition, and the specific machine all influence the result.
The embroidery hoop size chart can help match the design to a hoop that supports the project without forcing excess film into an unstable arrangement. Patient preparation does more for WSS than specialized talent.
Soaking and Rinsing So Nothing Is Left Behind
The removal bath should match the stabilizer's job. Topping usually needs only a light rinse after the excess film is trimmed. Backing on a garment may need more patience around dense stitching. Freestanding lace requires enough water to soften the film without losing the shape created by the thread.
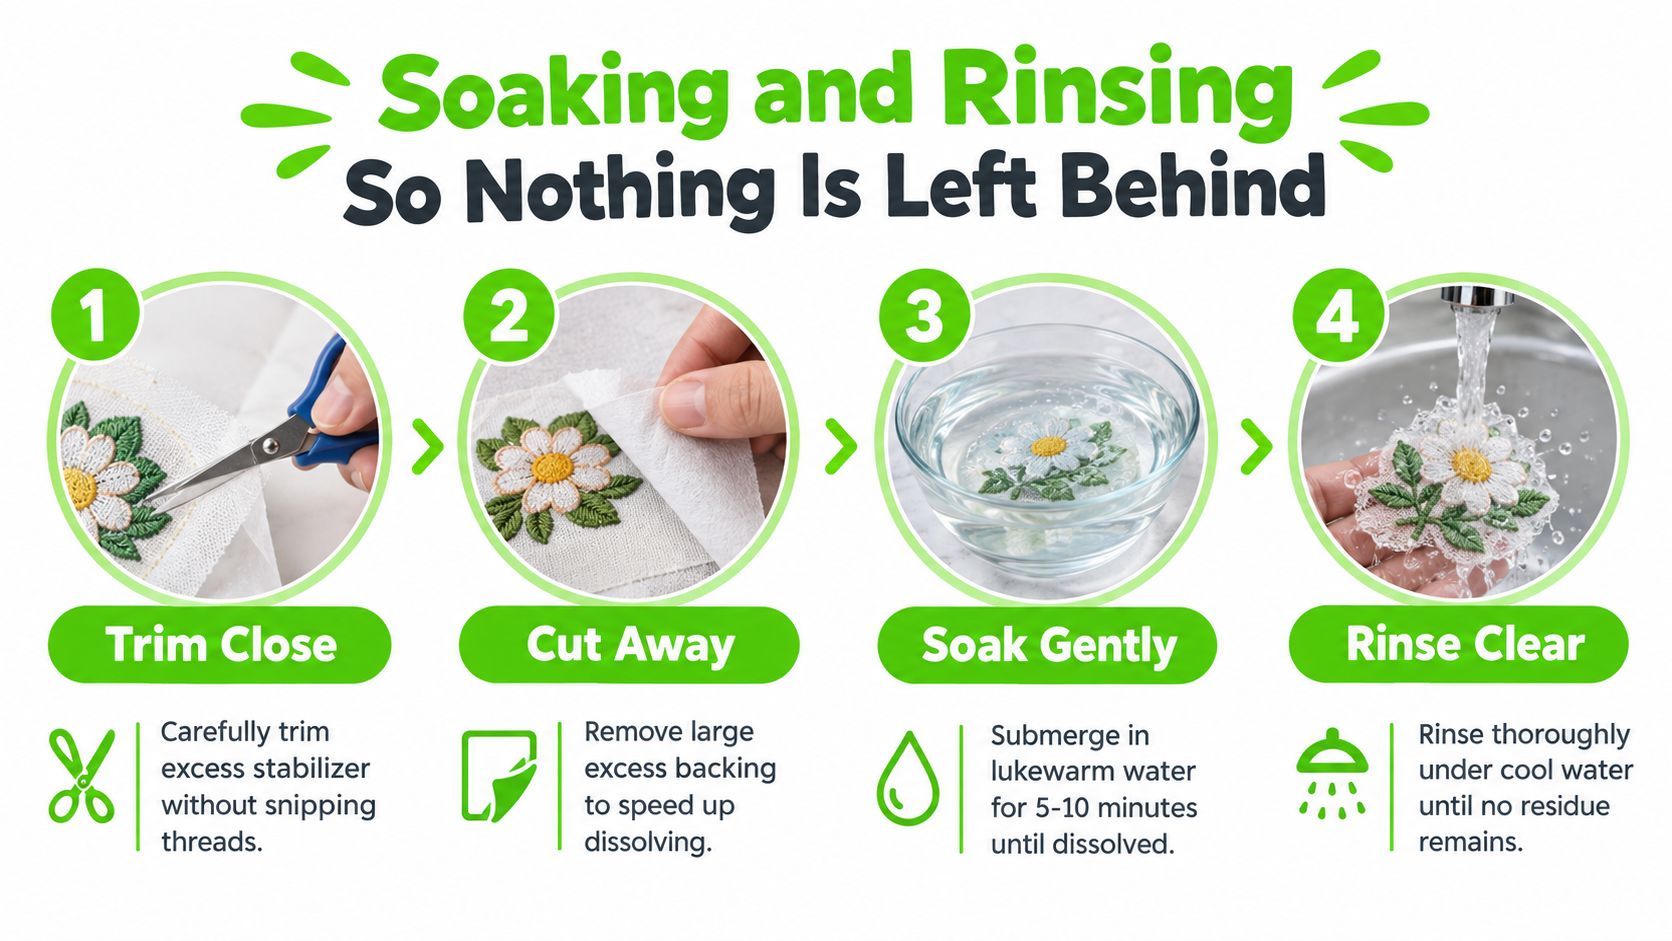
Trim or tear away the outer film first, working close to the embroidery without cutting thread. Removing those large pieces gives water faster access to the remaining stabilizer and reduces handling of the stitched surface.
Submerge the project in lukewarm water, then swirl it gently. Water-soluble stabilizer should dissolve, although thick films and dense lace may require several short soak cycles. Water around 90°F or 32°C works well for controlled removal. A practical embroidery stabilizer removal guide also covers trimming and rinsing choices.
Dissolve, don't wrestle
Rubbing, squeezing, and pulling can distort lace, stretch sheer fabric, or force softened residue deeper into dense stitches. Let the water do most of the work. Once the film has softened, use a fingertip to loosen one stubborn spot at a time, keeping the movement gentle and controlled.
Thin topping often releases quickly after the excess has been torn or trimmed away. Thicker freestanding support can need additional soaking and fresh water. Continue until the piece feels flexible rather than stiff or coated.
Dry according to the finished shape
A towel or garment can usually dry flat. Press it carefully between cotton layers if the fabric needs smoothing. Shape freestanding lace while damp, then pin it flat or support it over a form until dry. Never twist the project to remove water.
Mineral-rich water can leave cloudiness after the stabilizer has dissolved. Replace the bath with fresh lukewarm water and rinse thoroughly. A small splash of vinegar may help with mineral residue, followed by clean-water rinsing. The finished piece should dry in its intended shape, because reshaping becomes harder once the thread is fully dry.
Fixing the Problems Every WSS User Meets
A stiff finished piece doesn't automatically mean the project is ruined. Most WSS problems come from a mismatch between the material, the setup, and the removal process.
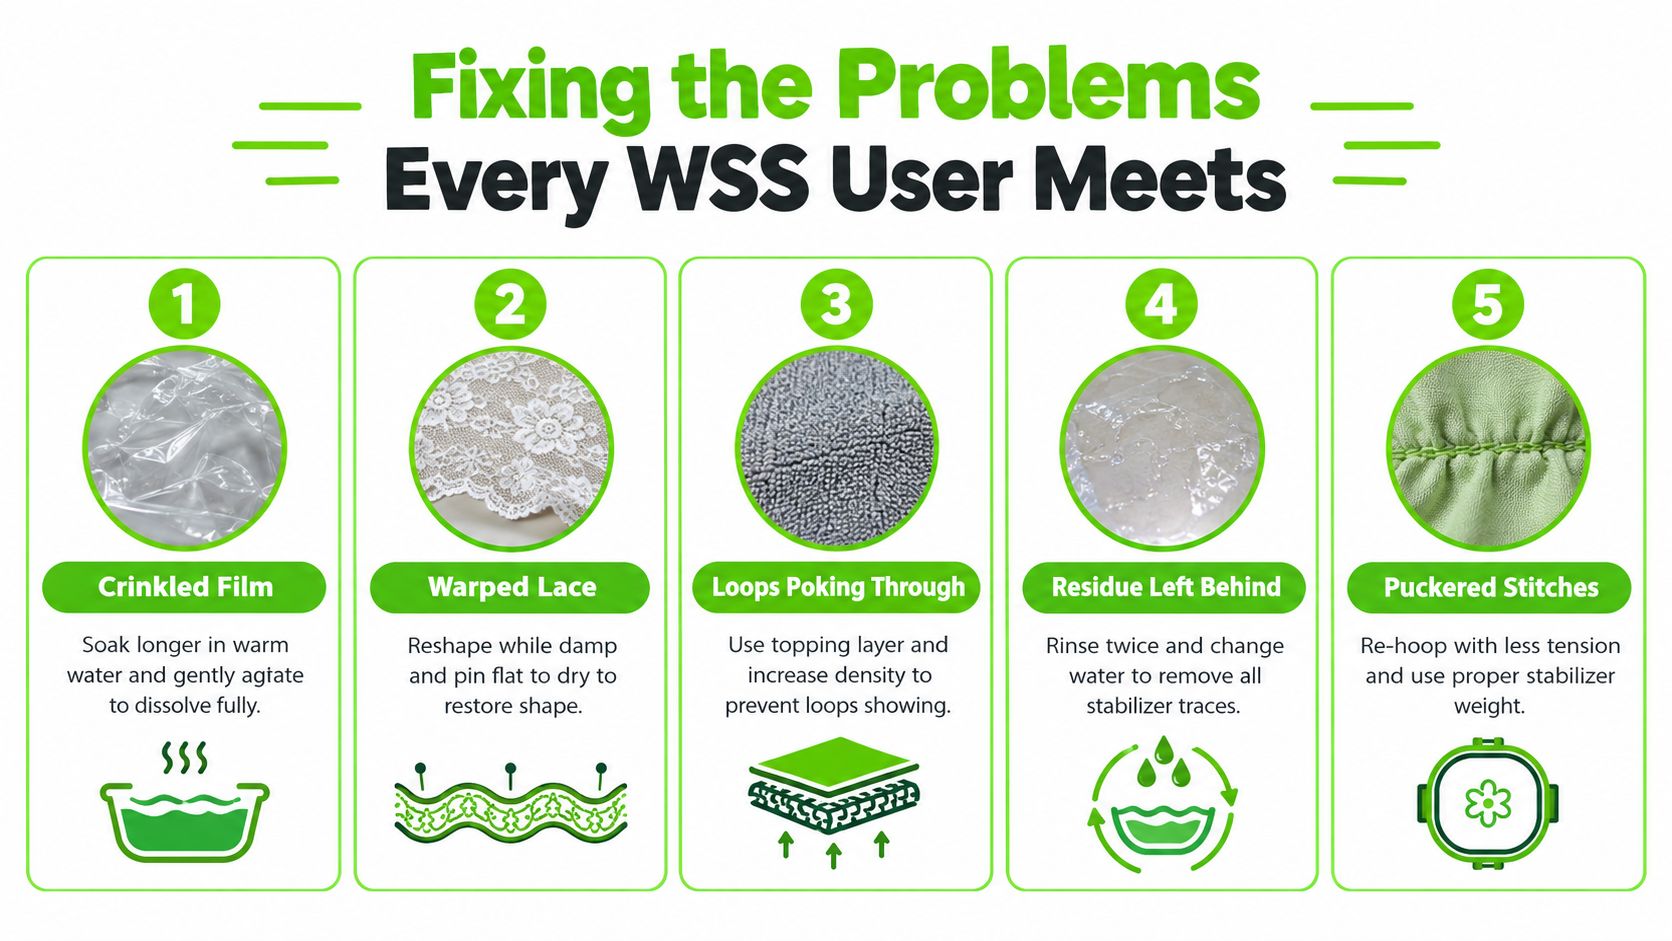
Crinkled film that remains visible usually needs more time in warm or lukewarm water and gentle swirling. Water that is too cold can slow dissolution, while very hot water can cause some films to stiffen rather than dissolve. Remove excess film before soaking, and don't let partially dissolved residue dry back onto the stitches.
Warped lace often starts with loose hooping or aggressive handling in the bath. Freestanding WSS should be taut during stitching, and the finished lace should be dipped and reshaped rather than pulled. Pin it flat or place it over a form while damp.
Loops poking through a towel monogram indicate that the topping didn't control the nap adequately. Use a lightweight topping over the terry surface, confirm that it covers the entire design area, and test the design density before stitching the final towel.
Diagnose the setup, not just the rinse
A shifted design usually reflects under-hooping, fabric movement, or skipped basting on slippery film. Re-hoop with even tension, use a larger stabilizer piece when the material is stretchy or high pile, and baste when the hoop alone can't hold the layers.
Bobbin thread appearing on the right side of freestanding lace can come from thread balance or excessive top tension. Check the machine's tension, use a suitable embroidery bobbin setup, and stitch a sample before repeating the full motif.
Before soaking, check four things: excess film has been trimmed, no thread has been snipped, the water is lukewarm, and the piece can be rinsed without being pulled or squeezed.
If a stubborn patch remains, change the water and repeat a short soak rather than escalating to force. The finished piece should feel soft and clean, with no visible film in holes, satin columns, or lace openings.
Three Projects That Show WSS at Its Best
The same roll of WSS can serve very different projects, but the setup changes with the job. A lace motif needs structural support, a towel needs nap control, and a sheer appliqué needs a clean temporary foundation that won't remain visible.
Freestanding lace motif
For a freestanding lace motif, hoop heavy or medium-heavy WSS without fabric. The film should be taut, and dense files often benefit from crossed layers when the design places substantial stitching in satin columns. A sharp 75/11 needle and balanced embroidery thread can make clean perforations, while a moderate speed and a slightly reduced top tension give the film less punishment during stitching.
After the design finishes, trim away the large excess and soak gently. Shape the lace while damp over a form or pin it flat, depending on whether the motif needs curve or a flat profile. The design's digitizing must provide enough connecting stitches to hold the finished lace together after the temporary support disappears.
Terry towel monogram
A towel monogram needs a lightweight clear topping over the terry loops. Pair it with a suitable tear-away backing beneath the towel when the fabric needs additional stability, then use an embroidery needle suited to the towel's structure. The topping keeps satin lettering from disappearing into the nap, while the base support helps prevent fabric movement.
A single lightweight topping sheet is generally the appropriate starting point for a straightforward monogram. Baste the topping around the design area if the film shifts or bunches beneath the presser foot. After stitching, tear or trim away the excess topping carefully, then rinse the remaining material without rubbing the monogram.
Sheer organza appliqué
A sheer organza appliqué calls for temporary support under the ground fabric so the embroidery can form without a permanent backing showing through. Lightweight mesh wash-away WSS can support the fabric from underneath, while a 75/11 sharp needle is suitable for many stable sheer fabrics. If the fabric is especially delicate, a test sample should determine whether a ballpoint or smaller needle produces the cleaner result.
Keep the hoop tension even rather than stretching the organza excessively. Once the appliqué is stitched, dissolve the wash-away support with lukewarm water and rinse until the stiffness disappears. The finished window should retain the appliqué and embroidery while losing the temporary foundation.
These projects show why stabilizer selection should follow the finished surface. The right WSS role makes removal part of the design rather than a repair job.
Your Next Stitch and Where to Find It
A successful WSS project rests on four decisions. Match the stabilizer role and weight to the fabric or design, hoop without distortion, use lukewarm water for removal, and rinse until no stiffness or visible residue remains. Topping, backing, and freestanding support aren't interchangeable, even when the materials all dissolve in water.
B-Sew Inn carries water-soluble films in light, medium, and heavy weights, along with matching toppers, embroidery needles in sizes 65/9 to 75/11, and stabilizers intended for high-pile terry projects. The retailer is an authorized sewing, quilting, and embroidery machine dealer with stores in Tulsa and Oklahoma City, Oklahoma, Springfield, Missouri, Humble, Texas, and Fayetteville, Arkansas. It also sells and services machines from Baby Lock, Bernina, Bernette, Brother, and Janome, plus sergers, longarm quilting machines, embroidery designs, thread, notions, cabinets, and cutting tables.
Turn the sample into a plan
A test stitch-out should answer practical questions before the final project begins:
- Does the needle suit the fabric?
- Does the topping keep loops away from the stitches?
- Does the backing prevent shifting without creating excess bulk?
- Does the lace remain stable through soaking?
- Does the machine form balanced stitches at the selected speed and tension?
The machine embroidery supplies collection can help organize the stabilizer, needle, thread, hoop, and notions required for that sample. Readers can also see, test, and try machines in person at B-Sew Inn stores across Oklahoma, Missouri, Texas, and Arkansas, an advantage when a new embroidery machine represents a significant purchase.
In-person instruction is another practical route. B-Sew Inn offers in-person machine mastery sessions, service, repair, trade-ins, and classes held at its retail locations. A sewist working on freestanding lace, monogrammed towels, or sheer appliqué can bring questions, samples, and machine-setting concerns to a class or store visit rather than troubleshooting every problem alone.
Photograph the finished lace or towel, share it in the B-Sew Inn community gallery, and keep the sample with its needle, thread, stabilizer, and machine settings. That record makes advanced work, including layered watercolor embroidery or three-dimensional freestanding sculpture, easier to approach with control.
B-Sew Inn offers the water-soluble stabilizers, embroidery needles, machines, service, and in-person education needed to turn this technique into a finished project. Browse the supplies online, or visit B-Sew Inn to test a machine, book a class, and get help choosing the right WSS for the next stitch-out.

