

A child's jacket sits on the kitchen table after school, its small silver logo looking plain under room light. Later, on a dark sidewalk, headlights catch that same logo and it flashes bright white. That change is the appeal of reflective thread for embroidery, and it's also the source of most confusion. It doesn't glow on its own, it doesn't light a path, and a pretty flash doesn't turn a garment into certified safety wear. Readers who understand those limits first make better choices about thread, needle, design and placement.
Table of Contents
- How Reflective Embroidery Thread Returns Light
- Constructions Tex Sizes and Needle Matches
- Accent Visibility Versus Certified Safety Gear
- Projects That Suit Reflective Stitching
- Settings That Keep Glass Beads Intact
- Wash Care and a Before and After Light Test
- Pick Thread and Test a Machine In Person
How Reflective Embroidery Thread Returns Light
That jacket logo works because of retroreflection. Ordinary thread scatters light in many directions. Reflective thread sends much of the light back toward its source, so a driver behind a headlamp, or a person holding a flashlight at eye level, sees the brightest return.
The construction explains the effect. Glass beads or microprisms sit in, or on, a polymer coating carried by a textile thread. Light enters those tiny elements and bounces back toward the lamp. There's no battery, LED or charging step. A textile-engineering study on retroreflective threads reports that retroreflective threads can exceed 300 cd/lx·m² in the direction of the light source.
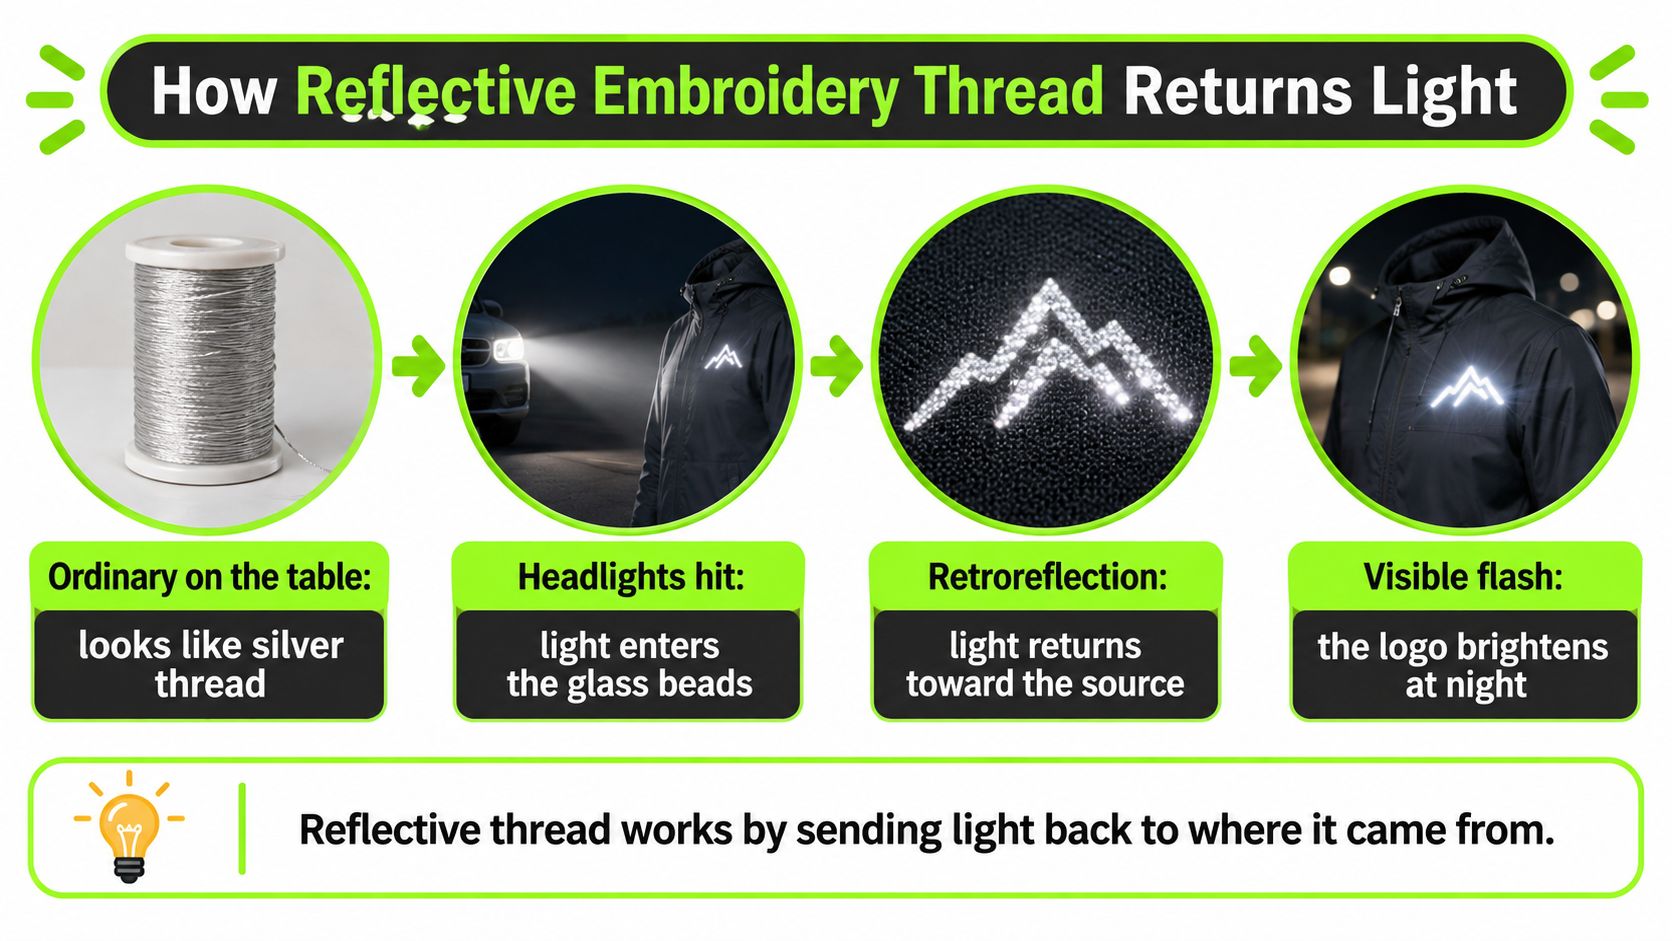
That number is a benchmark for the flash, not a promise for every spool or stitch pattern. Bead or prism shape, coating quality, stitch coverage, abrasion and laundering all change how much reflectivity remains. Placement matters too, because light has to strike the stitches directly.
Daylight Look Versus Night Return
Under daylight, reflective thread often looks like a muted silver accent. Under a headlamp or camera flash, that same stitching can read as bright white. Fluorescent thread behaves differently. It looks vivid in ambient light, but it doesn't necessarily return a headlamp beam toward a driver.
For readers comparing thread types before buying, a guide to good embroidery thread choices helps separate sheen, strength and specialty effects. Reflective thread belongs in the specialty category, with handling closer to a technical thread than to soft rayon.
Pros
- No power needed: The flash comes from returned light, not batteries.
- Built into the design: Logos, lettering, seams and motifs can carry the effect without a sewn-on patch.
- Flexible placement: Small areas of stitching keep a garment wearable.
Cons
- Plain in daylight: The color rarely looks dramatic on the table.
- Needs direct light: A fold, strap or collar can block the return.
- Harder on the setup: The thread is typically thicker and stiffer than rayon or polyester, and heat, abrasion and washing can reduce the effect.
Constructions Tex Sizes and Needle Matches
Reflective embroidery works best when the thread construction suits the motif, fabric and needle. A thicker thread can cover more of a design, but its added stiffness may affect the thread path and stitch registration. The table compares constructions and the specifications available for each. Check the maker's information for the exact spool before sewing, since needle recommendations and heat limits can vary by construction.
| Construction | Size and makeup | Needle | Strength or certification | Heat limit |
|---|---|---|---|---|
| AMANN Isa Reflect | Tex 50; polyamide, glass, polyester, polyurethane; 500 m | Nm 80/12 minimum | Abrasion resistance reported through embroidery | Press from the back and keep heat below the maker limit for that spool |
| Gunold Reflective 30 | Silver Miniking; polyester and glass beads | Large-eye embroidery needle sized from the maker sheet | OEKO-TEX Standard 100 | No hot iron directly on the motif |
| Signal Tex 80 (recycled variant) | Tex 80 | 90/14 R | About 1,000 cN; elongation 17–27% | About 210–220 °C |
| Signal Tex 120 | Tex 120 | 90/14 R | About 3,900 cN; elongation 17–28% | Stay below the maker limit stated for that exact spool |
| Signal softer Tex 70 | Tex 70 | 90/14 R | Lubricated finish for needle heat | About 250–260 °C |
The Coats Signal reflective threads product information sheet gives the Signal thread strengths, elongation ranges, needle recommendation and heat limits shown in the table. The AMANN and Gunold details are presented as product specifications; confirm construction-specific guidance with the maker before choosing a needle or applying heat.
How to Read Tex Without Guessing
Tex measures thread weight in grams per 1,000 meters. A higher Tex number means a heavier thread. Use this sewing thread size guide to compare reflective constructions with familiar sewing thread sizes. The practical tradeoff is straightforward: heavier thread can provide more coverage, but may increase needle deflection, abrasion and breaks.
Lighter thread generally passes through fabric with less resistance and leaves more room in the needle eye. That can help on lettering, where tight turns put extra stress on thread. A heavier construction can suit a bold outline on a jacket or bag, provided the sample supports lower stitch density and slower machine speed.
A small chest lettering job on a knit training top is a good test case. Start with the lightest construction that still gives the lettering a clear return under a flashlight. A larger backpack logo may allow a bolder thread, but sample it first to check needle fit and stitch density.
Choose coverage with the flashlight, not with the spool label alone. The right Tex is the lightest one that still returns a clear flash in the finished stitch.
Machine field size affects which design dimensions fit in one hooping, but it does not determine the thread match. The Baby Lock Meridian 2 Embroidery Machine is a dedicated embroidery machine. Match the thread, needle and stitch density to the fabric and motif, then check the design size against the machine's field before stitching.
Accent Visibility Versus Certified Safety Gear
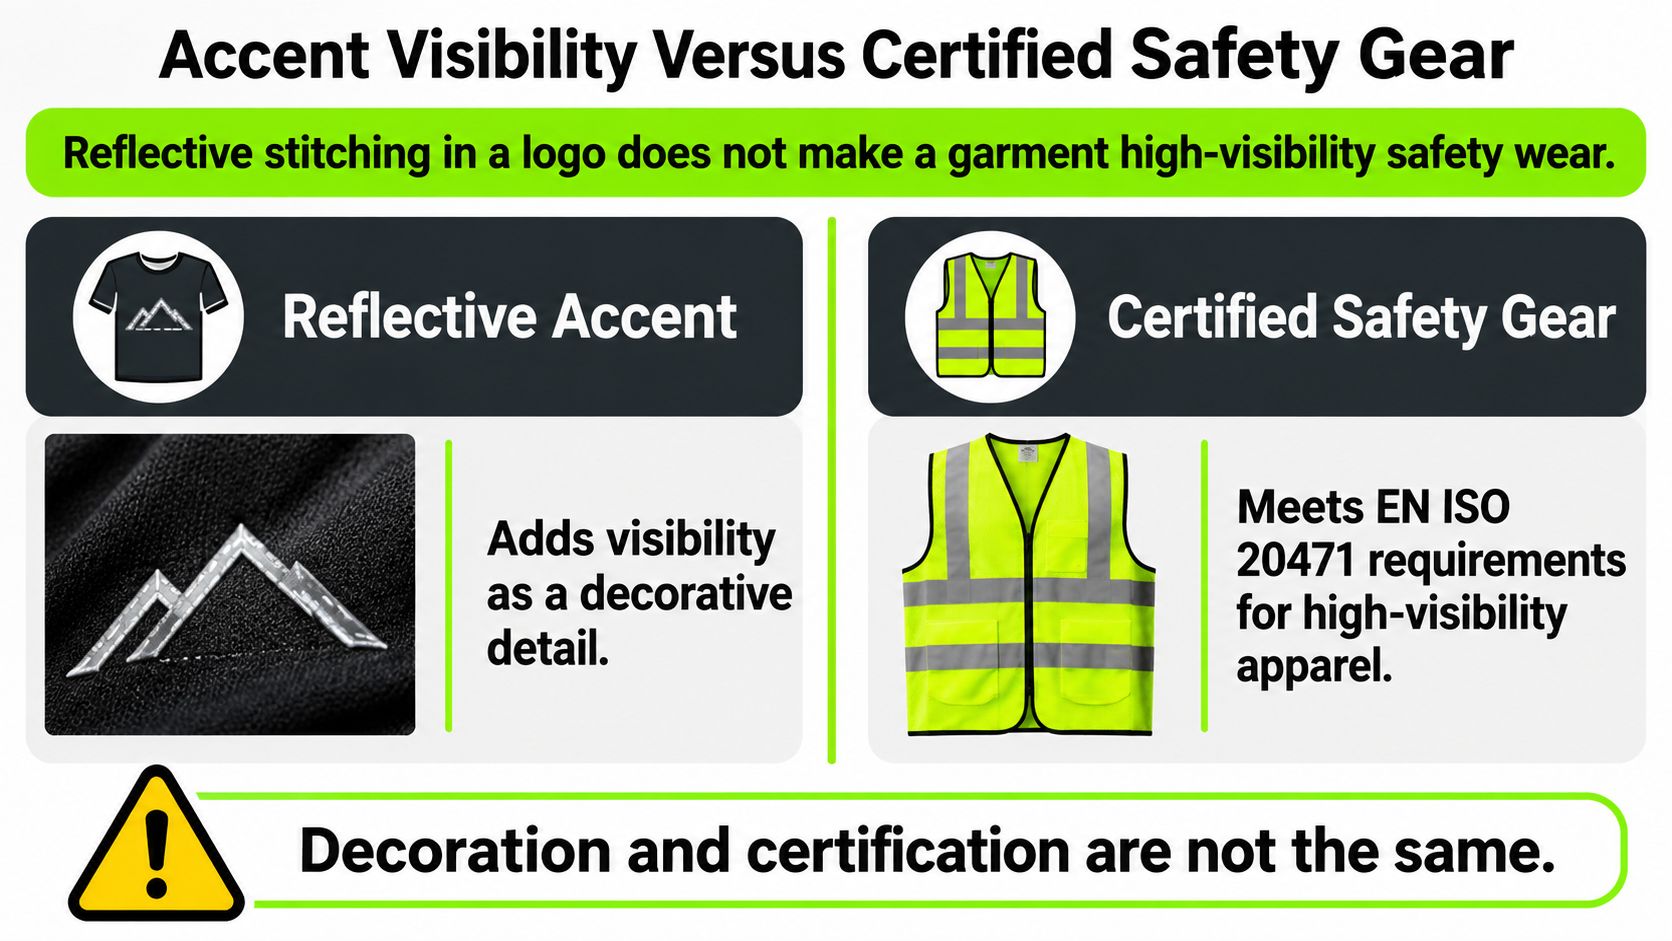
A reflective logo can catch a headlight without making its garment certified high-visibility clothing. Keep that distinction clear when adding stitching to a child's coat, cycling apparel, roadside workwear, or any product described with a safety claim.
EN ISO 20471 sets requirements for certified high-visibility garments, including retroreflective performance, garment design, and material placement. A decorative stitched motif by itself does not demonstrate that a garment meets the standard. Some reflective threads are also described as “not a safety rated product,” so choose materials designed and tested for the applicable standard when certification is required.
Three Jobs, Three Materials
| Job | Material | What it does | What it does not do |
|---|---|---|---|
| Daytime pop | Fluorescent thread or fabric | Looks bright in ambient light | Does not reliably return headlights |
| Night accent on a design | Reflective embroidery thread | Flashes toward a headlamp or flashlight on logos and outlines | Does not certify a garment to EN ISO 20471 |
| Required high-visibility gear | Tested retroreflective tape or fabric, placed to the standard | Meets a safety specification when the garment is designed for it | Is not replaced by a stitched motif |
The materials serve different purposes. A reflective star on a child's coat can add a light-catching detail, but a seller cannot use the stitch alone to support a claim that the coat is safety equipment. For a garment that must meet a standard, its design and materials need to be selected and assessed for that purpose.
A cycling jersey can use reflective lettering across the back or an outline on a sleeve as a supplemental accent at dusk. That detail does not replace riding lights or establish that the jersey is certified gear for road work. Describe the stitch according to what it does: it returns light when a headlamp or flashlight hits it.
Check the Effect on the Finished Garment
Construction and coverage affect what you see. Rather than assume one reflective construction will perform better than another, stitch a sample using the intended fabric, design, and thread. View it in ordinary daylight, then shine a flashlight toward it from the direction a viewer is likely to approach. This separates daytime brightness from the flash of returned light and lets you judge the actual stitched result.
Coverage matters too. A wide area of tested reflective material can return light across more surface than a narrow satin-stitch initial. Placement matters just as much: thread hidden beneath a backpack strap, inside a fold, under a collar, or on the underside of a cuff cannot be seen clearly from that viewing direction.
Decision rule: Use reflective thread for supplemental visibility after checking the finished item under a flashlight. If a safety standard applies, use materials and garment placement designed and tested to meet it.
Plan placement around how the item will be worn. A chest logo faces forward, while a back yoke outline faces someone approaching from behind. Side seams may be visible from the side, provided arms, bags, and outer layers do not cover them during normal use.
On workwear that already has certified reflective bands, embroidery can add a name or logo around the existing safety elements. Keep stitches clear of required bands, and do not puncture, cover, or replace them unless the garment maker approves the change. Treat the reflective thread as a designed accent, not part of the garment's safety certification.
Product wording should make the same distinction. Reflective accent and light-catching detail describe an embroidered feature. Terms such as safety vest, high-visibility certified, or road-safe make claims about tested garment performance that the embroidery alone cannot establish.
Projects That Suit Reflective Stitching
A team jacket with name lettering on the upper back gives each wearer a flash from behind when light reaches it. That is the strength of reflective embroidery as a designed accent: a small motif can add a nighttime glint while leaving most of the garment flexible. The effect depends on where the stitch sits and how the fabric feels, not on how much thread it uses.
A Hong Kong Polytechnic University project on jacquard woven retro-reflective textiles combined reflective threads with jacquard weaving and African-inspired patterns, then examined the textiles in a darkroom. The project used the Kawabata Evaluation System to score fabric hand. Tested fabrics received positive total hand-value results for men's winter shirts and women's lightweight winter dresses, but negative results for corresponding summer garments.
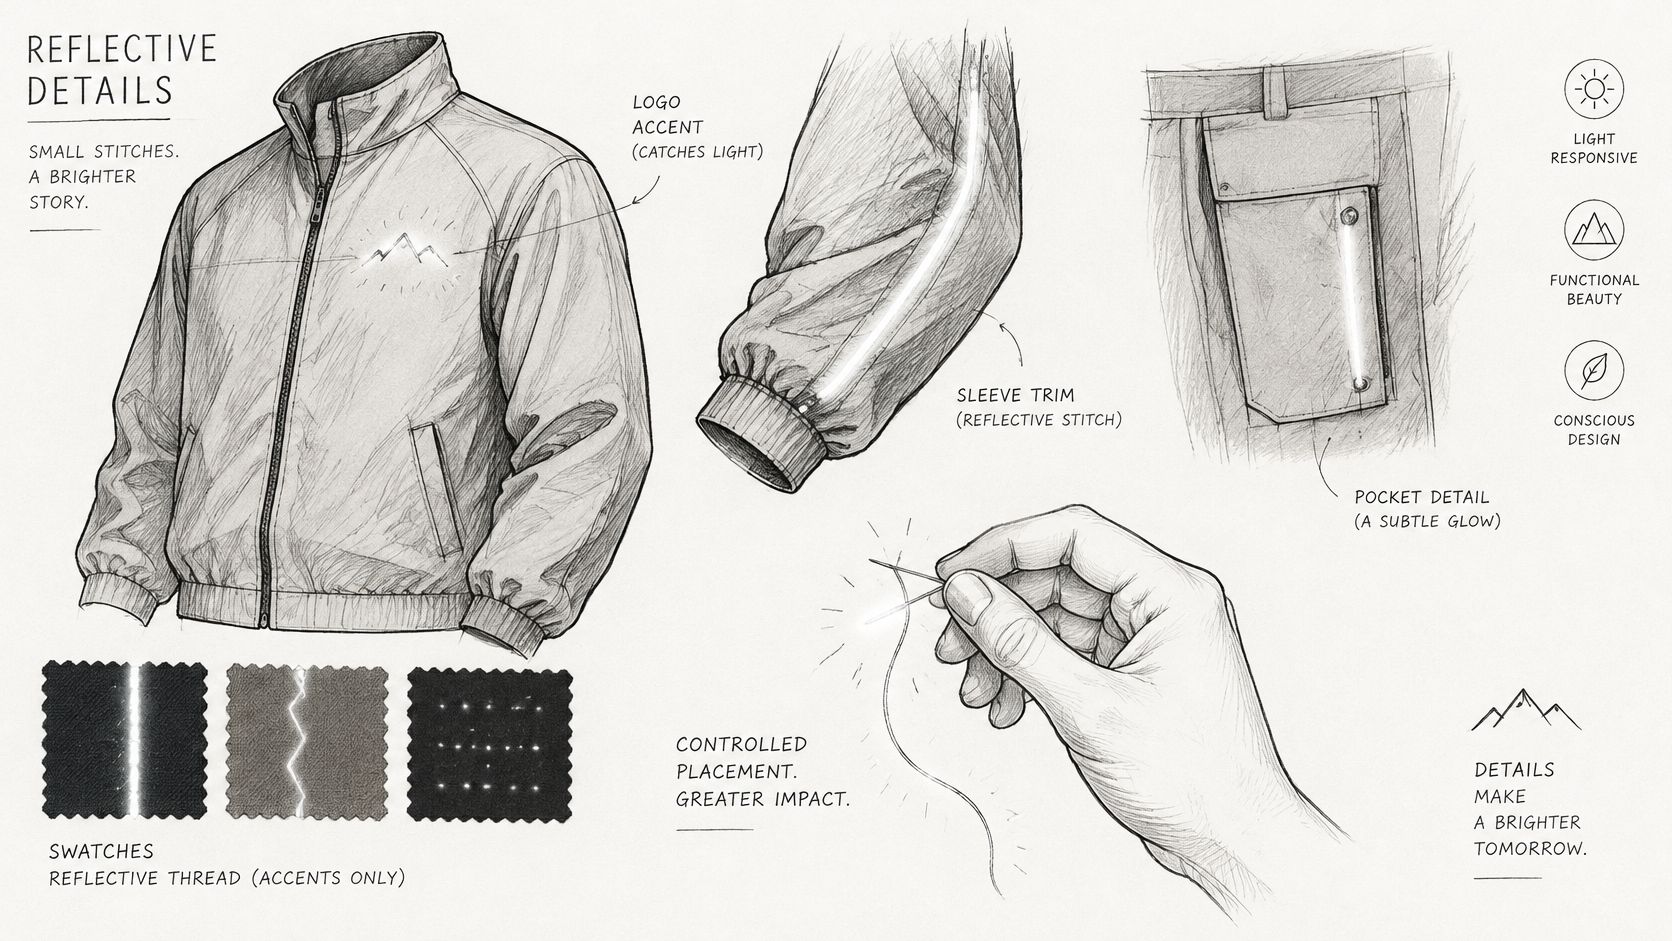
That seasonal difference is useful at the embroidery machine. A dense reflective fill on a summer tee can stiffen an area meant to drape and breathe. A small motif on a winter beanie, jacket or fleece is more likely to suit the fabric's weight and purpose.
Four Placements That Earn Their Thread
- Chest initial on a cycling jacket: A compact letter can catch a headlamp while keeping most of the jacket flexible.
- Edge line on a hat brim: A narrow outline adds a light-catching detail without filling the crown.
- Logo on a backpack pocket: The pocket can present the design to traffic or a following walker, and its fabric often supports stitching.
- Lettering on workwear with certified tape already in place: The name adds identification, while the existing tape remains responsible for its tested safety function.
For more starting points, browse these embroidery machine project ideas. Then consider where light will reach the finished item during use. A motif low on a child's coat might be covered by a scooter, a car-seat strap or an adult's hand.
Outlines usually offer more design contrast than solid fills. In daylight, an outline reads as a silver edge; under a flashlight or headlight, returned light can trace the shape against darker fabric. Open motifs also use less specialty thread and leave more of the base fabric free to bend. A flashlight check on the finished piece helps reveal whether the placement and shape show from the intended direction.
A broad reflective fill across a tote panel may look bold, but it uses more thread, takes longer and can leave the panel feeling boardy. Smaller lettering often suits the purpose better. Match the design to the season, fabric weight and viewing angle before opening the design file. Reflective stitching works well as an accent the wearer can present to a light source, on fabric that can carry the thread without losing comfort.
Settings That Keep Glass Beads Intact
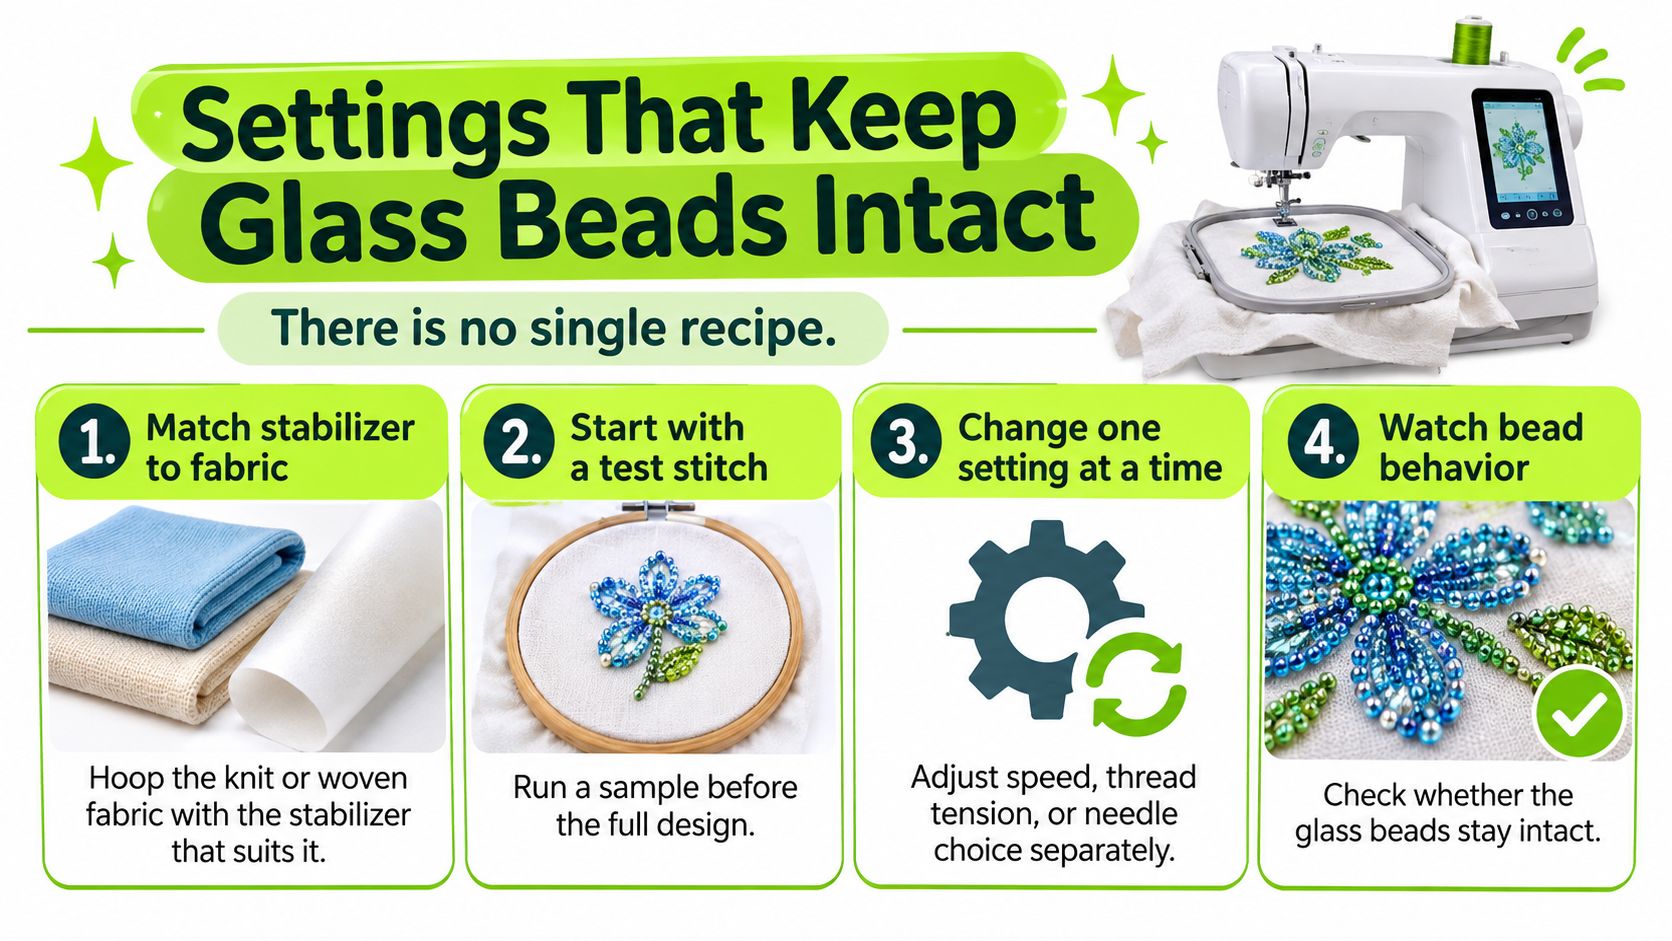
There is no single recipe that fits every machine, fabric and reflective construction. A reliable setup starts conservatively, then changes one variable at a time. That order protects both the glass elements and the reader's patience.
The AMANN Isa Reflect product specification describes a hybrid of polyamide, glass, polyester, and polyurethane at Tex 50, supplied in 500 m packages with a recommended minimum needle size of Nm 80/12. The manufacturer also reports abrasion resistance and retention of reflectivity during embroidery processing. Those details point to the risk during stitching. The glass elements have to survive the needle eye, the thread path and repeated penetration through fabric.
Starting Setup in Order
- Match stabilizer to the fabric: Hoop the knit or woven so the design area stays flat and doesn't move under the needle. A knit needs support that controls stretch. A stable woven needs enough support to prevent puckering around satin edges.
- Fit a new, large-enough needle: Start at the thread maker's minimum, such as Nm 80/12 for a Tex 50 hybrid or 90/14 R for heavier Signal constructions. A fresh needle with a generous eye reduces shaving and heat.
- Slow the machine well below normal embroidery speed: Slower movement gives the stiff thread more time to form each stitch and reduces friction in the path.
- Lower top tension in small steps: Ease tension until the thread feeds without snapping, then stop before the underside turns loopy. Check the back of the sample, not only the top.
- Reduce density: Prefer satin outlines, open lettering and light motifs over maximum fill. Dense coverage raises breakage risk and can crowd stitches so tightly that the flash looks dull instead of crisp.
- Stitch the actual design at sample size: Use the actual fabric, stabilizer, needle and design. A two-inch test of the actual lettering tells more than a generic square stitched on scrap cotton.
A wider guide to the best needles for embroidery helps readers match point style and eye size to fabric. With reflective thread, the eye deserves special attention. If thread has to squeeze through a small or worn eye thousands of times, the coating and beads take the punishment.
Why Breaks Happen
Glass content changes thread behavior. A construction built largely around glass beads with a polyester carrier won't flex like standard embroidery polyester. It can feel wiry coming off the spool, resist tight curves and abrade where it rubs metal guides or a dull needle.
Tight thread paths make that worse. Readers should check that the spool unwinds freely, the thread isn't catching on a spool cap and every guide is clean. A thread stand can smooth delivery for some spools, but the first checks stay basic. New needle, clean path, correct threading with the presser foot raised.
A lubricated finish, where a thread has one, helps against needle heat and supports smoother sewing. It isn't permission to run fast. Heat still builds in dense designs, and melted or damaged coating won't return light the way a clean bead surface does.
Change One Thing When It Breaks
When a sample breaks, follow one order and don't stack changes.
- Replace the needle: A burr too small to see can shred specialty thread.
- Slow down further: Give the loop time to form before touching tension.
- Reduce density or widen the lettering: Tight, crowded stitches create repeated stress in the same small area.
- Adjust tension last: Move in small steps and retest the same sample after each move.
If three settings change at once and the sample improves, nobody knows which change fixed it. The next project starts from guesswork again.
Write the winning combination on the sample with a fabric-safe marker or attach a note. Record fabric, stabilizer, needle, speed setting, tension change and density change. Save that physical sample, because it becomes the piece used for wash and light testing before a finished garment is risked.
Wash Care and a Before and After Light Test
A jacket can look well stitched in daylight, then lose its reflective pop after laundering. A fresh stitch-out only shows how the thread looks now. A swatch washed and checked under the same light gives a more useful answer for that fabric, thread and design.
A machine embroidery help discussion on thread problems shows how advice about needle type, tension and speed can conflict when a thread breaks. Those choices depend on the machine and materials, so another embroiderer's settings are a starting point, not a guarantee. The swatch test checks the result on your own setup.
Five Step Swatch Protocol
- Photograph the sample in ordinary daylight: Keep the camera distance and angle consistent. This records the daytime color and stitch quality.
- Photograph it in a dark room with light at the viewing position: Hold a flashlight near the camera or aim a headlamp from the direction a driver would be. This records how much light the thread returns.
- Launder the swatch the way the garment will be laundered: Follow the garment label for temperature, cycle and drying. A gentle wash may not represent what a jacket will face in a family laundry routine.
- Repeat both photos from the same positions: Compare the daylight color, flash brightness and edge sharpness side by side. Matching the angle matters, because moving the light can change how bright the sample appears.
- Inspect closely: Look for missing beads, fraying, puckering, loose loops and thread breaks. Lightly run a fingertip across the motif and note any gritty, patchy or newly rough areas.
Test before stitching a set of team jackets or finishing a gift. A single swatch uses little specialty thread, while a failed batch can cost garments, time and trust.
What Washing and Wear Can Change
Washing and light exposure can alter a textile's optical properties, so a bright new sample does not prove that it will stay bright. Detergent, agitation and tumbling can abrade a coating; sunlight can age polymers. Backpack straps, seat belts, bag hardware and repeated folding can also rub the same small motif over and over.
Heat calls for care too. Keep ironing and heat pressing within the limit for the chosen construction, and do not place a hot iron directly on reflective stitching. Press from the back or use a press cloth when finishing the garment. If a heat press will later apply a number or transfer near the design, test that full sequence on the swatch first.
A reflective motif earns its place after the wash, not before it. The second flashlight photo is the decision point.
If the post-wash flash looks dull, compare the two photos before changing the design. The earlier density step may help identify whether stitch coverage needs adjustment. The wash test adds a separate question: did laundering or rubbing change the thread's surface? If the motif looks patchy or rough, a design change alone may not restore its original flash.
A dull result may call for a placement or design change. Enlarge narrow lettering, move the motif away from straps and fold lines, or choose a lower-wear panel. If the purpose is required visibility rather than decoration, use certified tape or fabric in that area instead of adding another layer of thread.
Give recipients plain care instructions: follow the garment label, avoid ironing directly on the motif, and inspect the stitching if its flash seems weaker. Reflective embroidery can remain an attractive accent, but its appearance can change with wear. Treat the light test as a practical check, not as proof of safety certification.
Pick Thread and Test a Machine In Person
A spool can look silver in daylight and behave quite differently under a flashlight. Before stitching a finished garment, use a small sample to check the thread's purpose, its fit with the machine, and how the result reads on the fabric.
Buying Checklist
- Accent or certified material: Reflective thread can add visibility as a decorative accent. For garments that must meet a safety standard, use tested tape or fabric positioned to that standard.
- Smallest workable Tex: Choose the lightest construction that shows the lettering or outline clearly under a flashlight, then match the needle to the thread.
- Daylight and flash color: Look at the spool and a stitched sample in room light, then shine a flashlight on the sample. Silver may look white under the beam, so check whether that contrast works against the fabric.
- Post-wash result: Launder the swatch according to the garment's care instructions, then check the reflective appearance again.
- Spool length and needle system: Check the product details for spool length and the required needle system, as well as current availability. Published specifications describe the product, but availability can change.
For lettering that needs clear placement and readable satin stitches, the Stoles.com® guide to sash embroidery provides useful context on embroidered text on a finished garment. With reflective lettering, placement also determines whether the design faces the light during use.
B-Sew Inn sells sewing and quilting thread, embroidery thread, and serger thread, as well as machine embroidery supplies such as needles and stabilizers. Review its machine embroidery supplies when gathering materials for a sample. Bring the garment fabric and washed swatch when asking about how a thread may behave with a machine.
A hands-on sample can reveal whether thread path, speed, or tension needs attention. If you can test a machine in person, slow it down, try the needle suited to the thread, and watch the stitching as you adjust tension. B-Sew Inn also offers B-Creative classes and tutorials for developing sewing and embroidery skills.
Match the next step to the question you need answered: browse thread and stabilizers for a first swatch, seek hands-on guidance if you want to test how a machine handles the thread, or contact service if breakage continues after checking the needle, speed, and design density. Persistent breaks can point to a burr, timing issue, or worn thread path that needs inspection.
Start with one small motif on the actual fabric. Compare its appearance in daylight and under a flashlight, then check it again after washing. Once the sample meets your expectations, use the thread as a designed accent on a jacket, bag, or team garment.

