

“Use the biggest hoop and let the machine quilt” leaves out the decisions that prevent puckers, broken needles and mismatched repeats. A larger hoop can reduce handling, but it also asks the machine to move more batting and fabric without shifting the layers.
Learning how to quilt with an embroidery machine starts with choosing a manageable workflow. Quilt size, batting loft and the machine's supported embroidery field matter more than the hoop's advertised dimensions. A scrap sandwich, a suitable quilting design and an honest placement map make a better starting point than a finished quilt top.
Table of Contents
- Three Ways to Quilt with an Embroidery Machine
- Stabilizer Needle and Speed by Stitch Load
- Set Up the Machine for Quilting
- How to Stitch a Quilt Sandwich in the Hoop
- Map Placements Across a Larger Quilt
- Fix Puckers Skipped Stitches and Drift
- Test a Machine Before You Quilt the Top
Three Ways to Quilt with an Embroidery Machine
One hoop setting won't suit every quilt. Embroidery-machine quilting uses a programmed design to stitch through a quilt sandwich, the quilt top, batting and backing. The machine controls the movement rather than the operator steering the fabric, which distinguishes it from free-motion quilting.
The practical choices are quilting separate blocks before assembly, stitching a basted sandwich inside the largest supported hoop, or rehooping an assembled quilt to repeat a motif. The supported embroidery fields listed for your machine, along with batting loft and finished quilt size, decide which route is workable. As the project grows, repeated alignment becomes the deciding factor.
Embroidery quilting workflows by quilt and hoop
| Workflow | Best fit | Hoop demand | Main risk |
|---|---|---|---|
| Block before assembly | Single blocks about 6 by 6 inches | About 5 by 7 inches or one placement, provided the motif fits | Motif larger than the field |
| Basted sandwich in one hoop | Motif inside the largest supported hoop | Largest compatible hoop | Layers shift if basting is sparse |
| Rehooped finished quilt | Throw or larger with a repeated motif | Many placements plus extra backing | Registration drift |
| Longarm instead | Queen or king edge to edge | Not an embroidery hoop | Forcing a bed quilt into a small field |
The distinction between block size and design size decides whether a motif stitches cleanly. A block can extend outside the stitching field; its motif cannot. A square motif doesn't fit a rectangular field just because the fabric fits inside the hoop.
The comparison below shows the handling trade-offs.
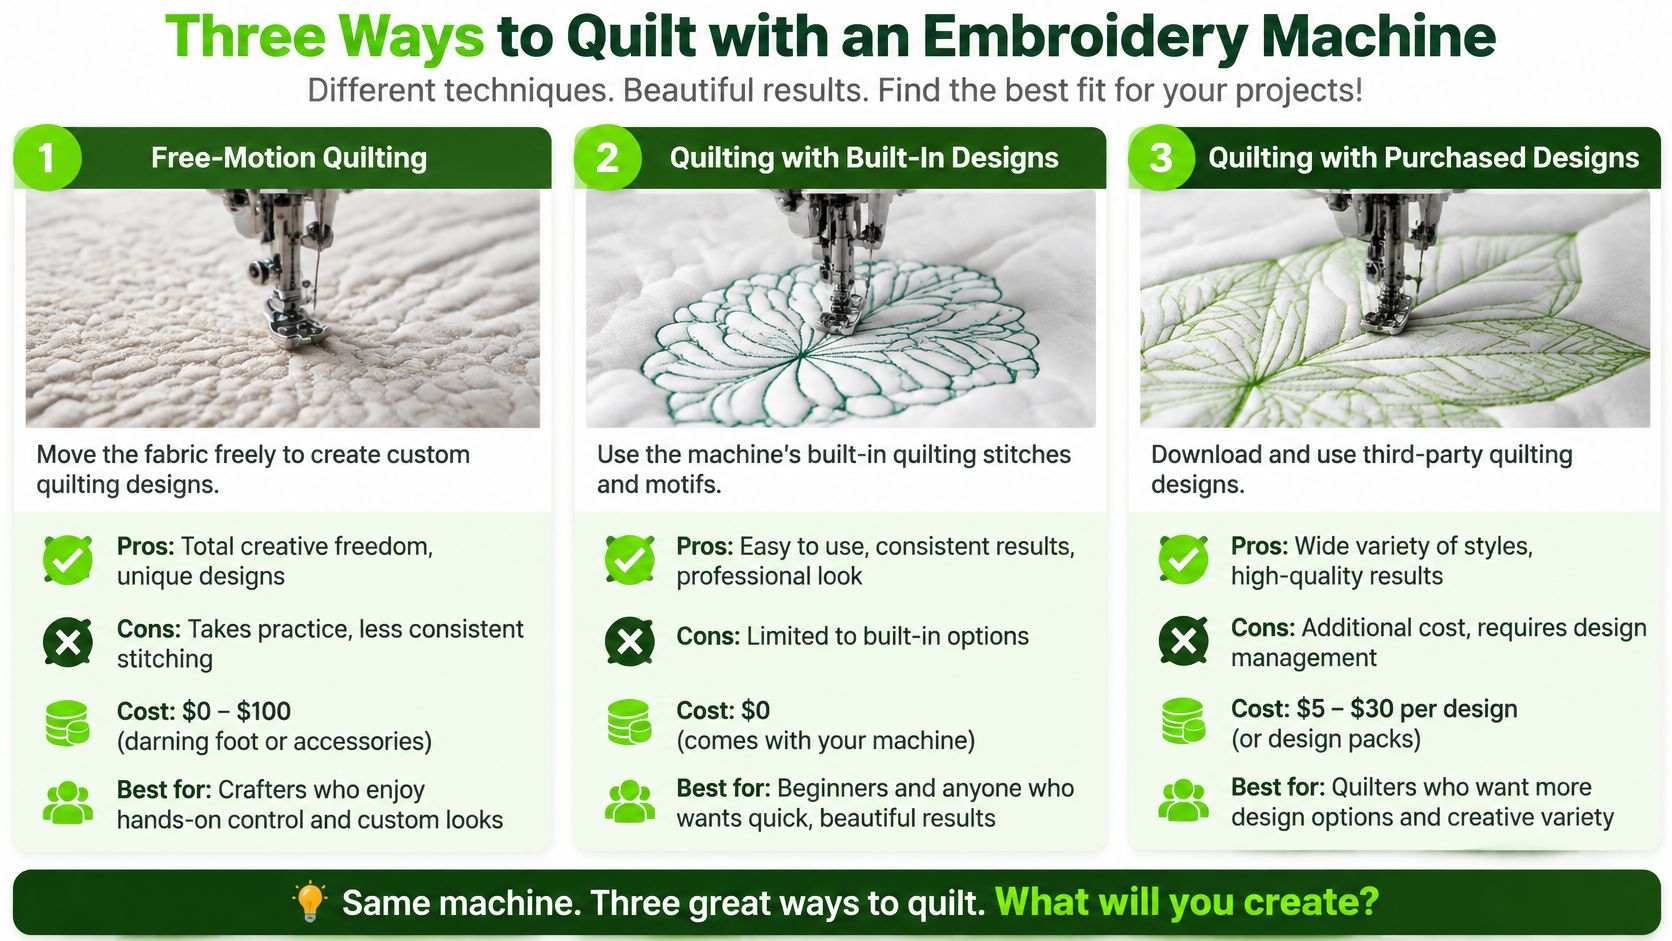
Match the workflow to the bulk
Separate blocks are the most forgiving choice for decorative motifs and lofty batting. They're easier to support around the embroidery unit, although the construction method must account for joining already-quilted sections.
A basted sandwich suits a small project or a localized motif. Rehooping an assembled quilt is reasonable when the repeats are manageable and the surrounding quilt can rest on a table without dragging against the carriage. A compatible magnetic hoop can simplify loading thick layers, but compatibility and holding power matter more than convenience.
A block-based layout changes the placement plan before you hoop anything. Cowboy quilts from Bridle Up Hope Shop show motifs set block by block with sashing between them, a style that suits the quilt-before-assembly route because each motif lands once inside the field instead of repeating across a full top.
Practical rule: Choose the workflow that keeps the sandwich flat without forcing the hoop or loading the carriage with hanging weight.
For a queen- or king-size quilt with continuous edge-to-edge stitching, a frame longarm is generally the more practical tool. A sit-down longarm offers more handling room for operator-guided quilting, while the embroidery machine remains useful for blocks and decorative accents.
Stabilizer Needle and Speed by Stitch Load
A sparse line motif and a densely filled emblem can occupy the same space on a quilt yet load the sandwich very differently. Read the design's stitch count before choosing support.
Shop-floor practice groups designs into approximate stitch-load bands, pairing lightweight support around 20–30 g/m² with small counts and heavy support around 60–80 g/m² with dense work. Use these bands as starting points and confirm them on a stitch-out.
Stabilizer by stitch count
| Stitch count | Support | Stabilizer | Typical use |
|---|---|---|---|
| Under 5,000 | Light | About 20–30 g/m² tear-away on stable cotton | Simple motifs and light fills |
| 5,000–10,000 | Medium | Medium tear-away, or light cut-away over loft | Moderate fills and borders |
| 10,000–15,000 | Heavy | Heavier or layered cut-away | Dense blocks and thick batting |
| Above 15,000 | Heavy or extra | About 60–80 g/m² or layered cut-away | Dense fills, satin stitching, metallic thread |
Needle and speed follow the same load logic. Dense fills over lofted batting deflect a fine needle and punish high speeds, so step up a needle size and ease the machine down as stitch count climbs.
Choose support without sacrificing the quilt's feel
Tear-away makes sense when stable woven cotton and an open design need temporary reinforcement. Cut-away remains attached and is the safer starting point for stretchy or unstable cloth. Loft alone doesn't dictate cut-away, but compressible batting can make a dense design harder to hold consistently.
Permanent support changes the finished hand of a quilt. Adding heavier stabilizer may stop distortion while leaving an uncomfortably stiff patch, so a more open quilting design can be the better correction. The guide to using embroidery stabilizer helps distinguish support types before testing.
A securely basted sandwich can carry light quilting on its own. Dense decorative fills still need dedicated support.
For repeat-based quilting, Amelie Scott Designs Edge To Edge Quilting Expansion Pack 18 adds designs built for the Easy-Connect Quilting technique explained in Edge-to-Edge Quilting on Your Embroidery Machine. The pack extends that design library, and the placement method itself comes from the book.
The final choice belongs to the stitch-out. Inspect the face, reverse and flexibility of the actual sandwich before accepting a stabilizer combination.
Set Up the Machine for Quilting
A configuration that survives a ten-inch practice block on low-loft cotton batting can fail outright on a thick queen sandwich. Build the setup around the quilt's size, the batting's loft and the hoop field the machine supports, and lock the hoop, needle and thread path before testing. Changing any of them after the test makes the sample meaningless.
Prepare the machine and thread path
- Confirm the supported hoop. Check the model's approved hoop list and maximum embroidery field before planning placements, since the field decides how many re-hoopings a large quilt needs. Similar-looking hoops aren't automatically interchangeable.
- Fit the required embroidery foot. Use the foot and embroidery attachment specified for the machine, then run its boundary or trace function with the needle clear of the fabric.
- Support the surrounding quilt. Position a table or level surface beside the machine so loose fabric can move freely. On a large sandwich the weight hanging off the hoop drags the design, so clear the area behind the embroidery unit too.
- Thread with the presser foot raised. Seat the upper thread correctly, insert the bobbin in the specified direction and use an evenly wound bobbin. Choose embroidery thread and bobbin thread matched to the sandwich; ordinary piecing settings rarely transfer cleanly to lofted layers.
Establish a testable starting point
Start with a 90/14 topstitch or quilting needle on a full sandwich and hold speed near 600–700 stitches per minute through dense fills. Both are proven starting values, and a 75/11 ballpoint can work on lighter woven layers if it punches the batting cleanly. Loftier batting pushes back harder on every penetration, so step up in needle size before questioning the machine.
A fine needle that pierces the quilt top alone may deflect once it meets batting and backing. When penetration looks uneven, swap the needle first and stitch the sample again.
Begin with the machine's recommended embroidery tension and adjust only after inspecting a scrap stitch-out. Numeric tension scales aren't standardized between machines, and automatic tension systems may not expose the same controls.
A usable setup is one that produces balanced stitches on the actual sandwich, not one that matches somebody else's screen.
Replace a damaged needle immediately. Keep the test hoop, thread, design and settings consistent with the planned project so the sample reveals real handling problems rather than an easier substitute. These needle and speed values are the baseline the troubleshooting section assumes, so confirm them here before chasing puckers or skipped stitches later.
How to Stitch a Quilt Sandwich in the Hoop
A quilt sandwich loads a hoop differently than a single layer of fabric. Batting compresses under the hoop's grip, the backing shifts a little with every needle penetration, and a hooping job that felt firm on flat cotton can let a lofted sandwich creep halfway through a design. Match the test materials to the quilt, keep the layers taut without stretching them, and watch for movement while the machine runs. Those habits prevent more trouble than any tension change made blind.
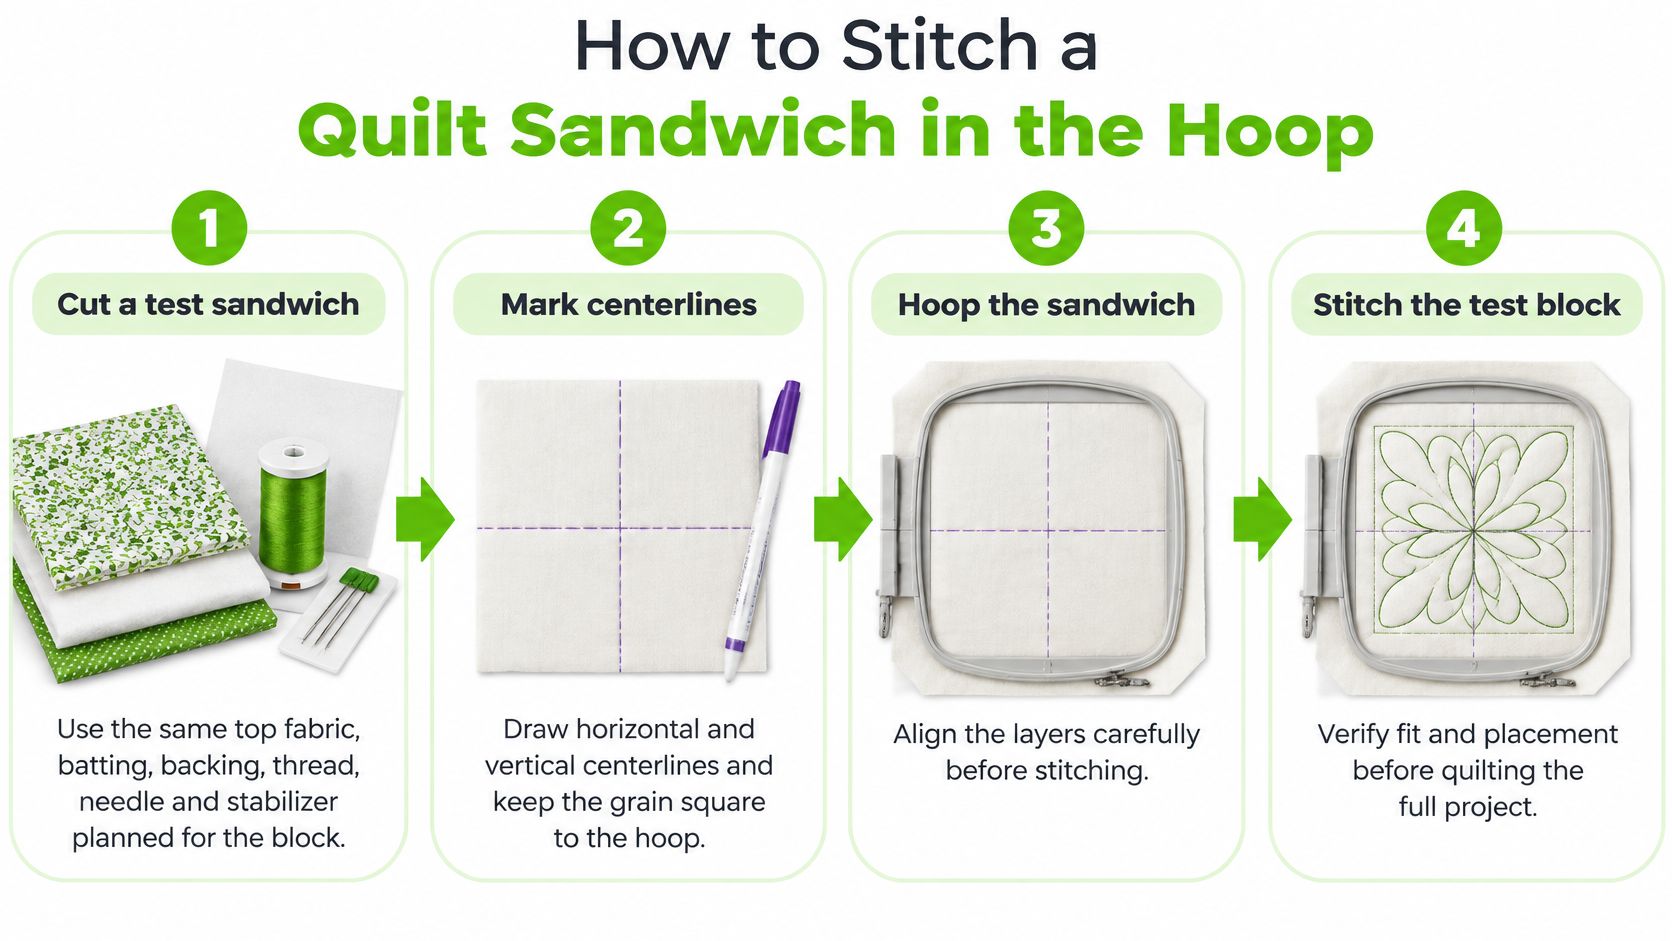
The sequence below keeps the test representative of the finished block.
Prepare and prove the sandwich
- Cut the test materials. Use the planned top fabric, batting, backing and stabilizer, with enough surrounding material for secure hooping. Use the production thread and needle too. A thinner sample can hide problems that appear in the finished quilt.
- Mark and baste the layers. Draw horizontal and vertical centerlines with a tested removable marker, keeping the fabric grain square. Smooth the backing, spread the batting without stretching it, and position the top. In its computerized-quilting demonstration, BERNINA describes basting the assembled sandwich with rows spaced as far as 6 inches apart; closer control may be needed where layers move easily.
- Hoop without distortion. Select the largest supported hoop that holds the chosen motif and can grip the sandwich evenly. Align the marked axes with the hoop references. The surface should be flat and taut, not pulled drum-tight by stretching the fabric after tightening the hoop. High-loft batting compresses enough that the frame can feel loose again moments after you close it, so check the grip on the full thickness rather than trusting the first tightening pass.
- Load and verify the design. Confirm its orientation, center and selected hoop on the machine screen. Run the boundary check before stitching, making sure the foot clears the hoop and no folded fabric lies underneath. Stitch placement or alignment elements before decorative fills.
- Run a sample, then the complete motif. An open, low-density sample checks basic feeding and balance, but it doesn't prove that a dense production design will behave. Complete the intended motif before approving the setup. Inspect the reverse for trapped folds, loops and puckers, and check that the centerlines remain square.
Stitch and finish without pulling the motif
- Baste in the hoop and monitor movement. Use the machine's basting function when available. Pause after major color or fill areas, with the machine stopped safely, to check that batting hasn't crept and surrounding fabric hasn't caught. Stabilizer supports the stitched area; basting controls the wider sandwich.
- Allow the stitching to settle. Let the block cool and rest flat before removing temporary support. Tear away small sections while supporting the stitches rather than pulling against the whole motif. If lightweight cotton ripples, revise the fill density or spacing before stitching the finished piece.
- Prepare an edge-to-edge trial carefully. Continuous designs need backing and batting cut with enough margin to reach the hoop at every placement, including placements that run off the quilt's edges. Secure those margins with a hoop-safe adhesive applied to the inner ring, and keep every trace of it out of the stitch path. Adhesive that reaches the needle builds up on the shaft and carries lint straight into the bobbin area.
- Remove basting and finish the quilt. Cut and withdraw temporary basting without snagging quilting stitches, then let the quilt rest flat. Remove tear-away close to the stitching; trim cut-away according to its placement, retaining support beneath the motif and trimming any perimeter excess flush with the quilt edge. Wash a representative sample before committing to the finished quilt's care routine, then square and bind.
For block-centered work, the guide to embroidering on quilt blocks gives additional context for matching placement to the block. Accurate marks and a complete test matter more than speed at this stage. And be honest about the limits of the field: when a quilt is large enough that placements multiply faster than you can rehoop cleanly, or the batting is lofted enough that the hoop won't close evenly, a sit-down or frame-mounted longarm is the better tool for that quilt.
Map Placements Across a Larger Quilt
The usable embroidery field limits each placement, not the quilt's overall width. The quilt-block embroidery guide identifies approximately 175 by 200 millimeters or larger as useful for many projects and describes an edge-to-edge example using a 10-by-16-inch design area on a 30-inch-square quilt.
The planning sketch should show actual stitching boundaries, not just decorative shapes.
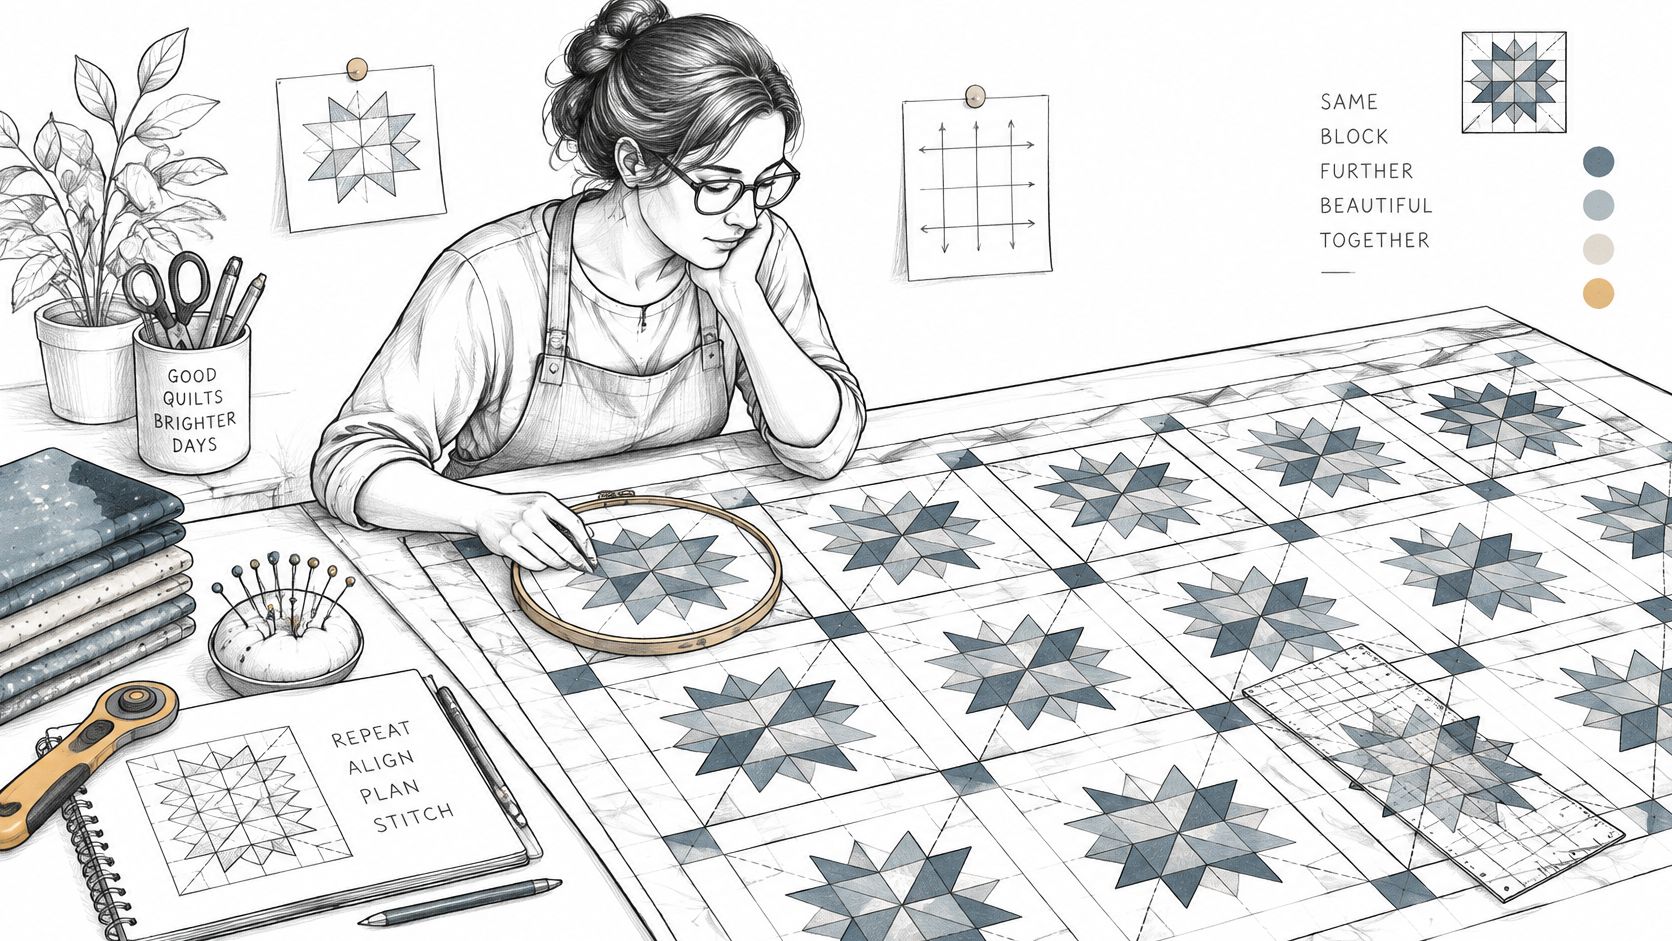
Calculate repeats from the design's connection points
- Measure the stitched motif. Record its actual width, height, start point and end point. Leave room for any basting outline or alignment marks that also need to fit inside the field.
- Establish the repeat spacing. Use the design's prescribed connection method. Some repeats meet at endpoints; others intentionally overlap. Arbitrarily overlapping decorative motifs can create dense knots rather than continuous quilting.
- Count the placements. Divide the planned quilted width by the horizontal repeat spacing and round up, then do the same vertically. Mark partial edge placements separately, because the machine may not support cropping a design.
- Choose a pass order. For independent motifs, start near the center and work outward so accumulated error becomes visible early. Connected edge-to-edge systems may require a different sequence, which should take priority.
- Plan the outer grip area. Calculate backing and batting before cutting. The cited edge-to-edge example specifies backing beyond the quilt by at least half the hoop width; the practical requirement is enough material to secure every edge placement.
A placement map should record centers, orientation arrows and completed motifs. Paper templates help reveal whether a repeat crosses a seam awkwardly or leaves an unquilted gap.
The following video can accompany placement practice.
Recover before the error spreads
Check registration against the quilt's marked references, not only the previous motif. A small error copied from placement to placement can become a visible curve across the quilt.
If a placement drifts, stop before stitching the next full motif. Recheck the centerline, inspect the completed design's endpoint and reposition the hoop without stretching the sandwich to make the marks meet.
Extra hoop capacity is useful only when the operator can load, support and align that field consistently.
The embroidery hoop size chart helps frame the machine comparison, but the model's supported field remains the final check. When the map requires more rehooping than the quilter wants to manage, a longarm workflow is a better decision than trying to solve the problem with accessories.
Fix Puckers Skipped Stitches and Drift
A pucker at the fifth motif usually started with the way the sandwich was hooped at the first. Work on a scrap sandwich and change one variable at a time: needle condition and thread path first, then hoop tension, stabilizer coverage, bobbin balance and design density.
Useful starting references are an upper tension near 4–5 and needle replacement after roughly 8–10 hours of stitching, earlier if the needle takes a knock or the thread runs abrasive. Confirm both on scrap for your machine, since tension scales and wear rates differ between models.
Quilt embroidery problems and the first fix
| Symptom | Likely cause | First fix |
|---|---|---|
| Bobbin dots on top | Upper tension high or bobbin loose | Ease upper tension slightly on a scrap |
| Loops underneath | Upper tension low, incorrect threading or bobbin tight | Rethread first, then tighten upper tension in small steps from about 4–5 |
| Skipped stitches | Dull needle or batting deflection | Fit a fresh quilting needle and hold the reduced speed chosen during setup |
| Puckering in the motif | Density too high or light stabilizer | Heavier support or a more open fill |
| Next placement drifts | Overstretched hoop or no map | Re-mark centerlines and hoop the sandwich taut without stretching |
Separate mechanical faults from design problems
Loops underneath can come from upper thread that missed the tension discs, which produces the same symptom as low tension, so rethreading with the presser foot raised is the cheaper first fix. Make bobbin adjustments the way the machine manual describes, measured against a test sample after each small change.
Thread breaks and skipped stitches can also come from quilt weight resisting carriage movement. Check for hanging fabric and seam bulk riding against the hoop edge before blaming the needle. The skipped-stitch troubleshooting guide helps distinguish penetration problems from threading faults.
For puckering, inspect whether the distortion sits inside the fill or across the whole hooped area. Local rippling points to design load or insufficient support; broad distortion points to stretched hooping or shifting layers.
After changing fabric, batting, stabilizer, thread or density, stitch another test motif. A balanced short sample proves the setup works on that sandwich, and the full design still has to hold that balance across every placement.
Test a Machine Before You Quilt the Top
The most useful buying test is a hooped scrap made from the intended quilt materials. Bring the top fabric, batting, backing, and thread to a dealer with a demonstration machine, and match the scrap to the batting loft you plan to quilt. Ask staff to run a motif inside the largest supported hoop field and watch whether the sandwich stays flat across the full design boundary.
A hoop that holds a small block flat can still strain once a larger quilt hangs off one side.
Compare the job, not just the screen
- Check handling space. Observe where the unused quilt rests and whether it can move without dragging as the carriage travels.
- Check placement controls. Compare how clearly each machine displays the design center, boundaries and alignment functions, since those same marks drive the placement map on a real top.
- Check the finished sample. Examine the reverse, seam crossings and batting compression, not only the decorative face.
A retailer stocking several machine classes makes that comparison easier. B-Sew Inn carries sewing and embroidery combination machines alongside sit-down long arm quilting machines and computerized quilting systems, and its Machine & Software Tutorials cover setup questions after the sale. Financing options and preowned sewing and embroidery machines offer an upgrade path when an existing machine struggles despite correct preparation.
If the placement map makes embroidery quilting impractical for the quilt size you have in mind, compare sit-down and frame longarm approaches during the same visit. Testing both on your own sandwich costs less than buying a larger hoop and finding the limit mid-quilt.
End the demonstration with a completed motif on representative materials. That stitched scrap is the concrete thing to compare before committing to a machine or quilting the finished top.
B-Sew Inn sells Baby Lock sewing, embroidery, serger and coverstitch, and long arm quilting machines, along with hoops, presser feet, thread and stabilizers. Visit B-Sew Inn to browse the lineup, or get in touch to arrange a hands-on comparison with a scrap quilt sandwich.

