

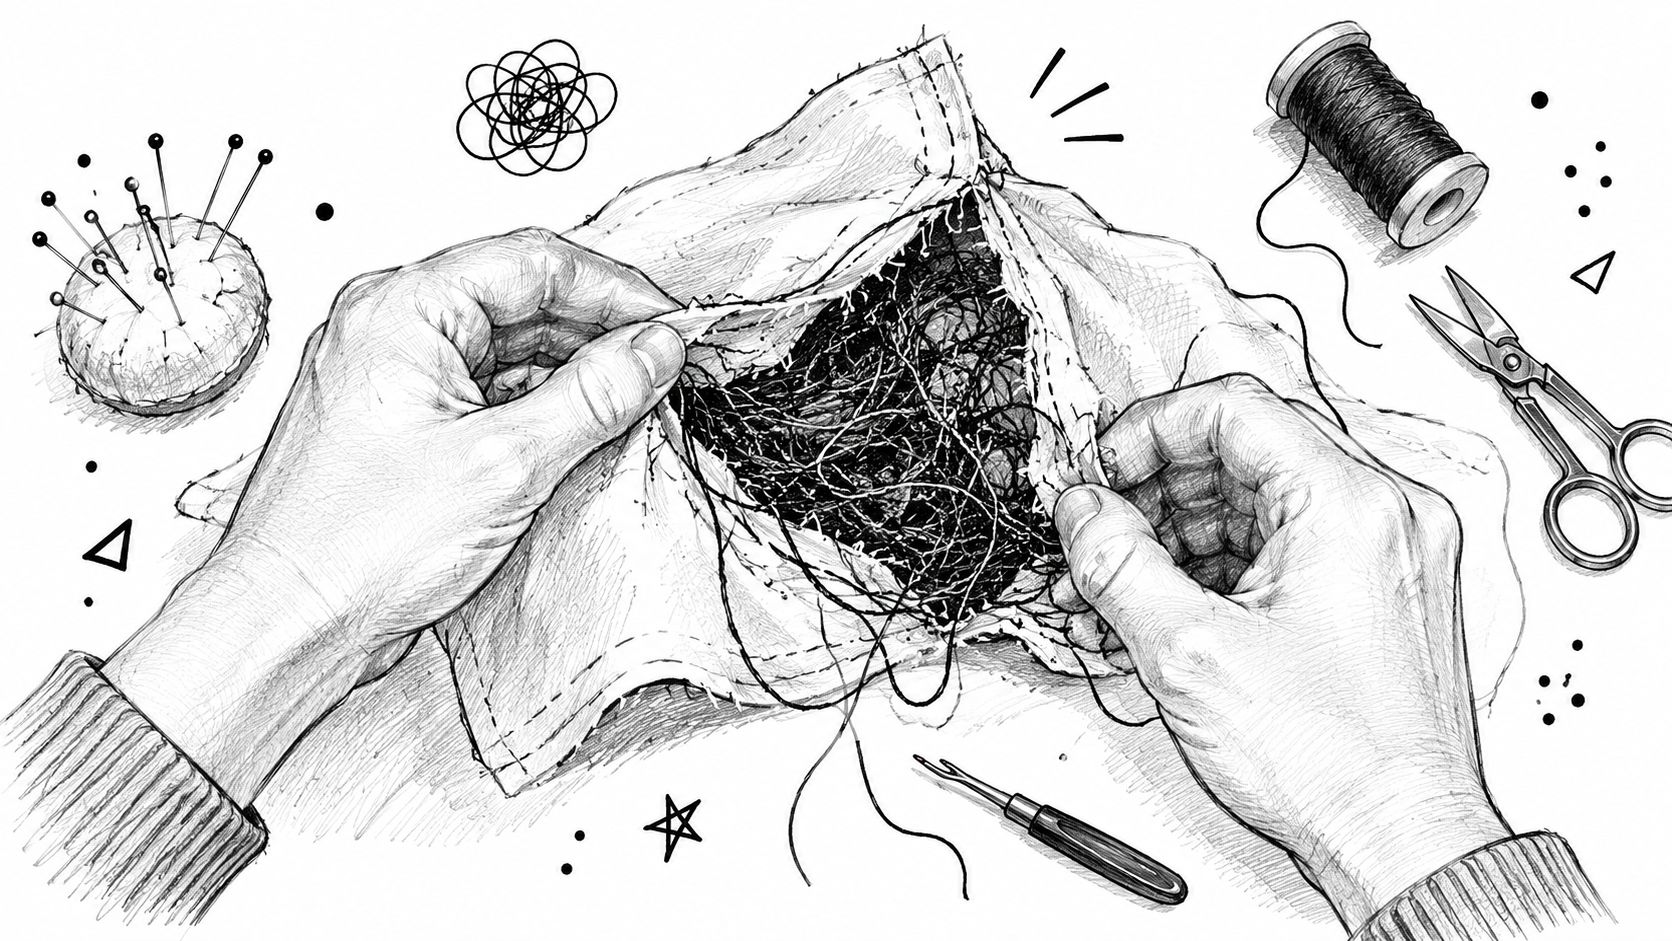
A seam has just been sewn, but the thread breaks apart when the fabric is opened. The underside looks like a nest, several stitches are missing, and the machine seems to be sewing normally until the problem appears again. For quilters, garment makers, and embroiderers, why does my sewing machine skip stitches is rarely answered by one quick parts swap.
Skipped stitches usually come from a mismatch somewhere in the stitch-forming system. The needle, upper thread, bobbin, fabric, tension, hook, and timing must work together. A practical diagnosis starts with the simplest likely cause, then moves toward adjustments that require service.
Table of Contents
- Why Your Sewing Machine Is Skipping Stitches
- Replacing and Installing the Needle Correctly
- Rethreading the Machine with the Presser Foot Raised
- Matching Needle, Thread, and Fabric Together
- Inspecting the Bobbin and Upper Tension Settings
- When Skipping Points to a Timing or Service Issue
- Getting Expert Help at B-Sew Inn
Why Your Sewing Machine Is Skipping Stitches
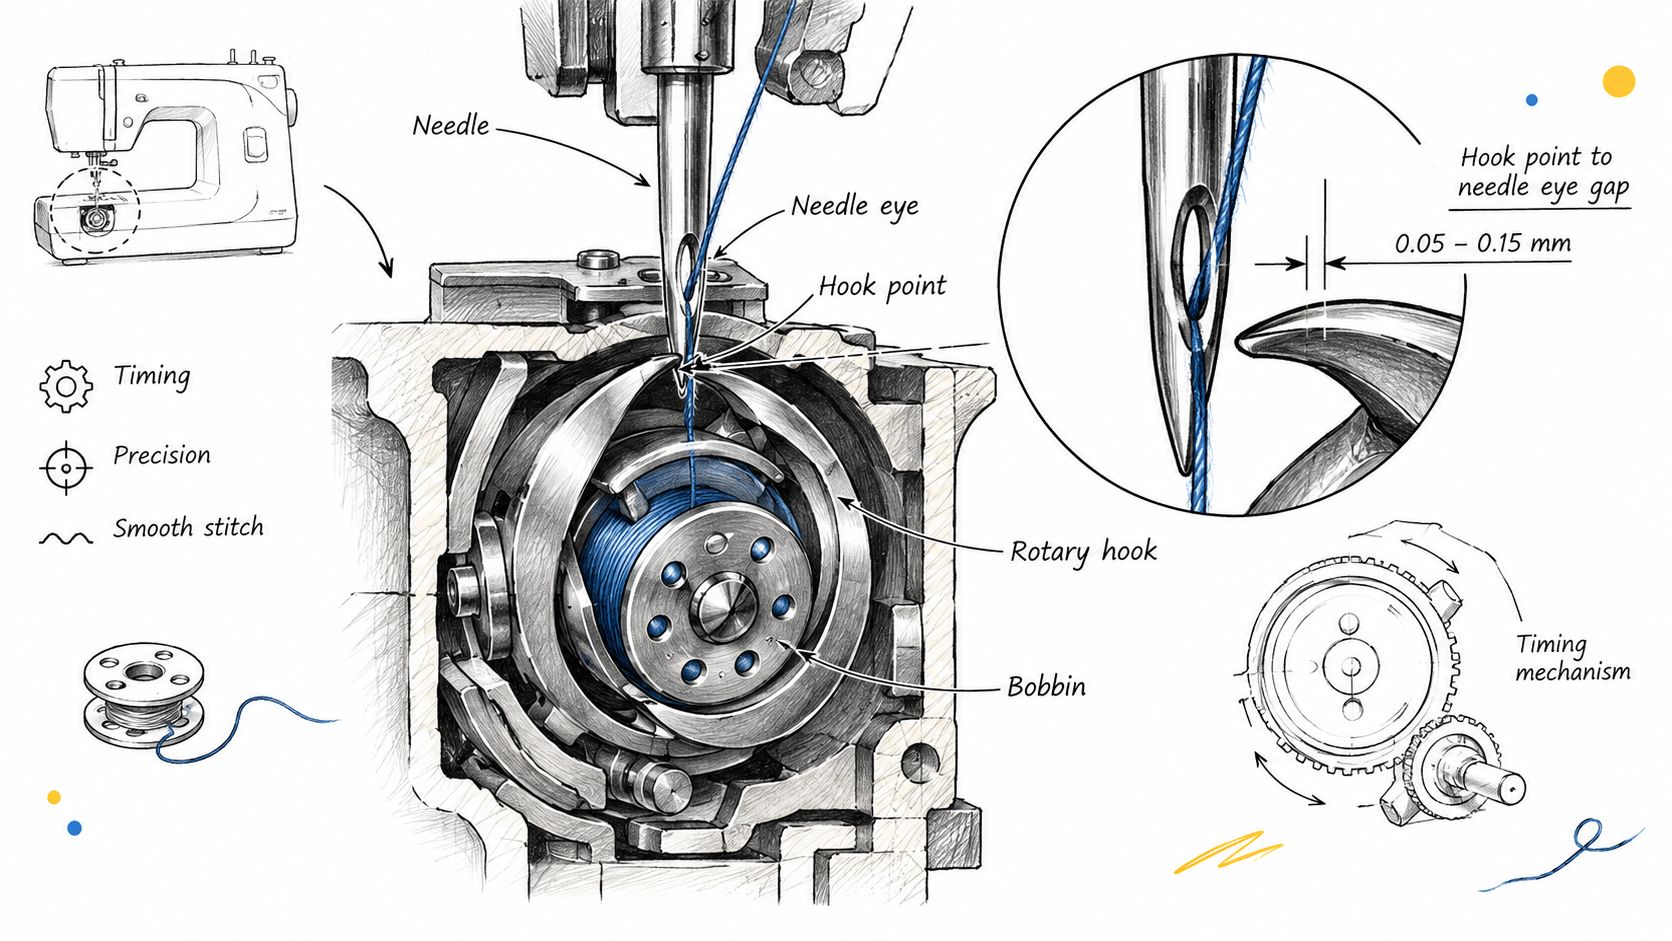
A skipped stitch happens when the upper needle thread fails to form a loop that the hook can catch. In a lockstitch machine, the needle descends through the fabric, begins rising, and creates a loop behind the needle. The hook must arrive at the right moment to catch that loop and bring the bobbin thread into the stitch.
That timing explains why a machine can look perfectly clean and still skip. The defect may not be a broken component. It may be a small difference in needle height, thread tension, fabric resistance, or hook clearance that prevents the loop from forming consistently.
A skip is a process problem
A 2010 AUTEX study describes online skip and loop detection by comparing thread consumption per 10 stitches against a reference value. Under constant tension, stitch length, and fabric layers, the study uses a tolerance of ±0.5 mm. When measured thread consumption falls outside the expected range, the stitch is classified as a skip or loop stitch. The technical discussion is available in the AUTEX study of stitch formation and skip detection.
That finding matters at the sewing table. Skipping isn't only a visual annoyance. It can be a measurable change in how the needle thread, take-up system, hook, and bobbin interact. A machine that skips only on knit fabric, thick seams, or a particular thread is giving a useful diagnostic clue.
Practical rule: Change one variable at a time, then test on the same fabric and stitch settings. Random adjustments make a mechanical problem much harder to identify.
The sensible order is straightforward: install a fresh, correctly positioned needle, rethread with the presser foot raised, check the fabric and thread combination, inspect the bobbin area, and adjust tension only in small increments. If the machine still skips after those checks, the cause may be internal timing or clearance. A detailed sewing machine maintenance and repair guide can help determine when cleaning and setup end, and when a service appointment makes more sense.
Replacing and Installing the Needle Correctly
The needle is the first part to replace because a needle can be bent without looking damaged. A slight bend changes the position of the thread loop behind the needle, especially while sewing multiple quilt layers, crossing a thick seam, or working with dense fabric.
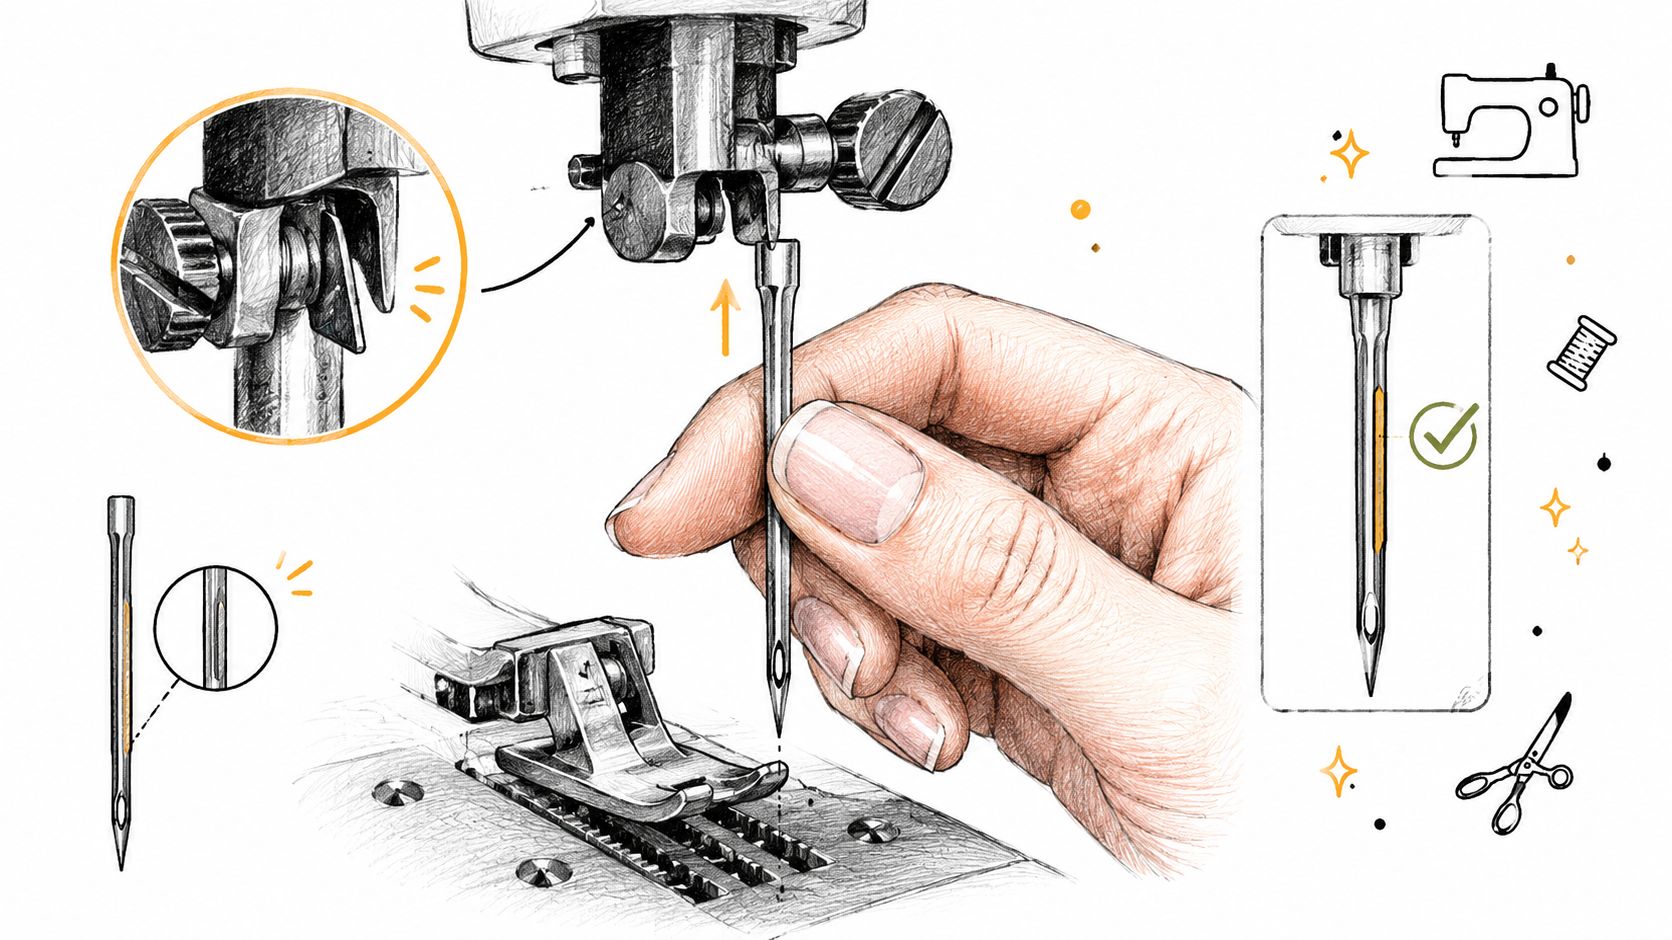
Turn the machine off before removing the old needle. Loosen the clamp screw, pull the needle down and out, then insert a new needle as far upward as the needle bar allows. The flat side must face the direction specified by the machine manufacturer, and the clamp screw needs to be tightened securely.
Why height and orientation matter
The hook needs to meet the needle loop during a very narrow part of the needle's upward movement. Industry troubleshooting guidance places hook entry as the needle rises roughly 1 to 2 mm above bottom dead center, while official manual guidance describes correct timing with the hook point aligned to the needle about 1/8 inch above the needle eye. These measurements are documented in guidance for troubleshooting skipped stitches.
That doesn't mean a home sewist should dismantle the machine and reset timing. It does explain why an incorrectly installed needle can imitate a timing fault. If the needle isn't fully seated, is facing the wrong direction, or has a damaged eye, the hook may pass without catching the loop.
A suitable needle also depends on the project. A sharp needle may suit a woven fabric, while a ballpoint or stretch needle is designed to move between knit fibers with less disruption. A needle selected for the fabric should be installed before tension changes are attempted. The sewing machine needle guide provides a useful reference for choosing the correct type.
Test the new needle on a scrap cut from the same project. If the stitch is clean on the scrap but skips on the project, the difference may be a thick seam, a change in layers, presser-foot pressure, or fabric finish.
Rethreading the Machine with the Presser Foot Raised
A fresh needle won't help if the upper thread isn't sitting correctly in the tension assembly. The most common shortcut is threading with the presser foot lowered. When the foot is down, the tension discs are closed, so the thread can pass around the discs without seating between them.
Raise the presser foot before removing and replacing the upper thread. Follow the machine's numbered path from the spool pin through the guides, between the tension discs, around the take-up lever, and down to the needle bar. The take-up lever is easy to miss, and missing it changes the amount of thread released during every stitch.
The upper thread path
Threading should be done slowly enough to confirm each contact point. A useful check is to lower the presser foot after threading and pull the thread. Resistance should increase when the foot is lowered and reduce when it is raised. That simple change indicates that the thread is interacting with the tension assembly rather than floating beside it.
The guide to threading a sewing machine can be kept beside the machine when the printed manual is unavailable. Threading diagrams vary, so the machine-specific path always takes priority over a general illustration.
Thread quality affects consistency, too. A fuzzy or aged spool can shed lint, drag through guides, and create uneven delivery into the needle eye. Smooth, good-quality polyester or cotton-wrapped polyester thread is a practical choice for many general projects, provided the thread weight suits the needle and fabric.
The bobbin thread doesn't need to be identical in color, but it should be compatible in weight and quality. Mixing dramatically different thread characteristics can make the two threads meet unevenly inside the fabric. The best test uses the same upper thread, bobbin thread, needle, fabric, and stitch settings planned for the finished seam.
Matching Needle, Thread, and Fabric Together
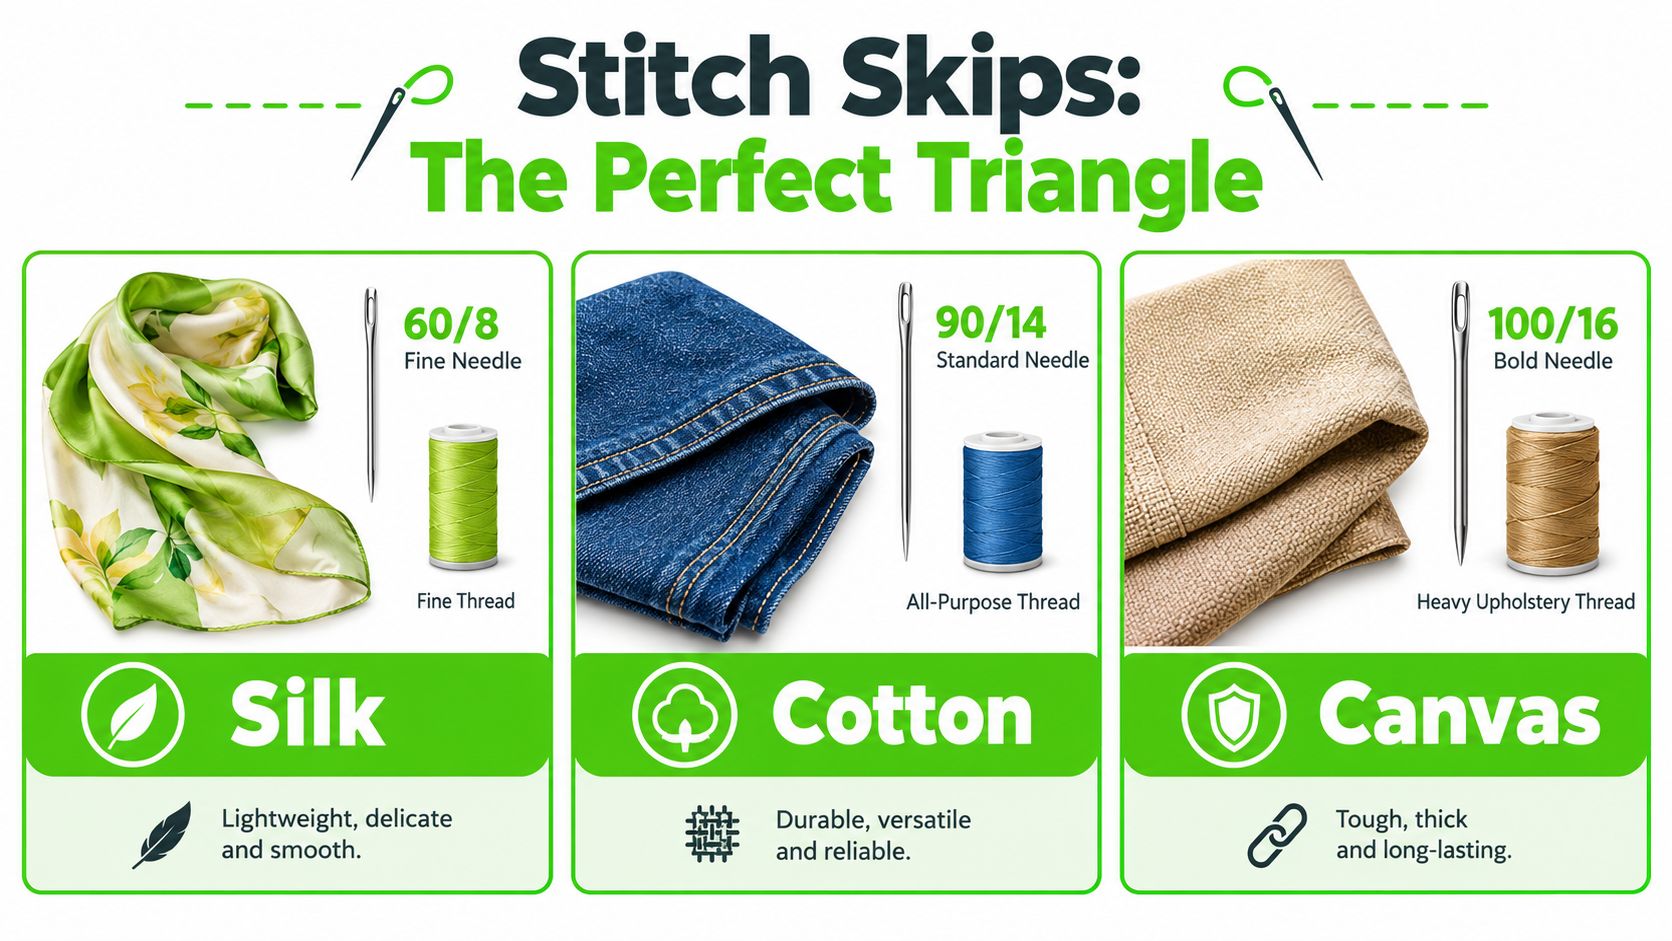
Skipping that appears only on one fabric often points to compatibility rather than a failing machine. The needle creates the passage, the thread must move through it without excessive friction, and the fabric must allow a stable loop to form. A change in any one of those elements can expose a weakness that wasn't visible on ordinary cotton.
Knit fabric is a useful example. A universal or sharp needle may push fibers aside instead of moving between them, allowing the loop to form inconsistently. A ballpoint or stretch needle is generally better suited to knits, while a sharp or microtex-style needle is appropriate for fine woven fabrics, according to this needle and fabric troubleshooting guide.
Compare the whole setup
| Sewing condition | Common risk | Practical response |
|---|---|---|
| Stretch knit | Needle deflects or fails to form a stable loop | Use a ballpoint or stretch needle and test on a fabric scrap |
| Fine woven fabric | Needle and thread create excess friction | Try a sharp or microtex-style needle with a suitably fine thread |
| Thick seam or several layers | Needle bends or fabric movement changes | Use a needle suited to the material and sew across the bulk steadily |
| Fabric with sizing or finish | Finish can clog the needle eye | Test with a fresh needle and clean the needle area when needed |
Thread size must also suit the needle eye. A thread that's too heavy can drag, while a thread that's too fine for the fabric may not balance properly with the bobbin thread. The sewing thread size guide helps connect thread selection to the project rather than treating thread as an interchangeable supply.
Presser-foot pressure can matter when fabric layers shift under the foot. Pressure that's too light may allow unstable movement, while an overly restrictive setup can distort a stretchy or bulky seam. The throat-plate opening also needs to support the needle and thread combination. A large opening can give delicate fabric too much room to push downward, which interferes with loop formation.
Inspecting the Bobbin and Upper Tension Settings
The bobbin area should be inspected before changing tension. Remove the bobbin and check for lint, broken thread, and scraps caught near the case or race. Even a small obstruction can affect how smoothly the bobbin rotates and how consistently the lower thread releases.
Confirm that the bobbin is the correct type for the machine and that it sits in the required direction. Pull the thread through the bobbin tension slit or guide exactly as shown in the manual. A bobbin that appears inserted but hasn't entered the tension path can create loose, irregular stitches that look like a larger machine fault.
Adjust gradually
Upper tension can cause skipping, not merely an unattractive balance on the finished seam. The New Mexico State University sewing troubleshooting checklist identifies excessive upper tension as a possible cause. Guidance from the same troubleshooting category also recognizes that either upper or lower tension can be too tight or too loose, with tight upper tension specifically associated with skipped stitches.
Begin with the machine's normal setting unless the project instructions call for something different. Sew a test line on scrap fabric, inspect both sides, and make only a small adjustment if the thread balance is clearly wrong.
Adjustment discipline: Turn tension in tiny 1/8-turn changes, then test again. Large changes can hide the original cause and create a second problem.
A sewing machine tension adjustment guide can help identify whether the upper thread is seated correctly before the dial is moved. Bobbin tension should not be altered casually. If the machine skips after a large bobbin adjustment, returning to the original setting and repeating the needle and threading checks is safer than continuing to turn the screw.
When Skipping Points to a Timing or Service Issue
Repeatedly replacing needles can waste time when the symptom points to hook timing or clearance. A machine that skips across every fabric after careful rethreading deserves a different response from one that skips only at a bulky cross-seam. The pattern helps separate setup trouble from an internal mechanical issue.
Timing determines whether the hook reaches the needle loop at the right moment. Needle height, needle-bar alignment, hook clearance, and worn timing-related parts can all affect that meeting point. A repair technician may also find damage caused by a needle strike, particularly when the machine has been used against resistance or a broken needle has passed through the hook area.
Recognize the service pattern
Professional troubleshooting material from Coats on solving sewing problems identifies machine and material causes among skip-stitch defects. Its analysis reports that 50% of skip-stitch defects were machine causes and 25% were material-related. That distribution reinforces a point many beginner checklists miss: not every skipped stitch is solved by another needle.
Service becomes the sensible next step when:
- The setup has been verified: A new, correctly oriented needle, raised-foot rethreading, compatible thread, and clean bobbin area haven't restored the seam.
- The symptom follows a repair: Skipping begins after internal work, a needle strike, or a mechanical impact.
- The fabric pattern is revealing: The machine sews ordinary fabric but skips on particular layers, thick seams, or stretch materials despite a suitable needle.
- The machine has changed behavior: Stitch formation becomes inconsistent across several projects rather than one isolated seam.
Internal timing adjustments require the correct clearances and machine-specific procedures. Turning accessible screws without measuring the result can move the hook farther from the correct position. A trained service department can inspect timing, needle height, hook condition, feed movement, and related parts without turning a manageable fault into a broader repair.
Getting Expert Help at B-Sew Inn
Skipped stitches usually can be resolved, but repeated trial and error isn't productive once the basic setup has been checked. A service appointment is appropriate when timing, clearance, worn parts, or damage from a needle strike may be involved.
B-Sew Inn is an authorized sewing, quilting, and embroidery machine dealer with retail stores in Tulsa and Oklahoma City, Oklahoma, Springfield, Missouri, Humble, Texas, and Fayetteville, Arkansas. The business sells and services machines from Baby Lock, Bernina, Bernette, Brother, and Janome, along with sergers, longarm quilting machines, embroidery designs, thread, stabilizer, notions, cabinets, and cutting tables.
A machine can be brought in for service or repair discussion, or tested in person when a replacement better fits the project. In-person machine mastery sessions and classes provide hands-on guidance for threading, needle selection, tension, quilting, and embroidery setup. Seeing and trying machines at a store also gives sewists a practical way to compare controls, presser-foot clearance, feeding behavior, and stitch quality before making a significant purchase.
B-Sew Inn can help diagnose persistent skipped stitches, supply compatible needles and thread, and arrange service or an in-person machine mastery session. Visit B-Sew Inn to browse supplies, contact the service team, or try sewing and embroidery machines at a store in Oklahoma, Missouri, Texas, or Arkansas.

