

If you've ever looked inside a store-bought t-shirt and wondered how they get those incredibly neat, stretchy, and durable seams, you've already seen what a serger can do. For anyone new to the craft, a serger is a specialized machine that trims, stitches, and finishes a seam all in one go, giving your projects a professional look that a regular sewing machine just can't match. This guide will show you exactly how to get started, with tangible examples you can create and replicate.
So, What Is a Serger and Why Will It Change Your Sewing?
Let's demystify this amazing machine. That polished, flexible seam on your favorite knit dress? The one that moves with you and never seems to fray, no matter how many times it's washed? That's the work of a serger, also known as an overlock machine.
It's important to think of a serger not as a replacement for your sewing machine, but as its powerful, highly specialized partner. They work together as a team.
Your regular sewing machine is the go-to for topstitching, buttonholes, zippers, and piecing woven fabrics. But a serger? It absolutely shines when it comes to construction and finishing. Its main purpose is to loop multiple threads together to create an interlocking stitch that wraps around the raw edge of your fabric, completely encasing it.
The Serger Difference
A serger is fast. Really fast. Many models stitch at more than double the speed of a typical home sewing machine, which is a lifesaver on big projects. It usually uses three or four threads at once to create a seam that stretches right along with the fabric. This feature alone makes it a must-have for sewing knits, activewear, swimwear, and other materials that tend to pucker or break stitches on a standard machine.
But the real game-changer is the built-in blade. As you feed the fabric through, a tiny knife cleanly trims the seam allowance just before the needles stitch. This single, fluid motion creates a perfectly uniform and tidy edge, transforming your projects from looking "homemade" to beautifully "handcrafted."
A serger takes your sewing to the next level by giving you the speed, strength, and polished finish you see in ready-to-wear clothing. It's the secret to making your creations look just as good on the inside as they do on the outside.
Here’s a quick breakdown of what makes these machines different:
Serger vs Sewing Machine at a Glance
| Feature | Serger (Overlock Machine) | Regular Sewing Machine |
|---|---|---|
| Primary Function | Trims, sews, and finishes seams in one step. | Sews a single seam, typically in the middle of the fabric. |
| Best For | Knit fabrics, finishing raw edges, and decorative rolled hems. | Woven fabrics, topstitching, zippers, buttonholes, and quilting. |
| Stitch Type | Looped stitches using 2-5 threads for stretch and durability. | Lockstitch using a top thread and a bobbin. |
| Cutting Blade | Yes, it has a built-in blade that trims the fabric edge. | No, the fabric edge must be trimmed or finished separately. |
| Speed | Very high speed (1,000+ stitches per minute). | Moderate speed. |
Ultimately, having both a serger and a sewing machine gives you the best of both worlds, allowing you to tackle any project with the right tool for the job.
Why Sergers Are Getting So Much Attention
The surge in home sewing has pushed manufacturers to make incredible advances in serger technology, making them far more user-friendly than the intimidating machines of the past. The global serger machine market was valued at around $2.1 billion and is expected to grow to $3.4 billion by 2033. This growth is all about innovations like simplified threading and intuitive controls designed for people like you and me.
This renewed focus on the home sewer is exactly why now is the perfect time for a beginner to jump in. If you're ready for a deeper dive, check out our guide on what a serger machine is and how it all works. At bsewinn.com, we are committed to empowering crafters. Our custom sewing machine designs, combined with our online classes, training, and extensive resources, provide the support you need to master this amazing machine.
Understanding the Most Important Serger Features
Choosing your first serger can feel like trying to learn a secret language of threads, feeds, and tensions. But it doesn't have to be that complicated. The key is to cut through the noise and zero in on the features that actually make a difference when you're just starting out. When you know what these core functions do, you can confidently pick a machine that will help you grow, not hold you back.
The great news is that sergers aren't the terrifying beasts they used to be. Technology has made tricky tasks like threading so much simpler, and a wealth of online tutorials means getting started is easier than ever. This accessibility is a big reason why sewing is booming! In fact, the use of residential sewing machines is expected to grow by over 7%, which just goes to show how many people are discovering the joy of creating with fabric. You can read more about the growing sewing machine market to see how the industry is shifting to welcome new makers like you.
Thread Capabilities: What Do the Numbers Mean?
One of the first things you'll see on any serger description is its thread capability, usually listed as 2/3/4-thread. This isn't just a random spec—it tells you exactly what kind of stitches the machine can create. For most people dipping their toes into the world of sergers for beginners, a 3/4-thread machine is the perfect sweet spot.
- 4-Thread Overlock: Think of this as your go-to, everyday stitch. It uses two needles and two loopers to create a strong, stretchy seam that’s also beautifully finished. It's the stitch you'll use for putting together knit garments like t-shirts, leggings, and hoodies.
- 3-Thread Overlock: This is your primary choice for finishing the edges of woven fabrics to stop them from fraying. It’s also great for sewing very lightweight knits, and it’s a little less bulky than the 4-thread version.
- 2-Thread Stitches: These are more specialized. A 2-thread stitch is fantastic for creating delicate rolled hems on fabrics like chiffon or for flatlocking, a decorative stitch that joins two pieces of fabric with a flat, reversible seam. It's a nice-to-have feature, but definitely not essential for your first few projects.
A good way to think about thread options is like the gears on a bike. You’ll spend most of your time in the 4-thread “gear” for sturdy construction. The 3-thread and 2-thread options are for specialized situations, like finishing touches or decorative flair.
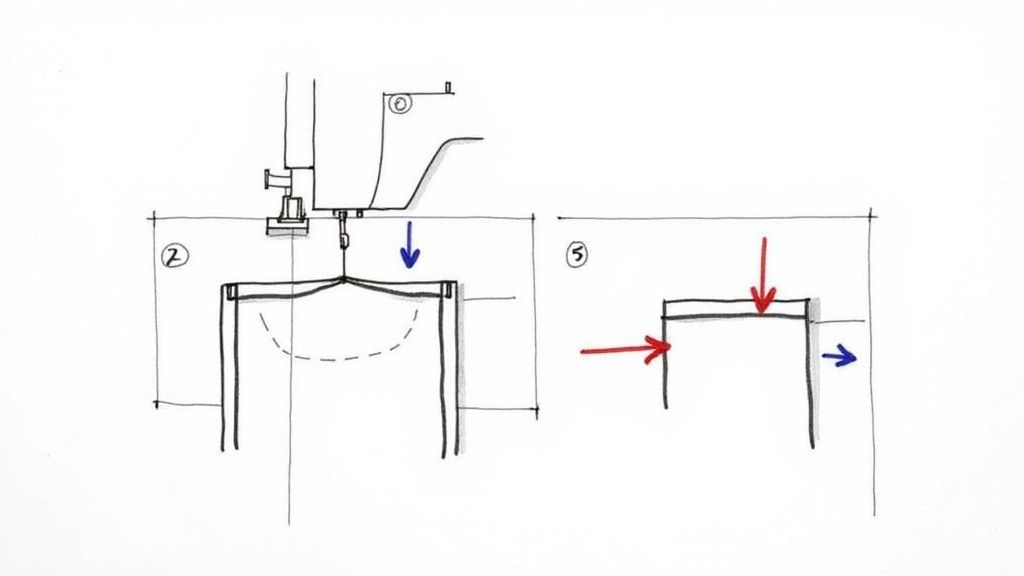
Differential Feed: Your Secret Weapon for Perfect Seams
If you have any intention of sewing with stretchy knits, differential feed is a non-negotiable, must-have feature. It sounds technical, but the concept is pretty simple. Imagine your machine has two sets of feed dogs—those little teeth that pull the fabric through. With differential feed, you can make the front set move at a different speed than the back set.
A simple dial gives you total control, and it's the secret weapon for solving the biggest headaches that come with sewing knits:
- It Stops Stretching: When you're working with super-stretchy fabric, seams can get wavy and look like lettuce edges. By adjusting the differential feed, you can prevent the fabric from stretching out as you sew, keeping your seams flat and professional.
- It Prevents Puckering: On the other hand, some lightweight or slippery fabrics have a tendency to pucker up. Differential feed solves that, too! You can adjust it to slightly stretch the fabric as it feeds, resulting in a perfectly smooth seam.
Features That Make Learning Easier
Beyond the main functions, a few thoughtful design elements can make the learning curve a whole lot less steep. One of the biggest helpers is color-coded threading paths. These are basically a map printed right on the machine, with colored lines showing you exactly where each thread goes. It takes the guesswork out of what can be an intimidating process.
Also, look for simple, straightforward dials for adjusting stitch length and width. Being able to tweak your seam's appearance with the turn of a knob gives you immediate creative control without having to dig through the manual. These little things add up, turning a potentially frustrating experience into one that’s smooth and fun, so you can focus on what really matters: creating amazing projects.
Your First Steps to Confident Serging
That moment you pull a brand-new serger out of its box is pure magic. But for a lot of us, that excitement hits a speed bump the second we see all those thread spools. Let’s just be real for a second: threading is the #1 fear for anyone new to serging. But it absolutely does not have to be the thing that stops you.
I promise, with a little guidance and practice, you’ll be threading that machine without even thinking about it.
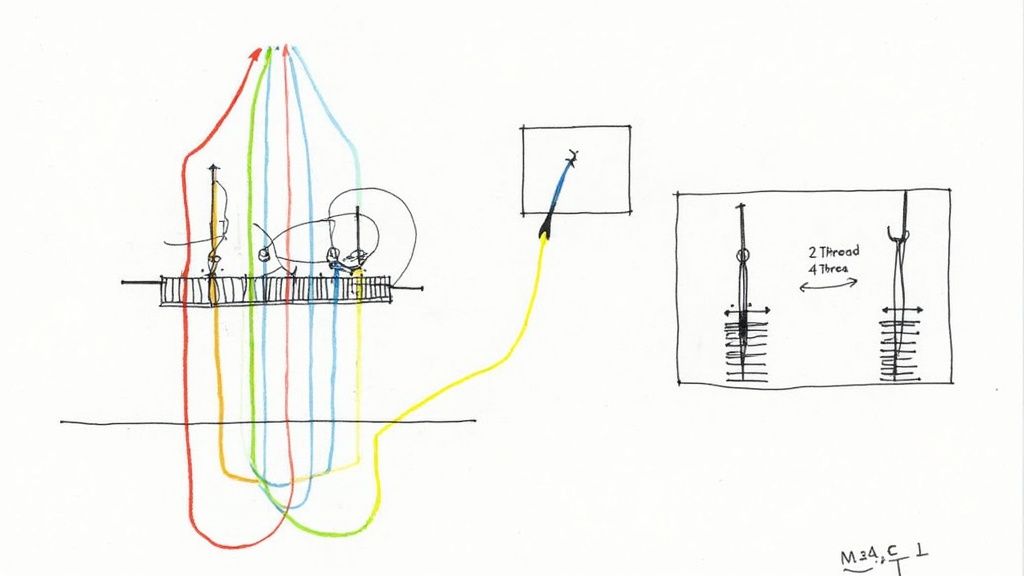
The trick is to stop seeing it as one giant, complicated task. Instead, think of it as four small, simple paths you’re creating. Most modern sergers have color-coded threading diagrams printed right on the machine. This is your personal roadmap! Just follow the colors, one by one, and you’ll see that each thread has its own clear, easy-to-follow journey.
Conquering the Threading Process
Before you even touch a thread, let's set you up for success. Always, always thread your machine in the order your manual tells you to. Usually, that means starting with the upper looper, then the lower looper, followed by the right needle, and finally, the left needle. Sticking to this order is a game-changer because it keeps the threads from getting tangled up in each other. For a really detailed look at this, our complete guide on how to thread a serger breaks it all down with pictures.
Want to know a fantastic little shortcut? It’s called the "tie-on" method. When you’re ready to switch colors, don't unthread everything! Just snip the old threads close to the spool, tie the new color onto the old ones with a small, tight knot, and then gently pull them all the way through the machine. It feels like cheating, but it’s a pro move that saves a ton of time.
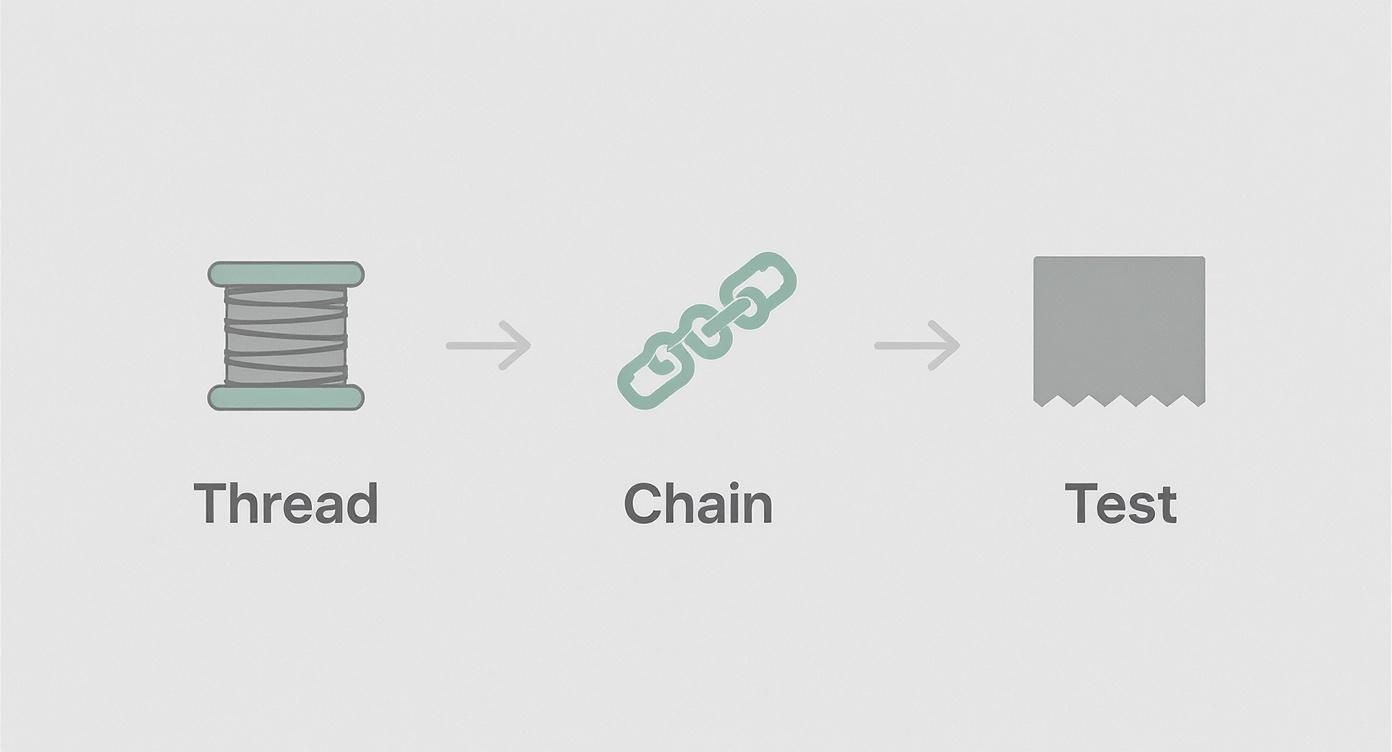
Creating Your First Stitch Chain
Okay, you're threaded! Now for the fun part. Before you even grab any fabric, just press down on the foot pedal. The machine will hum to life, and you'll see a neat chain of thread start to form right behind the presser foot. This is your stitch chain, and it’s the most satisfying proof that you’ve threaded everything perfectly.
Let it run for a few inches. This little chain is a great way to see how the looper and needle threads are playing together to form that beautiful, interlocked stitch. It’s a huge confidence booster before you’ve even made a single cut.
Think of a standard 4-thread overlock stitch as a team effort. The two looper threads are the ones that wrap around and seal the raw edge of the fabric. Meanwhile, the two needle threads stitch a straight, secure seam right alongside them. It’s a strong, stretchy, and professionally finished seam, all in one go.
Your First Project: A Simple Success
Now, let's put those new skills to work on a project that delivers instant gratification. Finishing a set of simple cloth napkins is the perfect first mission. You’ll be working with straight lines, which lets you focus on the simple joy of guiding the fabric and watching that serger do its thing.
- Cut Your Fabric: Grab some easy-to-handle woven cotton and cut a few squares, maybe 12x12 inches each.
- Set Your Serger: A standard 3-thread or 4-thread overlock stitch is perfect for this.
- Always Test First: This is a golden rule! Run a scrap piece of your napkin fabric through first. It’s your chance to check the tension and make sure the blade is just kissing the edge, not chopping off too much fabric.
- Serge the Edges: Gently guide each side of your napkin under the presser foot. Let the blade trim off just a tiny sliver from the raw edge as you sew.
- Secure the Ends: With a serger, you don't backstitch. Just serge right off the edge of the fabric, create a 2-3 inch chain, and snip it. You can lock that tail in place with a tiny dot of seam sealant or by weaving it back into the stitches with a tapestry needle.
Finishing a small project like this gives you that "I did it!" feeling that's so important. It proves you can handle this amazing machine and create things with a beautiful, professional finish. That foundational confidence is exactly what bsewinn.com loves to build. Through our hands-on classes and online training, we provide the support system to set you up for a lifetime of creative projects.
Mastering Three Essential Serger Stitches
Alright, you're getting the hang of your new machine! Now, let's get to the fun part and unlock what it's really made for: the stitches. Think of this as your starter library. While a serger can do a whole lot, you’ll find that most of your day-to-day sewing will come down to just three core stitches. Once you get these under your belt, you can tackle almost any project that comes your way.
This comprehensive how-to guide will show you exactly what they look like, and more importantly, when you should use them. For us crafters, seeing is believing, so we'll provide tangible examples you can replicate to see the professional quality you can achieve right in your own sewing room.
Before you start any project, get into this simple habit: thread your machine, run a little stitch chain off the end, and always, always test your settings on a scrap of your project fabric.
This little ritual makes sure everything is threaded correctly and your tensions look good before you touch your actual garment. Trust me, it saves a lot of headaches!
The 4-Thread Overlock: Your Construction Staple
This is the superstar, the stitch you'll probably use 80% of the time. The 4-thread overlock is your go-to for putting things together. It's incredibly strong, has a good amount of stretch, and feels really secure, making it absolutely perfect for sewing with knits. It uses two needles and two loopers to create a sturdy seam and finish the edge all in one go.
- Best For: Seaming t-shirts, leggings, sweatshirts, and pretty much any activewear.
- Replicable Project Idea: Create a simple infinity scarf from a fun knit fabric. It's a fantastic how-to project to get a feel for guiding stretchy fabric through the machine and see just how beautiful this stitch is.
The 3-Thread Overlock: For Perfect Finishes
When you just need to clean up a raw edge to stop it from fraying, the 3-thread overlock is your best friend. It’s a bit less bulky than the 4-thread version and is ideal for finishing the seam allowances on woven fabrics like cotton, chambray, or linen. You can also use it to seam very lightweight knits that don't need a super-strong construction seam.
- Best For: Finishing the inside seams of blouses, skirts, and trousers made from woven fabrics.
- Replicable Project Idea: Whip up a set of custom pillowcases. You'll sew the main seams on your regular sewing machine, then use your serger to give the inside edges a clean, durable finish that won't turn into a mess of threads in the wash. This is a great tangible example of teamwork between your machines.
While the 4-thread stitch is all about building your projects, the 3-thread and rolled hem stitches are about adding those elegant, professional finishing touches that take your work from homemade to handcrafted.
The Rolled Hem: For a Delicate Touch
The rolled hem is where your serger gets to show off its fancy side. This tiny, tight stitch wraps around the very edge of your fabric, creating a beautiful, almost thread-like decorative finish. It’s the secret to getting a high-end look on lightweight and sheer fabrics.
- Best For: Finishing the edges of chiffon scarves, formal wear, cloth napkins, and ruffles.
- Replicable Project Idea: Make a set of cloth napkins with a bright, contrasting rolled hem. It’s a super quick project that looks incredibly polished and helps you master this delicate technique.
Getting comfortable with these three stitches is a huge step, but there's always more to explore! For instance, learning how to do a coverstitch on a serger can open up a whole new world of hemming knits. Here at bsewinn.com, we are committed to empowering crafters with our custom sewing machine designs. We offer online classes and training to guide you through every stitch and technique, so you always have the support you need to keep growing.
Basic Care and Simple Troubleshooting
Keeping your serger happy is the secret to keeping yourself happy. Like any precision machine, a little bit of regular attention will save you a world of headaches down the road. This isn't about complicated mechanical work; it's about building a few simple habits that protect your investment and make sure your serger is always ready to go when inspiration strikes.
The single biggest thing you can do for your machine is keep it clean. Because sergers trim fabric as they sew, they create a shocking amount of lint. That fluff can get packed into the works, soak up oil, and cause unnecessary wear and tear on all those moving parts.
Your Simple Maintenance Checklist
Getting into a good routine is easy. Just plan to spend a few minutes giving your machine some love after every couple of projects. It's a tiny habit that pays off big time in stitch quality and machine longevity.
- De-Lint Regularly: Grab that little brush that came with your machine and gently sweep out all the fluff from around the loopers, feed dogs, and knife area. A word of caution: avoid using canned air! It can actually blow lint deeper into the machine's mechanics, which is the last thing you want.
- Change Your Needles: Serger needles are workhorses, and a dull or bent needle is the #1 culprit behind skipped stitches. A good rule of thumb is to pop in a fresh set after every 8-10 hours of sewing, or at the start of any big new project.
- Oiling Your Machine: Some sergers need a little oil, while others are self-lubricating. Always, always follow your manual’s specific instructions on where to oil and how often. It’s usually just a single drop in the right spot.
Troubleshooting Common Serger Issues
Even the best-maintained machine will have an off day. Before you get frustrated, take a deep breath and run through this quick checklist. Most of the issues new serger owners run into are surprisingly simple to fix.
I can't stress this enough: the vast majority of serger problems—like skipped stitches, nests of thread, or wacky tension—can be traced back to one simple thing: incorrect threading. When in doubt, unthread the entire machine and start over from scratch.
Seriously, that one step solves the problem 9 times out of 10. If a complete re-thread doesn't do the trick, here are a few other common culprits to investigate:
- Are the needles inserted correctly? Double-check that they are pushed all the way up into the clamp and facing the right direction. It's an easy mistake to make!
- Is the thread seated in the tension discs? Give each thread a gentle tug. You should feel it "floss" or snap securely into its tension dial.
- Are the spool caps on securely? The thread needs to feed smoothly off the cone or spool without catching on anything.
This proactive approach is something the entire sewing industry supports. In fact, the market for sewing machine components—all those essential bits like needles, loopers, and blades—was projected to grow from $2.7 billion to $5.0 billion by 2035. That's great news for us, as it shows a huge focus on helping home sewists maintain their machines for years to come. You can discover more insights about the sewing components market and see how it’s supporting our creative journeys.
So, you've picked out the perfect serger. That’s a huge step, but I’ll let you in on a little secret: your creative journey isn't over. It's just getting started. Here at bsewinn.com, we are committed to empowering crafters by providing not just custom sewing machine designs, but also the support to use them confidently. Our whole goal is to give you the skills and confidence to make all those amazing projects you're dreaming of.
Imagine having an expert right there with you, guiding you through threading your exact model for the first time. Or picture yourself in a fun class, sewing your first knit top with step-by-step instructions. That's not just a nice idea—it’s exactly what our support system offers.
More Than a Machine—It's a Community
Learning to use a new machine is a process, and we get that. That's why we’ve built up a whole system of support just for new serger owners. We want you to feel excited, not intimidated, every time you sit down to sew.
- Hands-On Classes: We have workshops designed specifically for beginners. You can learn in a super friendly, encouraging space with other people who are just starting out, too.
- Personalized Training: Need some one-on-one help? We can walk you through specific techniques or just help you get comfortable with all the cool features your machine has.
- Tons of Online Resources: Get stuck at 10 p.m. on a Saturday? No problem. We have a huge library of tutorials and guides you can access anytime, so help is always just a click away.
With bsewinn.com's custom sewing machine designs, you're not just making a purchase. You're getting a real partner who’s genuinely invested in seeing you succeed. We’ll give you the tools, the training, and all the encouragement you need to go from feeling like a beginner to a totally confident creator.
We're here to help you nail it, one perfectly finished seam at a time.
Got Questions? We’ve Got Answers.
Jumping into the world of sergers usually brings up a few questions. It’s totally normal! Here are some of the most common things we hear from fellow sewists, answered simply to get you started on the right foot.
Can a serger replace my sewing machine?
That’s a big one we hear all the time. The short answer is no. A serger is a fantastic partner for your regular sewing machine, not a replacement. Think of them as a dynamic duo.
Your serger is the specialist for rock-solid seams, flawless edge finishes, and wrangling stretchy knit fabrics. But it can’t do things like install a zipper, sew a buttonhole, or add topstitching. Most projects need the skills of both machines to get that polished, store-bought look. You’ll find yourself using your sewing machine for the detailed construction and your serger for strong, clean seams that won't ever fray.
How often should I change the serger blades?
This really comes down to how much you use it. If you’re a hobbyist sewing a few times a month, your blades could easily last a year or even longer. You’ll know it’s time for a swap when your fabric edges start looking a bit ragged or chewed up instead of being sliced cleanly.
When that time comes, just grab your machine’s manual. It’ll walk you through exactly how to change them out safely.
What kind of thread should I use?
Technically, you can use your regular sewing thread, but you’ll have a much better (and cheaper!) experience using the big cones of serger thread. Sergers are thread-guzzlers, and these cones are made to keep up with their high speed without skipping a beat.
This type of thread is also finer, which means your seams will be flatter and less bulky—a huge plus for a professional finish. If you’re just starting, a great way to build your stash is to grab four cones of a neutral color you love, like gray, cream, or white.
At bsewinn.com, we’re committed to empowering crafters through our custom sewing machine designs and extensive support. We’ve got the expert advice, online classes, training, and a community that gets just as excited about sewing as you do. Come explore our resources and find the perfect machine to bring your ideas to life at https://www.bsewinn.com.

