

Every stitch you make has an unsung hero working behind the scenes: your sewing machine belt. It’s the critical link that takes the power from the motor and delivers it to the handwheel and needle, making sure everything moves together like a well-oiled machine. Without a healthy and properly tensioned belt, that creative flow can quickly turn into a session of pure frustration.
The Hidden Engine of Your Sewing Machine
Whether you're working on a trusty vintage Singer or a high-tech embroidery powerhouse, a belt is what makes it all happen. This simple loop of rubber or fabric is the mechanical heart of your machine. Its main job? To choreograph a perfectly timed dance between the motor, the upper shaft that drives the needle, and the lower shaft that moves the feed dogs. This beautiful coordination is what gives you those clean, even, and strong stitches we all strive for.
When the belt is in good shape, that power transfer is completely seamless. The needle goes down just as the feed dogs pull the fabric forward, creating flawless seams. But the moment that belt starts to wear out or get damaged, the whole rhythm gets thrown off.
A failing belt is one of the most common culprits behind pesky issues like skipped stitches, a sluggish-feeling machine, or a needle that just can't seem to punch through thicker fabrics. Learning to spot the early warning signs can save you a world of mechanical headaches down the road.
Here at bsewinn.com, we are deeply committed to empowering crafters like you. We believe that understanding every part of your machine, from custom designs to essential components like the belt, is the key to unlocking your full creative potential. Through our comprehensive online classes, hands-on training, and extensive resource library, we provide the support you need to tackle any project with confidence. If you want to zoom out and see how all the parts work together, check out our complete guide on sewing machine basics for beginners.
Why Your Belt's Condition Matters
A healthy belt is non-negotiable for top-tier performance. It directly impacts your machine in a few key ways:
- Consistent Timing: It's what keeps the needle and feed dogs in perfect sync, which is essential for uniform stitches. No more wonky seams!
- Sufficient Power: A good, taut belt ensures the motor's full strength gets to the needle. This is what lets you power through tough materials like denim or canvas without your machine sounding like it's struggling.
- Machine Longevity: When a belt has the right tension, it prevents extra strain on the motor and other moving parts. This simple thing can actually extend the life of your entire machine.
So, how do you know if your belt is the source of your sewing troubles? Let's break down the common symptoms.
Common Signs of a Failing Sewing Machine Belt
It can be tricky to figure out exactly what's wrong when your machine starts acting up. This quick reference table should help you connect the dots between what you're experiencing and a potential belt issue.
| Symptom You Notice | What It Likely Means | How It Affects Your Sewing |
|---|---|---|
| Loud grinding or squealing noises | The belt is slipping, frayed, or has become too brittle. | Distracting noises are just the start. This can lead to inconsistent stitching and put extra wear on your motor. |
| Machine runs slowly or feels weak | The belt has stretched out and is no longer gripping the pulleys tightly. | You'll lose piercing power, making it a real struggle to sew through multiple layers or heavy fabrics. |
| The handwheel is hard to turn | The belt is either too tight or has become stiff and inflexible with age. | This puts a ton of strain on the motor and can cause it to overheat or fail prematurely. |
| Skipped stitches or uneven seams | The belt is slipping, causing the timing between the needle and feed dogs to be off. | Your stitch quality will suffer dramatically, resulting in weak seams that can easily pull apart. |
| Visible cracks, fraying, or shininess | The belt material is physically breaking down from age and use. | This is a clear red flag. A belt in this condition could snap at any moment, stopping your project dead in its tracks. |
If you spot any of these signs, it's a good idea to pop open your machine's cover and take a look. Catching a belt problem early is a lot easier (and cheaper!) than dealing with a major mechanical failure.
Decoding the Different Types of Sewing Belts
Picking the right sewing machine belt is about more than just finding the right size; it’s about understanding which type your machine was designed for. Think of it like tires on a car—you wouldn't put skinny road bike tires on a rugged off-road truck. In the same way, your sewing machine needs a specific style of belt to transfer power from the motor to the needle flawlessly.
Getting this right is the secret to a machine that runs smoothly and reliably.
Once you get a handle on the four main varieties, replacing a belt goes from a frustrating chore to a simple, satisfying fix. Each one has a unique design built for different kinds of machines, from those beautiful vintage workhorses to the high-tech embroidery models we use today.
This simple diagram shows what every sewing machine belt does at its core: it connects the motor's power to the machine's moving parts.
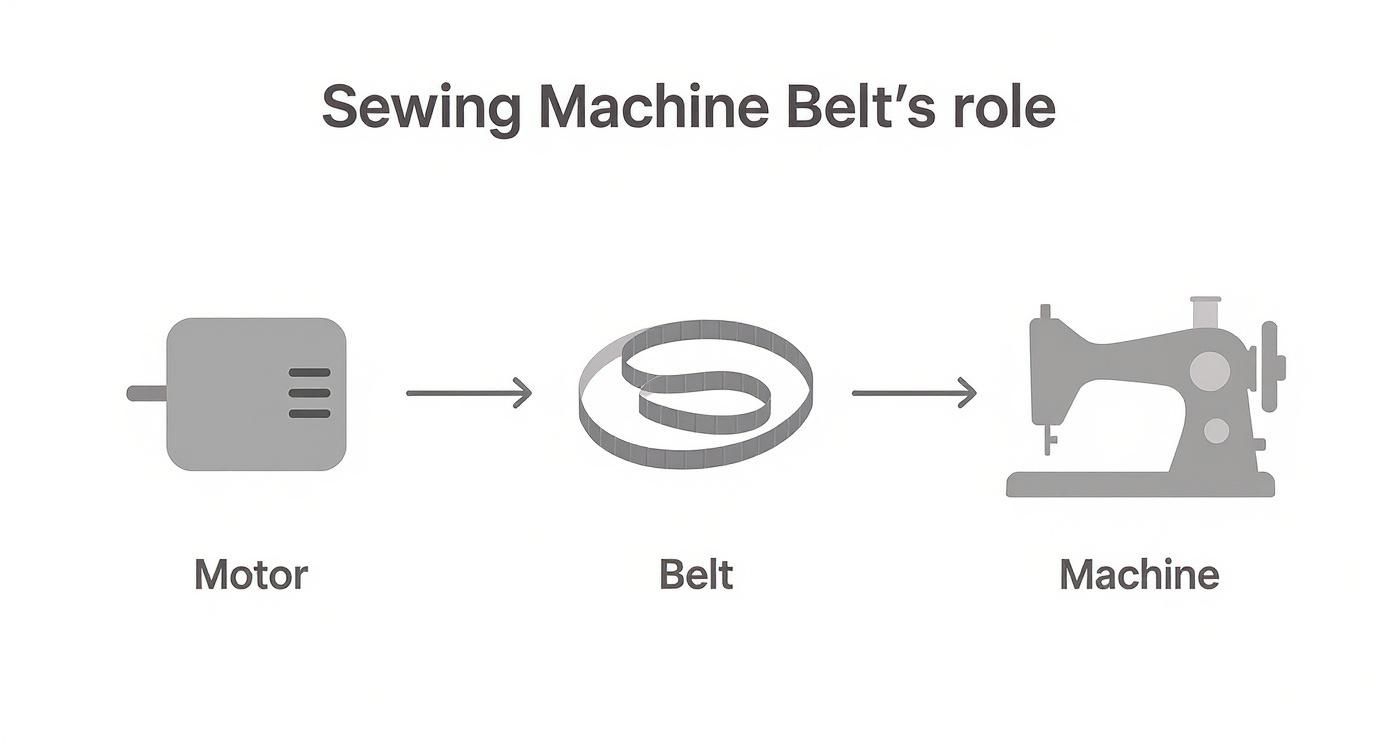
As you can see, the belt is that essential bridge making sure every component moves in perfect time to create those beautiful stitches.
The Classic V-Belt
A V-belt is the trusty workhorse of the sewing world. Its trapezoidal shape wedges right into the pulley grooves, creating an incredibly strong grip that relies on friction. This design is fantastic for transferring a lot of power without slipping.
It's why you'll almost always find these tough belts on heavy-duty industrial machines and vintage models celebrated for their sheer power. If you have an older mechanical machine, especially one that can punch through leather or denim, chances are it has a V-belt doing all the heavy lifting.
The Precision Timing Belt
Now, picture a bicycle chain engaging perfectly with its gears. That’s exactly how a timing belt works. Often called a cogged or toothed belt, its teeth lock into matching grooves on the pulleys, which completely eliminates any possibility of slipping.
This kind of precision is absolutely critical for modern computerized sewing, quilting, and embroidery machines. They rely on perfect synchronization between the needle and the embroidery arm or feed dogs to execute those complex, intricate patterns we love.
A timing belt guarantees that for every single rotation of the motor, the needle moves a precise, non-negotiable distance. This perfect timing is what makes intricate embroidery and flawless decorative stitching possible—a core strength of the custom sewing machine designs we champion at bsewinn.com.
The Versatile Stretch and Flat Belts
The simplest of the bunch are flat belts and stretch belts. Flat belts, which are less common now, are just a flat loop that runs over a smooth pulley, relying completely on tension and friction. You might still spot one on a much older or very basic machine.
More common these days are stretch belts, which you'll often find on sergers and many lighter-duty home machines. These are typically round, rubbery belts designed to stretch over the pulleys for a snug fit. They provide a simple, effective way to transfer power for everyday sewing, and their natural elasticity makes installation a breeze since they create their own tension.
How to Find the Perfect Replacement Belt
Tracking down the right sewing machine belt can sometimes feel like a wild goose chase, but it’s actually a lot simpler than you might think. With a little bit of detective work, you can find the exact belt you need and get your machine humming along again in no time.
Let's walk through the three best ways to identify your belt, starting with the easiest.
The absolute quickest way to find a match is to look for a part number printed right on the old belt. These numbers can get pretty faded over the years from all the friction and use, so you might need to grab a magnifying glass and get under some good light to see them.
This little string of numbers and letters is your golden ticket. If you can read it, your search is pretty much done—just pop that code into a search engine, and you'll find an exact match waiting for you.
Check Your Machine’s Manual
If the part number has completely worn off, your machine’s manual is your next best friend. Most manuals come with a detailed parts list or a diagram that shows every component, including the right belt.
Always keep your machine’s manual somewhere safe. It's more than just a setup guide; it’s the blueprint to your machine, full of priceless info for repairs and maintenance.
Don't have the original booklet anymore? No sweat. A quick online search for your machine’s brand and model number, plus "manual PDF," usually brings up a digital copy you can download. Here at bsewinn.com, we provide extensive resources to ensure you have the information needed to become a more confident and self-sufficient sewist.
Measure for a Perfect Fit
What about those beautiful old vintage machines where the manual is long gone and any part number has faded into history? This is where a good old-fashioned measuring tape comes in. Getting an accurate size from a stretched or broken belt just takes a little care.
- For an Unbroken Belt: If the belt is still in one piece, you'll want to measure its inside circumference. Try not to stretch it while you measure, or you'll end up with the wrong size.
- For a Broken Belt: Just lay the broken belt out flat and straight. Measure it from one end to the other to get its full length. That measurement is the circumference you'll need for your new belt.
This hands-on method is perfect for finding compatible sewing machine belts for even the most unique models, ensuring those classic machines can keep on stitching for many more years.
Before you start, it's a great idea to run through a quick checklist. This will help you gather all the right information in one go, making your search a whole lot easier.
Your Belt Identification Checklist
Follow this checklist to accurately identify and measure your sewing machine belt for a perfect fit.
| Action Step | Practical Tip | Common Mistake to Avoid |
|---|---|---|
| Inspect the Old Belt | Use a magnifying glass and a bright light to search for faded part numbers or brand markings. | Giving up too quickly. The number might be faint or hidden in a creased area. |
| Consult the Manual | Look for a dedicated "Parts List" or a schematic diagram. If you don't have it, search online for a PDF version. | Guessing based on a similar model. Always use the manual for your exact model number. |
| Take Accurate Measurements | For a loop, measure the inside circumference. For a broken belt, lay it flat and measure end-to-end. | Measuring the outside of an intact belt, which will give you a size that's too large. |
| Document Everything | Snap a clear photo of the old belt and any visible numbers. Write down the measurements you took. | Relying on memory. It’s easy to forget a number or mix up measurements later on. |
With these details written down—whether it's a part number or a precise measurement—you're all set to order the perfect replacement belt and bring your machine back to life.
Alright, let's roll up our sleeves and get your machine running like a dream again. Replacing a sewing machine belt is one of those DIY repairs that feels incredibly empowering. It usually just takes a screwdriver and a little bit of patience, and it puts you right in charge of your machine's health.
This guide will walk you through the whole process, step by step. We'll cover how to get to the old belt, pop on the new one, and get that tension just right. Learning these skills is central to our mission at bsewinn.com—giving you the knowledge to not only replicate beautiful designs but also to confidently maintain the tools you rely on. And hey, if you ever need a little extra help, our online classes and resources are always here for you.
Getting Ready for the Swap
First things first, let's get your tools together. For most machines, all you'll need is a screwdriver that fits the screws on your machine's cover. It’s also a good idea to have a soft cloth nearby to clean out any dust bunnies you might find hiding inside.
Safety is everything. Before you do anything else, unplug your sewing machine from the wall. This is non-negotiable. It ensures there's zero chance of the machine kicking on while your hands are near the motor or handwheel.
Getting the Old Belt Off
Time to find that old belt. The basic idea is the same for most machines, whether you're dealing with a motor belt on the outside or a timing belt tucked away inside.
- Open Up the Housing: You’ll need to remove a cover to see the belt. For an external motor belt, this might just mean loosening the motor's mounting bracket. If it's an internal belt, you'll probably have to unscrew the top or side panel of your machine.
- Ease Up the Tension: To get the old belt off without a fight, you need to give it some slack. Loosen the screws that hold the motor in place and gently nudge it toward the machine's body. This will take the tension right off the belt.
- Slip It Off: Now you can carefully slide the old, loose belt off the motor pulley and the handwheel pulley. This is a great time to give it a quick look-over and make sure your new belt is a perfect match.
Putting on the New Belt and Setting the Tension
With the old belt out of the way, it's time for the new one to shine. This is also the perfect opportunity to clean out any lint or gunk that's built up in the pulley grooves and around the motor.
Go ahead and loop the new belt around the handwheel pulley first, then stretch it over to the motor pulley. Now for the most important part of the whole job: getting the tension right.
Think of it like the "Goldilocks" rule. The belt needs to be just right—not too tight, and not too loose. If it's too loose, it'll slip, which means you lose power and get wonky, skipped stitches. If it's too tight, you'll put a ton of strain on your motor and risk burning it out way too soon.
To set the tension, gently pull the motor away from the machine until the belt feels snug. A good rule of thumb is that you should be able to press down on the middle of the belt and feel about a quarter-inch of give. Once you hit that sweet spot, tighten up the motor's mounting screws so it stays put.
Getting this tension right is crucial for the health of your machine's components. And in a world where these machines are more important than ever—the global sewing machine market was valued at USD 4.51 billion in 2023 and is still growing—taking good care of them matters. You can learn more about these market trends in the full analysis from SkyQuestt.com.
Last step! Put any covers you removed back on, plug your machine in, and give it a whirl. You're going to love how smooth, powerful, and quiet it runs with a brand-new belt.
Troubleshooting Common Sewing Machine Belt Problems
When your sewing machine starts acting up, the belt is one of the first places you should look. It’s one of the most common culprits, believe it or not. All sorts of strange noises, sluggish performance, and even funny smells can often be traced right back to this one simple part. Learning to play detective and diagnose these symptoms is a fantastic skill for any sewist.
Start by just listening to your machine. Is there a rhythmic thumping sound? That often means the belt has developed a "memory" from sitting in one position too long, creating a flat spot. If you hear a persistent, high-pitched squeal, that's a tell-tale sign of a belt that’s too loose and is slipping on the pulleys—kind of like a car tire spinning on ice.
Now, if you catch a whiff of burning rubber, that’s a big red flag. Stop what you're doing. This points to extreme friction, either from a slipping belt or one that's way too tight, and it can quickly lead to the belt snapping or even damaging the motor.
Common Issues and Their Solutions
Most belt problems you'll run into fall into just a few categories, and thankfully, each has a pretty clear solution. Figuring out which one you're dealing with is half the battle.
- Slipping Belt: Your machine feels weak and just can't punch through thicker fabrics like it used to. This almost always means the belt is too loose. A simple tension adjustment usually does the trick.
- Overly Tight Belt: Does the handwheel feel stiff or like you're fighting it? The belt is probably cranked down too tight, putting a ton of strain on your motor. Loosening the tension is a must to prevent burnout.
- Worn or Damaged Belt: Take a close look at the belt itself. If you see cracks, fraying edges, or a glazed, shiny surface, the material is shot. No amount of adjusting will fix this; a replacement is your only real option.
The whole idea is to catch these things early. A quick check-up can stop a minor annoyance from turning into a major, project-halting repair. It keeps your creativity flowing and your machine humming along happily.
While you're troubleshooting or swapping out a belt, you might hit a snag like a stubborn stripped screw. It happens to the best of us! Knowing how to get a stripped screw out is a super handy skill for any kind of DIY repair, not just for sewing machines.
Many of these fixes are pretty straightforward, but sometimes the problem is a bit more stubborn. If you've fiddled with the tension and you're still not getting anywhere, it might be time to call in the pros. For a closer look at what professional maintenance involves, check out our guide on sewing machine service and repairs to make sure your machine gets the TLC it deserves.
Simple Habits for a Longer-Lasting Belt
Good machine maintenance isn't about scrambling for repairs; it's about building smart habits. Just like any other hardworking part of your sewing machine, the belt will stick around a lot longer if you give it a little attention now and then. A few simple routines can stop a surprise breakdown in its tracks and keep your machine humming along for years.
These checks only take a minute but can save you from a massive headache later. Every few projects, just pop open the cover and give your belt a quick once-over. You’re looking for the little tells of wear and tear—tiny cracks, shiny spots where it looks glazed, or any fraying along the edges.
Catching these little things early is the whole game. A belt that looks a bit worn today could be a snapped belt tomorrow, bringing your big project to a screeching halt. A quick look-see ensures your machine is always ready to go when you are.
Keep It Clean and Tidy
One of the biggest culprits in wearing down sewing machine belts is the slow, sneaky buildup of lint, dust, and oil. It’s like kryptonite for rubber and fabric, making the belt brittle or causing it to slip.
A regular cleaning is your best line of defense. Keeping this area clear of gunk not only helps the belt last longer but also keeps the motor from working harder than it needs to. It’s a tiny step that makes a huge difference for your machine’s overall health. This is a foundational practice we teach in our classes, ensuring every crafter can properly care for their equipment.
It’s easy to forget how important every single part of a sewing machine is until you look at the big picture. China, for example, is the world's biggest exporter of sewing machines, shipping out around 1.82 billion units. Keeping that many machines running smoothly worldwide requires a staggering number of quality parts, and durable belts are right at the top of that list. You can dig into the numbers in this sewing machine market analysis.
Answering Your Top Sewing Machine Belt Questions
Let's dive into some of the questions we hear all the time from fellow crafters about sewing machine belts. Getting straightforward answers is the best way to feel more confident with your machine, and that’s a huge part of our mission here. We truly believe anyone can master their machine with a little support.
How Often Should I Replace My Belt?
There’s really no magic number here. A belt’s lifespan totally depends on how much you use your machine and even where you store it. Instead of watching the calendar, just get in the habit of doing a quick visual check.
A good rule of thumb is to take a peek at the belt every six months or so, or whenever you’re giving your machine a good deep clean.
You’ll want to keep an eye out for a few tell-tale signs of trouble:
- Visible Cracks: Even tiny cracks mean the belt material is getting brittle and will eventually snap.
- A Glazed Surface: If the belt looks shiny and feels slick, it has lost its grip and can't turn the pulleys effectively.
- Fraying Edges: This one’s a dead giveaway. Any fraying means the belt is literally starting to come apart.
Can I Use a Generic Belt on My Vintage Machine?
It’s tempting, I know, especially when a generic belt is cheap and easy to find. But for vintage machines, it’s almost always worth the effort to find a belt made specifically for your model. Those older machines often have quirky pulley sizes and very specific tension needs.
A generic belt might seem like it fits, but if it doesn't have the right grip or tension, you’ll end up with wonky stitches or, worse, you could put a real strain on the motor.
Taking the time to find the right belt is a small step that really protects the long-term health of a treasured machine. This ensures it's always ready for the tangible examples and custom sewing machine designs we guide you through in our bsewinn.com classes.
At B-Sew Inn, we're all about giving you the tools, knowledge, and support to bring your creative visions to life. Come explore our huge selection of machines, accessories, and classes designed to empower every single crafter.

