

You've spent an afternoon cutting triangle pieces, carefully sewing the units, and pressing every seam. Then the blocks meet on the design wall, and the points don't line up. One triangle seems slightly taller, another has a drifting tip, and the mismatch becomes more obvious as the quilt grows.
That frustration usually begins before the sewing machine starts. A small error in angle, size, or seam placement can repeat across every unit. A triangle quilting ruler gives those cuts a stable geometric reference, helping quilters replace guesswork with repeatable steps and cleaner quilt construction.
Table of Contents
- Why Triangle Quilting Rulers Change Your Piecing
- How Triangle Ruler Geometry Works
- Types of Triangle Quilting Rulers and When to Use Each
- Cutting Triangles Without Distortion or Miscuts
- What to Look for When Buying a Triangle Quilting Ruler
- Quilt Patterns and Projects That Shine with Triangle Rulers
- Your Next Step Toward Perfect Triangle Piecing
Why Triangle Quilting Rulers Change Your Piecing
A star block can look accurate while it is still on the cutting table. After several blocks are joined, however, a slightly wrong angle or uneven side length may appear as a shifted point, a stretched seam, or a diamond that no longer sits flat. Each small discrepancy affects the next piece, so the quilt top gradually reveals errors that were difficult to see in a single unit.
A triangle quilting ruler controls that first stage. Place the acrylic guide over a prepared strip or fabric section, align the required markings, and cut along its edge. The fixed shape gives every triangle the same reference, reducing the need to trace templates or draw separate diagonal lines.
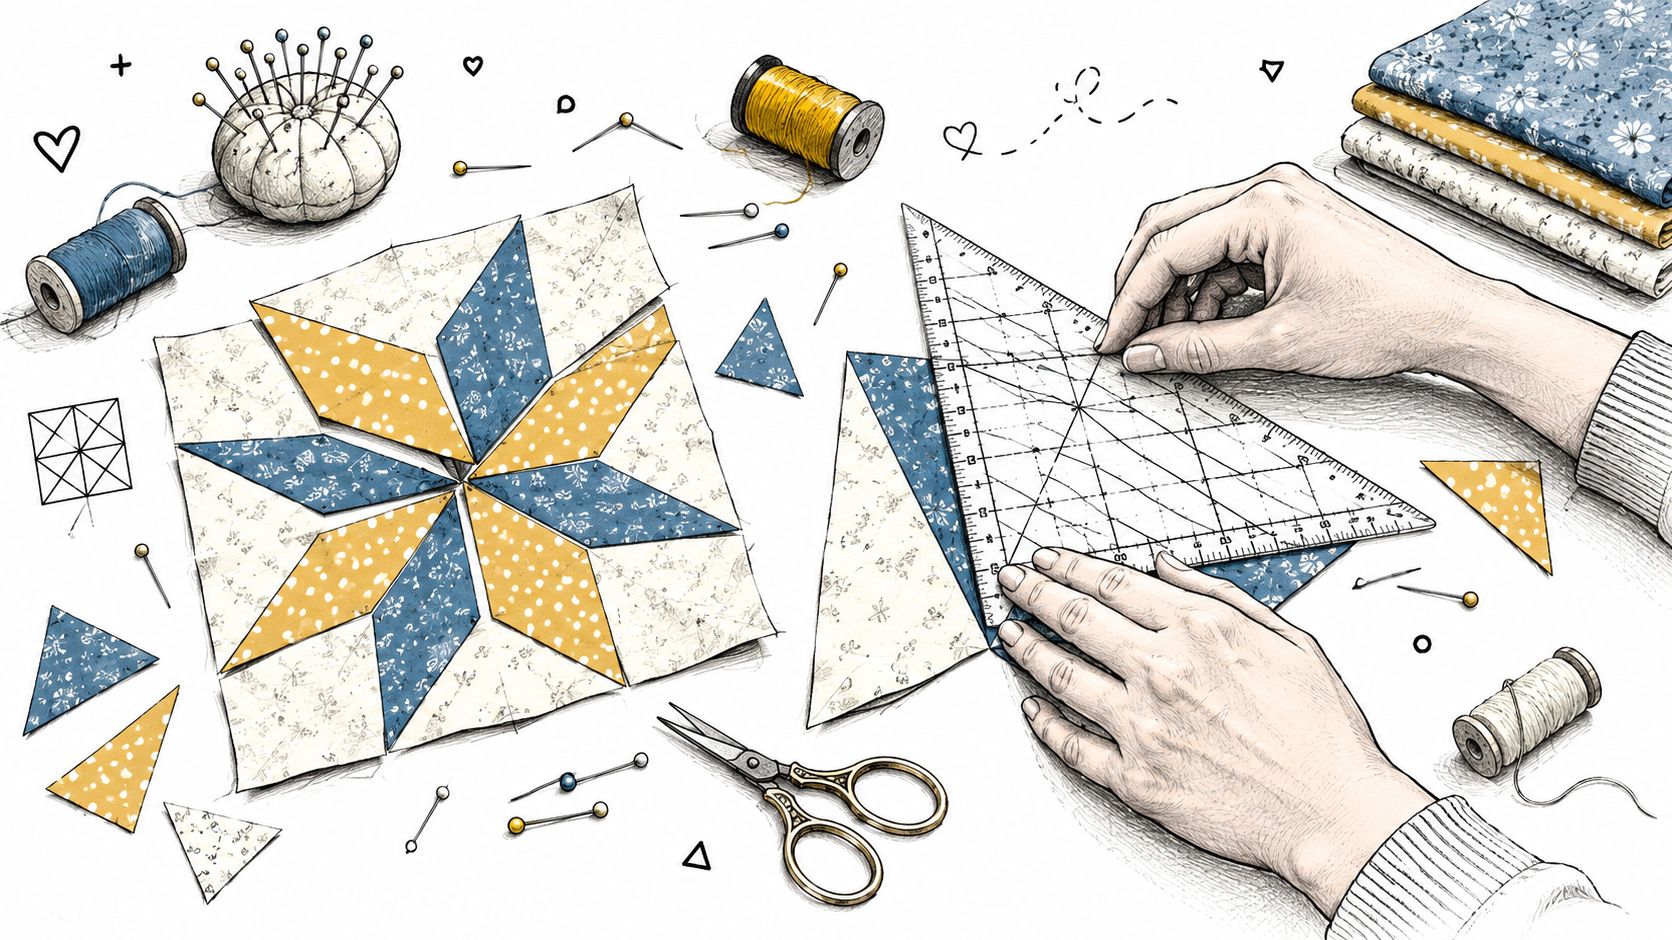
The error starts at the cutting table
A hand-drawn diagonal may shift from one piece to the next. A traced template may move, stretch, or sit differently against the grain. Those methods can suit an occasional piece, but repeated triangle units need a reference that stays consistent.
The angle markings help produce pieces with matching geometry. By the time the fabric reaches the sewing machine, corresponding edges are already more likely to meet where the pattern expects them. Accurate cutting does not replace a dependable quarter-inch seam, but it gives that seam a straighter, more predictable starting point.
Practical rule: If the same triangle appears throughout a quilt, repeatable cutting matters more than cutting each piece quickly.
Rotary cutting changed quilting by pairing a sharp cutter with marked acrylic guides. Triangle rulers developed within that shift from hand-drawn templates and scissors toward standardized shapes, angle markings, and rotary-cutter compatibility. Their practical value is easy to see in a repeated design: consistent cuts limit the small geometry differences that can turn matching points into mismatched ones.
Handle style also affects control. Quilters who want an overview of grip options and ruler handling can review B-Sew Inn's guide to quilting rulers with handles. A stable grip helps keep the ruler from shifting as the cutter passes along its edge, particularly when several cuts must follow the same line.
The result is not faster preparation. It is a quilt top with fewer corrections, cleaner intersections, and points that remain aligned as separate units become a larger pattern.
How Triangle Ruler Geometry Works
A triangle quilting ruler earns its place through the fixed angle lines built into its shape. Common markings include 30°, 45°, and 60°, and each directs the cutter toward a particular triangle or angled unit. The ruler turns angle selection into a visible alignment task, rather than a calculation repeated for every piece.
A one-degree error may seem harmless in one triangle. After eight units are joined, however, that small difference can create a noticeable drift, leaving points blunt, seams wandering, or a section out of square. The problem begins at the cutting line and becomes harder to correct as more pieces are sewn together. Accurate geometry gives each seam a consistent starting point.
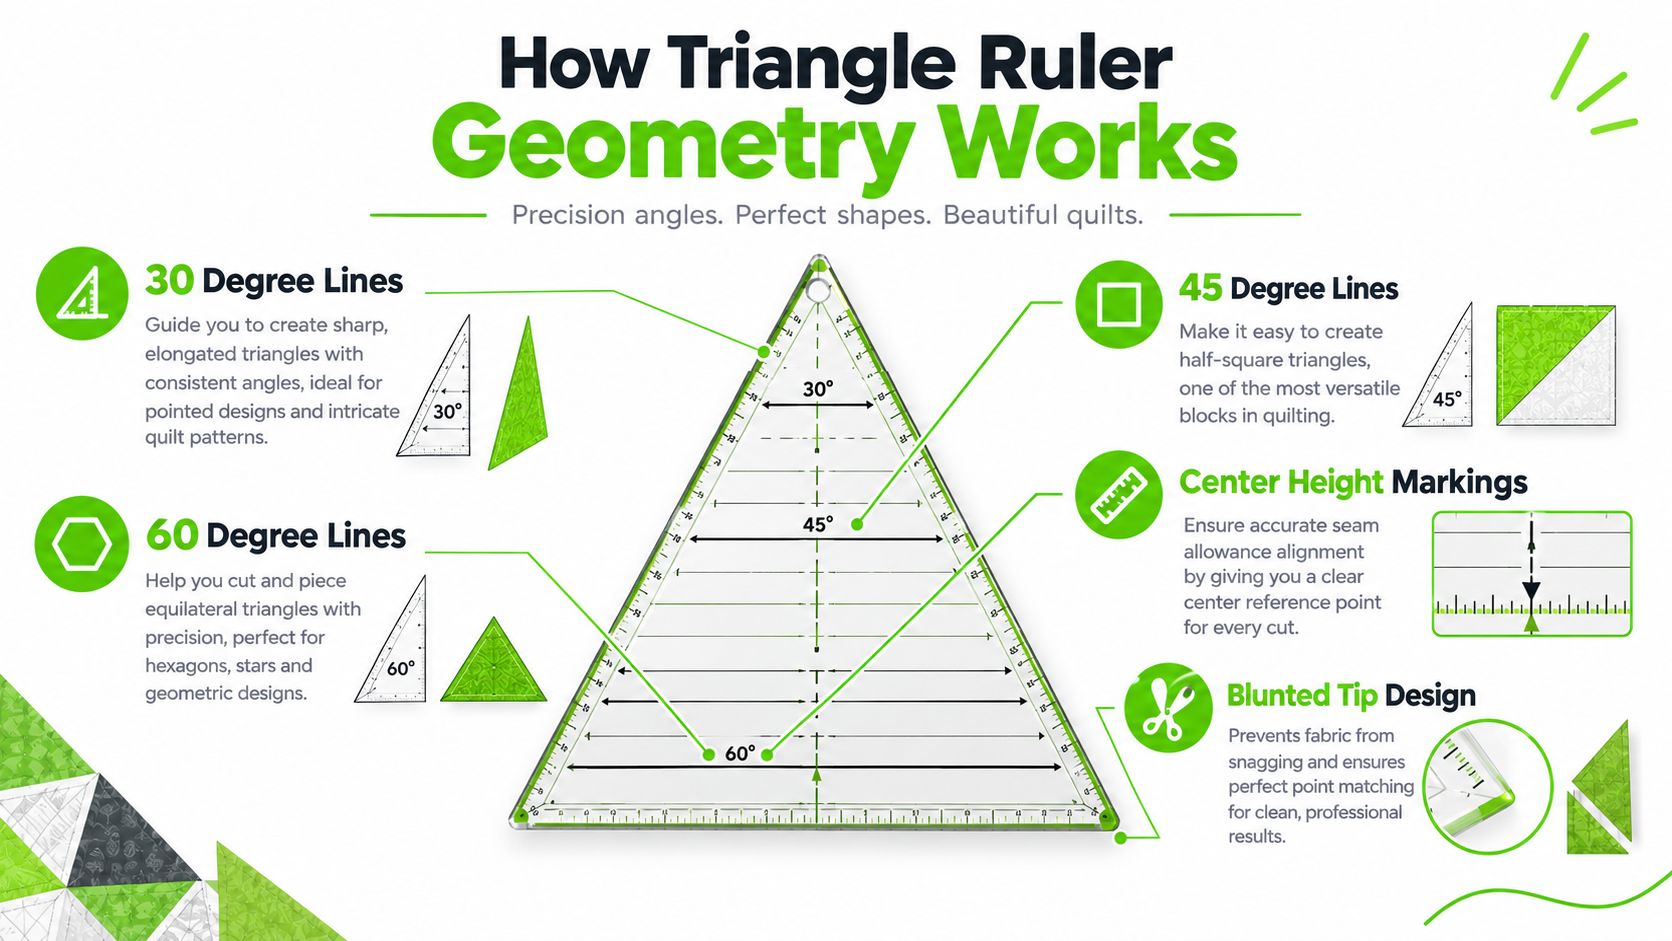
Reading the angle lines
A 60° line supports equilateral and half-equilateral triangle cutting. A 45° line commonly supports half-square triangle work and other units based on diagonal divisions. A 30° line produces a different slant, useful for elongated triangles and layouts built around sharper angles.
Read the pattern before placing the ruler. Several lines may cross near one another, so choosing the one that merely “looks close” can change the shape of the cut. Mark the line you use most often with removable tape or a washable marker. That small visual cue helps prevent a repeated angle mistake across an entire block.
Finished size versus unfinished size
Patterns often give a unit's finished measurement, the size after sewing. The fabric piece must be larger beforehand because the seam allowances use fabric along the edges. Some specialty rulers include that cutting allowance in their markings, while others require the pattern's separate instructions.
Start at the ruler's reference edge, then read the grid from there. Confirm whether the selected marking describes the finished unit, the unfinished unit, or a cutting measurement that already includes the seam allowance. Confusing these references can make every triangle consistently too small or too large.
Test one triangle before cutting the full set. Cut it, sew it to its partner, press it, and measure the completed unit against the pattern. This quick check exposes a misunderstood line before it affects an entire block.
B-Sew Inn's quilt block calculator resource can help plan unit measurements, but the ruler must still match the pattern's stated geometry. Calculations and cutting guides work together. Neither corrects an incorrectly chosen angle.
Types of Triangle Quilting Rulers and When to Use Each
A triangle ruler earns its place by matching the block's geometry. A 60-degree quilt needs different reference lines from a block built with right angles. Choosing the ruler from the construction method prevents a quiet error at the cutting table: the pieces may look usable, yet their angles shift the points farther with every sewn unit.
A 60-degree quilting triangle ruler suits equilateral triangles, whose three sides and three angles match. The same geometry supports diamonds and other shapes based on 60-degree relationships. Select this type when the pattern repeats that angle rather than relying on a square divided diagonally.
| Ruler Type | Angle | Best For | Common Blocks |
|---|---|---|---|
| Equilateral triangle ruler | 60° | Equal-sided triangles, diamonds, half-hexagon layouts | Tumbling blocks, triangle mosaics |
| Half-square triangle ruler | 45° | Diagonal units and paired triangle construction | Star points, pinwheels, flying geese |
| Right-angle ruler | 90° | Squaring and cutting perpendicular corners | Small units, corner pieces |
| Specialty setting ruler | Pattern-specific | Setting triangles and corner triangles | On-point layouts |
Match the tool to the block
Use the 60-degree option for equilateral triangles and diamond motifs. Choose a 45-degree option for patterns that split square units diagonally or build half-square triangles. A 90-degree ruler fits squaring tasks and pieces with a perpendicular corner.
Specialty rulers are useful for setting triangles, corner triangles, and other pattern-specific shapes. They place the required edges and angles directly on the fabric, reducing the calculations needed for an on-point layout. The edge pieces can differ from the central block dimensions, so a pattern-specific guide helps keep the quilt border aligned. For a broader explanation of ruler categories and templates, see B-Sew Inn's quilting rulers and templates guide.
Think about coverage
The ruler's physical size limits the unit it can cut. Check the largest triangle measurement against the pattern before buying. A small ruler may handle individual units well but force extra steps for a larger block. A larger ruler can cover more fabric, though its markings must remain easy for you to read and position accurately.
One multi-angle ruler can serve several projects. Two specialized rulers may be faster when each has a clear, uncluttered angle and measurement system. Compare the pattern's required angles, unit sizes, and cutting method, then choose the tool that repeats those requirements without mental conversion. The right match removes small geometry decisions before they become mismatched points across the quilt top.
Cutting Triangles Without Distortion or Miscuts
A triangle can look correct on the cutting mat and still create trouble several seams later. A slightly shifted strip changes the angle, a misplaced measurement line shortens one side, and those small differences collect across the quilt top until points no longer meet. Accurate cutting starts with fabric that stays stable. Press it without stretching, keep the mat flat, and consider the fabric grain before placing the strip. The ruler sets the geometry, but steady pressure and a blade that moves cleanly keep that geometry intact.
For repeated units, begin with the strip-cutting method. Cut a strip to the pattern's required finished size and seam allowance. Then place the triangle ruler on the strip and use the specified angle line to slice each unit in the same orientation. The ruler acts like a fixed template, so you repeat the shape instead of recalculating every triangle.
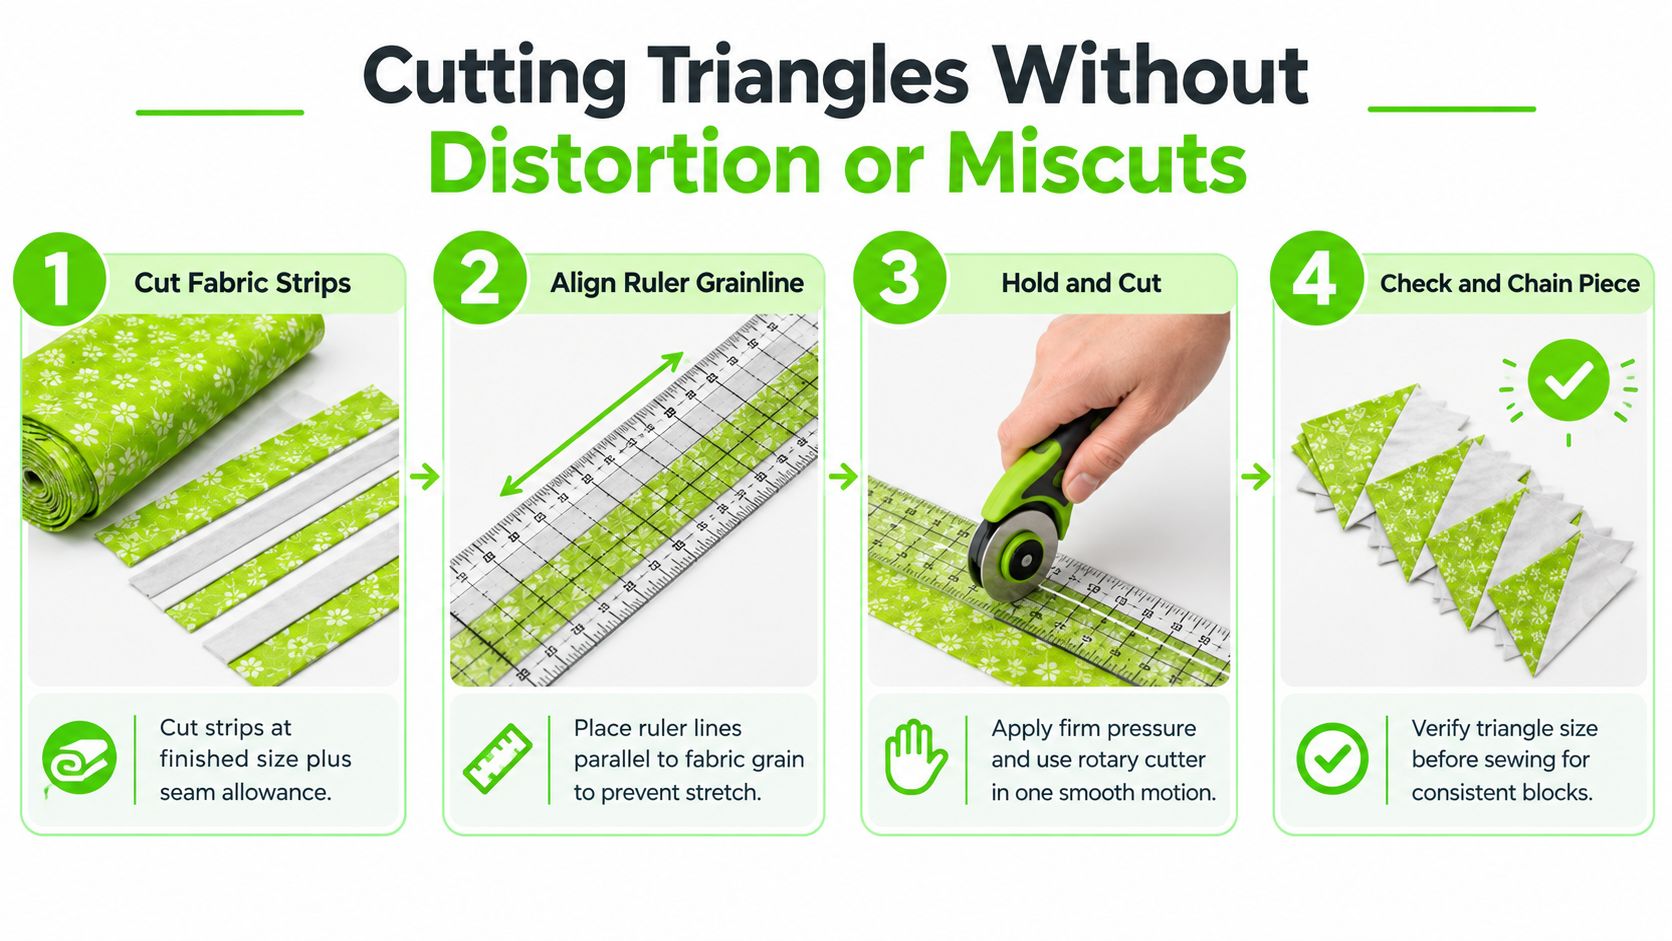
A controlled cutting sequence
- Prepare the fabric. Press without pulling the cloth, align the strip carefully, and place it on a suitable cutting mat.
- Identify the ruler line. Confirm whether the pattern requires a 30°, 45°, or 60° cut. A small removable marker on the line you use most can prevent confusion where markings overlap.
- Align before applying pressure. Keep the ruler's grainline or directional marks parallel to the fabric grain when the pattern requires it. Match the fabric edge to the intended measurement line, not to the acrylic's outside edge.
- Cut smoothly. Hold the ruler firmly with your non-cutting hand. Move the rotary cutter in one controlled motion, keeping the blade against the ruler without pushing it sideways. Follow these handling principles in this rotary cutter guide.
- Inspect a test unit. Before cutting the full quantity, compare one triangle with the pattern. Check its point, angle, and side lengths before continuing.
Specialty triangle rulers reduce calculation-heavy steps for setting triangles, corner triangles, and half-square triangles. Their built-in angles and reference points help size those pieces without working through the geometry manually. That matters especially in an on-point layout, where an incorrect edge triangle can pull an entire border out of alignment.
Preventing shifting and distortion
Non-slip features help, but hand placement still controls the cut. Spread pressure across the ruler rather than pressing mainly on one corner. If the fabric shifts, stop and realign it. Do not try to correct the line while the rotary cutter is moving.
Check any triangle that looks uneven before sewing. If enough seam allowance remains, careful trimming may restore consistency. If the cut is materially wrong, recut the piece instead of forcing it into the seam and hoping pressing will conceal the difference.
A sharp rotary-cutter blade, a stable mat, and markings that remain readable in your sewing-room light create a dependable cutting system. Consistent setup prevents hidden geometry errors from becoming mismatched points later.
What to Look for When Buying a Triangle Quilting Ruler
A triangle ruler proves its value when it prevents a small angle error from spreading through the quilt top. If one cut triangle is slightly off, the next seam can shift, points may miss, and the mismatch becomes harder to hide in later rows. Choose a ruler that makes the intended cut repeatable, then compare its size range, markings, grip, and readability with the projects you plan to sew.
Start with coverage. A compact ruler suits small blocks, while a larger model accommodates bigger finished triangles. One 60-degree triangle ruler lists a 12.5-inch finished-size capacity, showing why product specifications deserve careful reading. The outline alone does not reveal the largest block the ruler can produce. Check the stated finished size, unfinished size, and included reference points before buying.
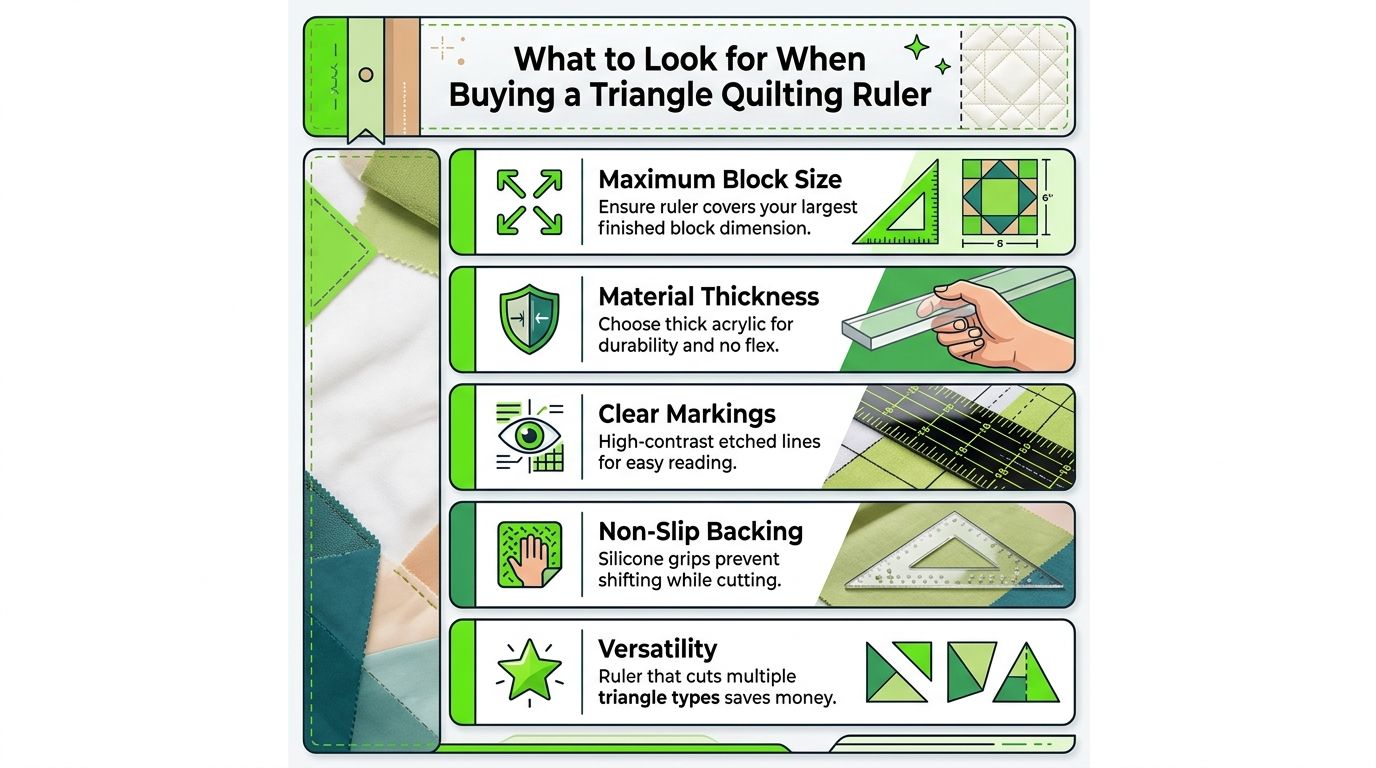
Markings deserve close attention
Hold the ruler over light and dark fabric, if possible. Strong contrast between the acrylic and the printed or etched lines makes the correct grid easier to locate, especially when several angles meet near the center. Laser-etched lines may remain readable through frequent use. Printed markings also work well when they are sharp, durable, and easy to see in your sewing-room light.
Thickness affects control. Rigid acrylic resists flexing during rotary cutting, while a non-slip backing or grip dots can limit fabric movement. Confirm that the ruler uses the measurement system required by your patterns, and check whether its center point and seam references are clearly marked.
A practical buying checklist
- Maximum size: Match the ruler to the largest finished triangle or block in your planned project.
- Angle selection: Confirm the 30°, 45°, or 60° reference your pattern requires.
- Grip: Choose a surface that steadies fabric without covering useful markings.
- Readability: Inspect line contrast, numbering, and center-point visibility.
- Construction: Select acrylic that feels stable and does not flex during cutting.
A physical store offers one useful test that product photos cannot: hold the ruler, assess its weight, and view its markings under ordinary lighting. B-Sew Inn has retail stores in Tulsa, Oklahoma City, Springfield, Humble, and Fayetteville, where shoppers can examine quilting notions in person. The fabric ruler guide offers another way to review features that affect everyday cutting and help keep triangle points aligned.
Quilt Patterns and Projects That Shine with Triangle Rulers
Triangle rulers show their value when a quilt depends on repeated angles and precisely meeting points. In tumbling blocks, triangles and diamonds create the illusion of depth. Thousand pyramids layouts rely on triangles facing the same direction. Star variations often combine half-square triangles with other angled units, so a small error can shift the points surrounding the center. One uneven edge may seem minor, but repeated across many blocks, it can pull the entire design out of alignment.
On-point quilts create another fitting challenge. The center blocks may be simple, while the setting triangles and corner triangles must fill the edges correctly. A specialty ruler can remove much of the calculation. Choosing a 60-degree or 45-degree ruler that matches the pattern also makes each cut easier to repeat.
Sizing and assembly deserve attention because accurate cutting alone does not guarantee points will match after sewing. Check whether the pattern lists finished or unfinished measurements, keep the required grain direction, and compare points before joining larger sections. Guidance on cutting triangles and diamonds with a basic quilting ruler is available in this triangle and diamond cutting resource.
Build skills in a sensible order
A gradual project sequence keeps the geometry manageable:
- Start with half-square triangles: Practise seam allowance control, pressing direction, and protecting the points.
- Move to equilateral designs: Repeated 60-degree units build confidence with angled edges.
- Try diamonds and tumbling blocks: These increase visual complexity while using related shapes.
- Attempt on-point settings: Setting and corner triangles add layout planning and edge control.
Machine setup affects accuracy as sections grow. A quarter-inch foot supports a consistent seam. A walking foot helps layered pieces feed evenly, and an extension table supports more of the quilt top near the needle, reducing drag during assembly.
Triangle motifs can extend beyond piecing. Point-to-side and side-to-point designs appear in ruler quilting and free-motion work, including patterns made on longarm quilting machines. An in-person machine mastery session can let quilters practise ruler handling, foot clearance, machine speed, and fabric support in a controlled setting.
The ruler does not replace sewing skill. It supplies more consistent pieces, so accurate seams have a better chance of producing clean points and balanced, complex designs.
Your Next Step Toward Perfect Triangle Piecing
Perfect triangle piecing is a learnable skill, and the process becomes less frustrating when each decision is deliberate. First, identify the block geometry. Then choose the ruler with the required angle and finished-size coverage. Finally, test one cut and one sewn unit before committing to the full project.
The right tool can remove manual calculations for specialty units, but accurate results still depend on fabric preparation, ruler alignment, steady pressure, and a consistent seam. A quilter who develops those habits will spend less time correcting mismatched points and more time assembling the design as intended.
B-Sew Inn supports home quilters with sewing, quilting, and embroidery machines from Baby Lock, Bernina, Bernette, Brother, and Janome, along with sergers, longarm quilting machines, threads, stabilizers, notions, cabinets, and cutting tables. The company offers in-person quilting classes, machine mastery sessions, service, repair, and trade-ins, giving shoppers a way to connect ruler technique with the machine and accessories used to finish the quilt.
B-Sew Inn's team can help match a triangle quilting ruler, rotary-cutting setup, sewing machine, or quilting accessory to the project on the cutting table. Browse B-Sew Inn, visit a store in Tulsa, Oklahoma City, Springfield, Humble, or Fayetteville to try equipment in person, or book an in-person class for guided triangle piecing practice.

