

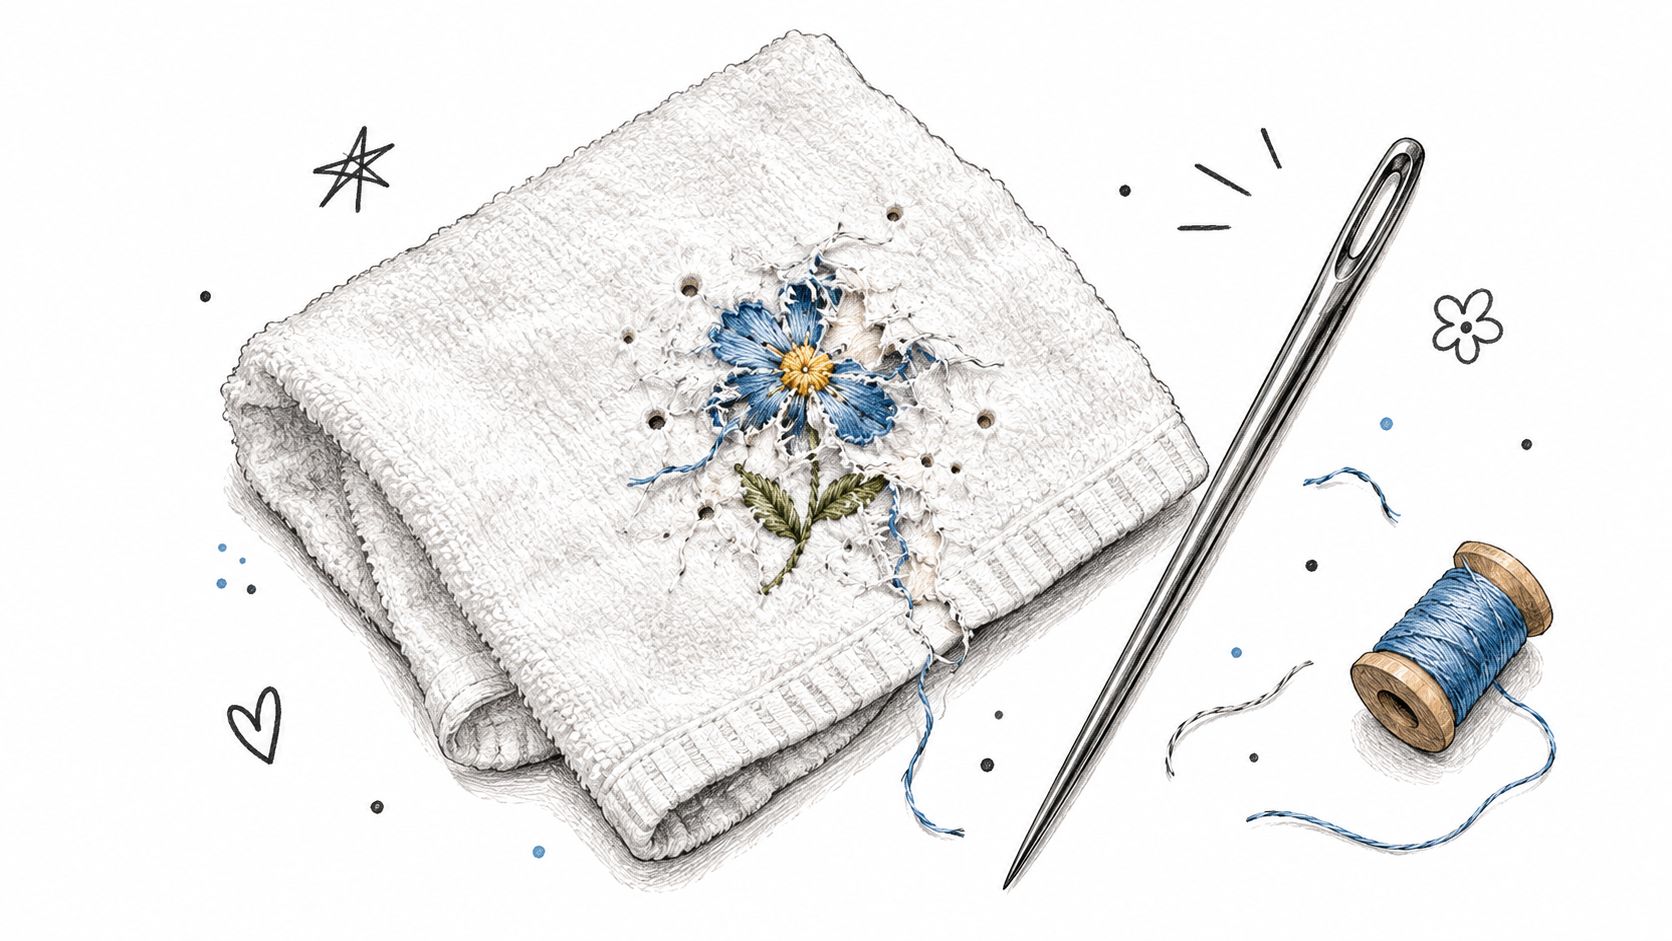
A finished towel comes off the embroidery machine with a flower that looks crisp from a distance, but up close the thread is frayed and the fabric is peppered with visible holes. The design may be fine. The needle may be the wrong size for the thread and towel, and that mismatch can spoil the result before changing tension ever helps.
Understanding embroidery machine needle sizes means looking beyond a number on a package. The needle has to suit the fabric, pass the thread through its eye without excess friction, and work with the stabilizer and design density. Think of it as a key that has to fit both the thread and fabric lock: too small, and the thread struggles; too large, and the needle can leave damage behind.
Table of Contents
- Why the Right Needle Size Changes Everything
- How Embroidery Needle Sizing Actually Works
- Fabric, Thread, and Density Working Together
- Matching Needle Size to Your Project
- Troubleshooting the Most Common Embroidery Problems
- Specialty Threads and What They Demand
- Quick Reference Chart and Care Habits
- Next Step and Common Questions
Why the Right Needle Size Changes Everything
A common first instinct is to put a 75/11 needle in every project. It's a useful starting point, but it isn't a universal answer. A dense design on a towel, a delicate motif on fine fabric, and lettering on a knit garment ask different things of the needle.
The needle is the first point of contact between the machine, the thread, and the fabric. If its eye is too small for the thread, friction can lead to fraying, heat, looping, or breaks. If its blade is too large for the fabric, it can leave visible perforations or weaken the embroidered area. And if the needle point doesn't suit the fabric structure, stitches may snag or fail to form cleanly.
Start with the whole setup
A good needle decision considers fabric, thread, and stabilizer together. Design density matters, too. A tightly stitched motif puts more repeated penetrations into one area than a sparse outline, so it may call for a different needle choice even on the same material.
The practical goal isn't to find the biggest needle that can push through the fabric. It's to find the smallest needle that carries the thread cleanly and penetrates the project without damaging it. That choice often prevents problems before anyone reaches for the tension dial.
Keep in mind: Needle size is an upstream decision. It affects stitch quality, fabric damage, and thread behavior before tension adjustments enter the picture.
By the end of the guide, the number on a needle pack should feel less like a rule to memorize and more like a clue. The quick reference later in the article gives starting points for common projects, while the decision rules explain how to adapt when fabric, thread, or design density changes.
How Embroidery Needle Sizing Actually Works
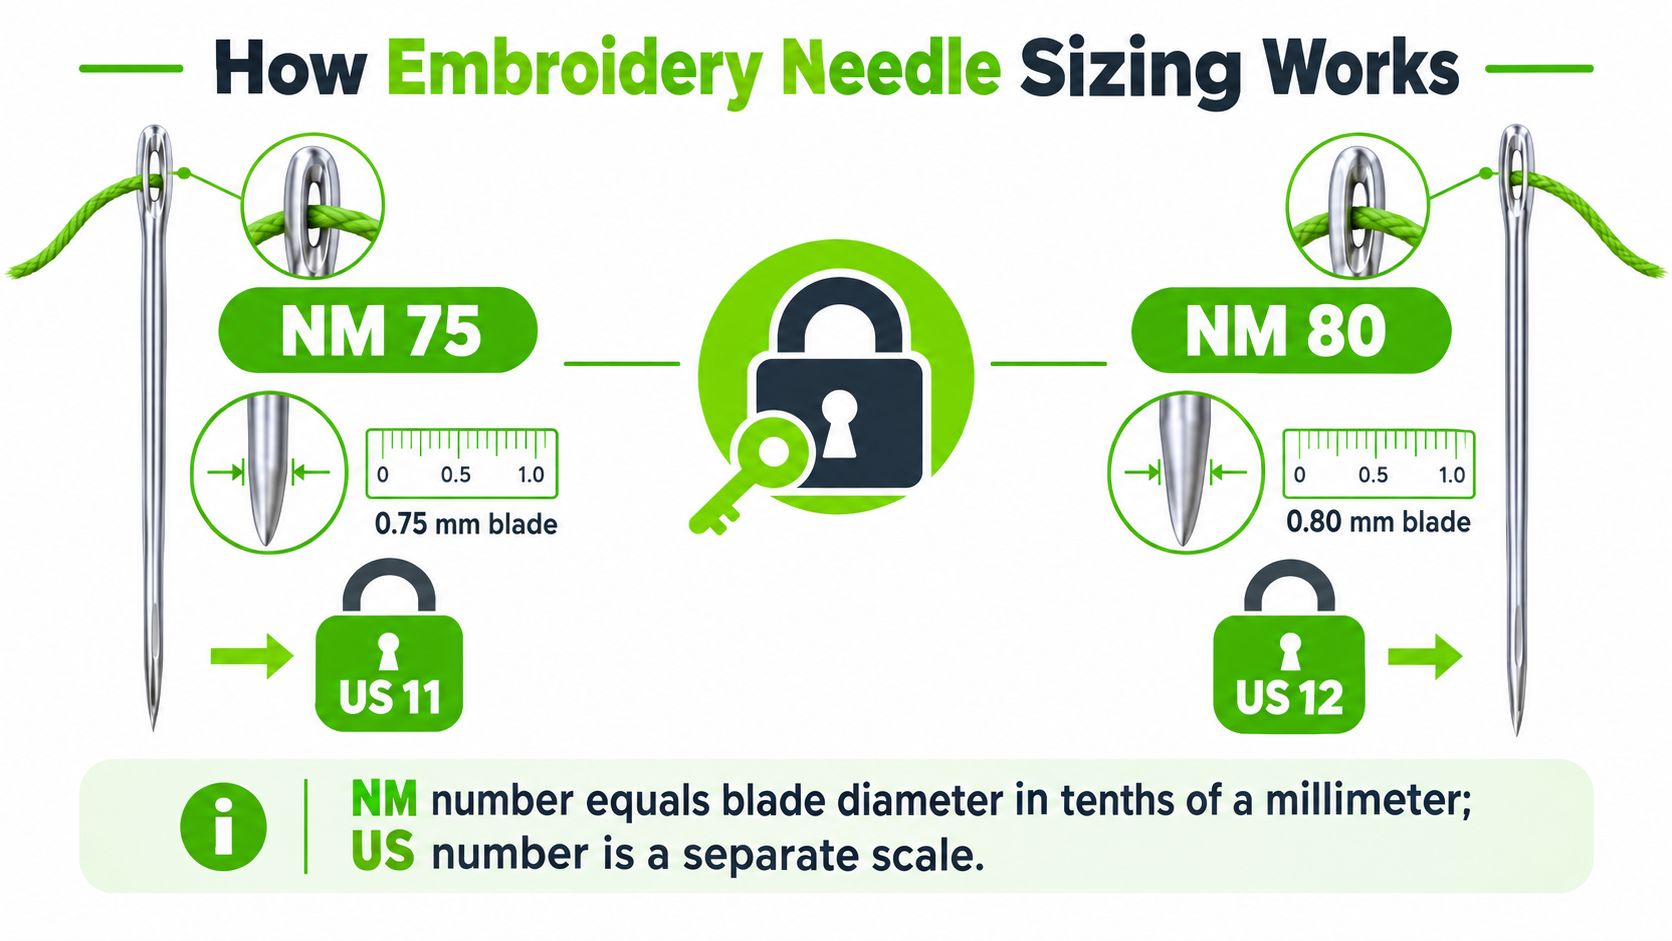
Needle sizes use two numbering systems. The metric NM number describes the blade diameter in hundredths of a millimeter, while the US number appears after a slash. For example, NM 75/11 has a blade about 0.75 mm in diameter, and NM 90/14 is about 0.90 mm. The NM system and general embroidery-size guidance are outlined in this embroidery and sewing needle reference.
Think of those numbers as two labels for one key. NM tells you how wide the blade is; the US number is another sizing scale for the same needle. A bigger NM number means a thicker blade, not a longer needle. That distinction matters because a thicker blade can resist deflection and make room for heavier thread, but it also makes a larger hole.
Read the package, then check the needle type
| Metric and US marking | Approximate blade diameter | General starting point |
|---|---|---|
| NM 65/9 | 0.65 mm | Very fine materials |
| NM 75/11 | 0.75 mm | Ordinary fabrics and routine embroidery |
| NM 90/14 | 0.90 mm | Medium-weight or heavier materials |
A smaller number means a finer needle, while a larger number means a thicker one. General machine-embroidery recommendations often sit between NM 70 and NM 90, though conventional embroidery machines can use a broader approximate range. Always check the machine's requirements as well as the project materials.
An embroidery needle isn't a universal or sharp sewing needle with a different label. Embroidery needles are designed for embroidery thread and may have a larger eye and a scarf shaped to support stitch formation. For a beginner learning to read packs, the types of sewing machine needles guide can help distinguish needle styles as well as sizes.
If clothing decoration is part of the project, group style embroidery ideas can also help with design inspiration. Whatever the motif, choose the needle by matching its diameter and type to the fabric and thread, not by assuming that a larger size will work better.
Fabric, Thread, and Density Working Together
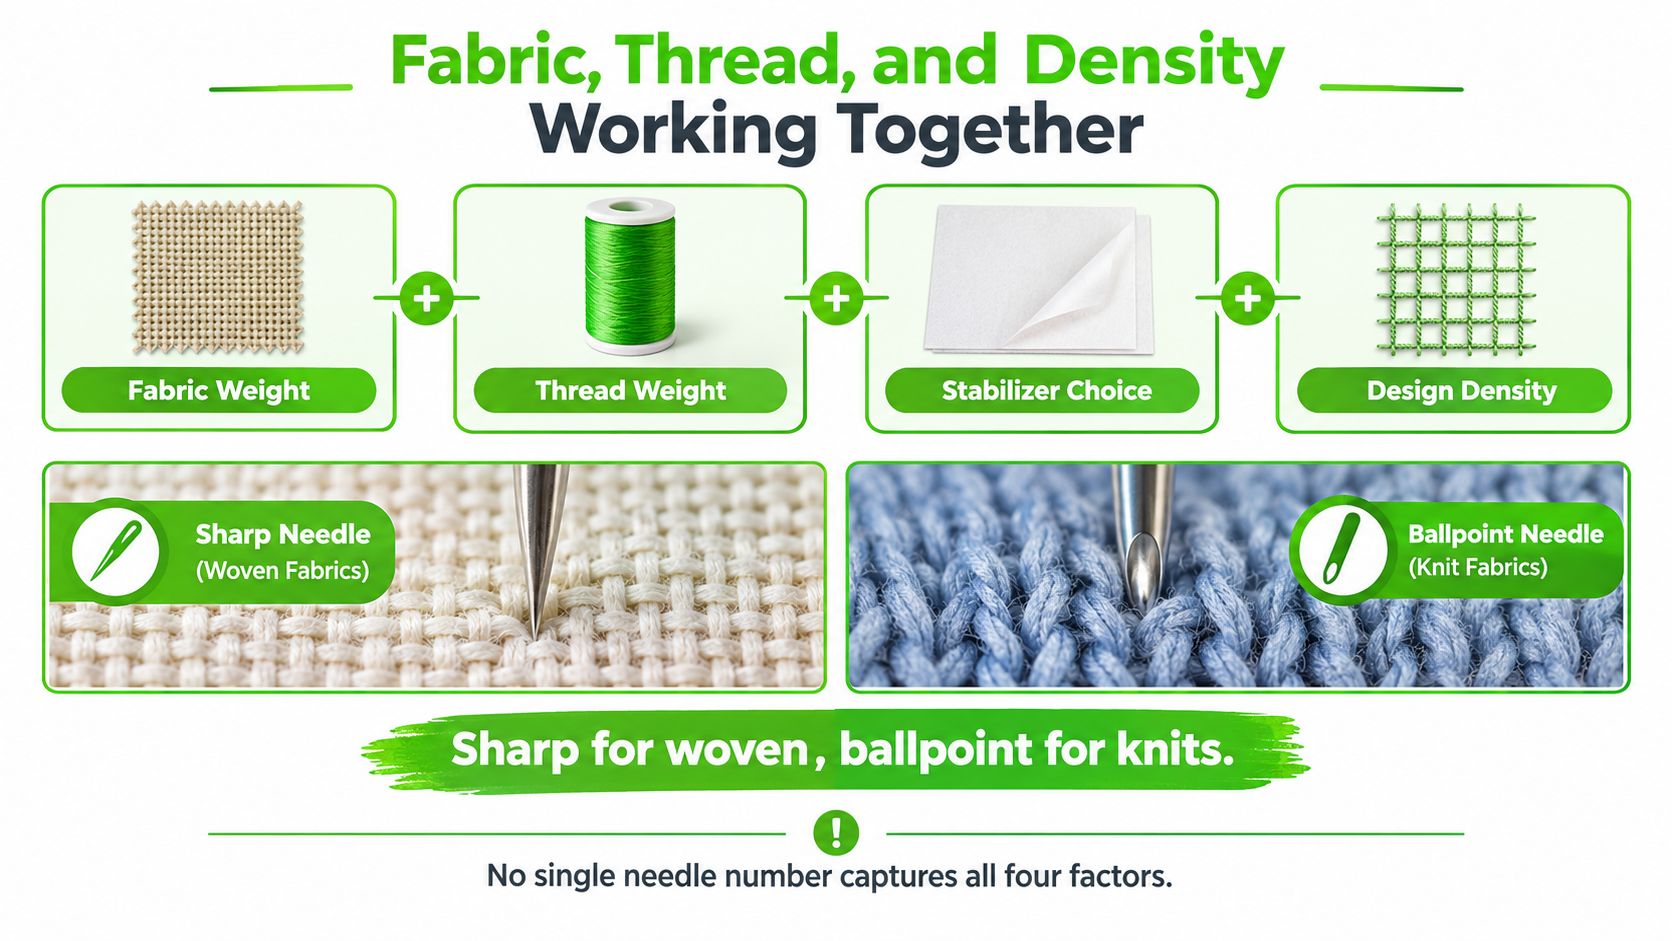
No single needle number captures every part of an embroidery setup. Fabric weight points toward a blade diameter, but thread thickness, stabilizer, design density, and needle point can all change the decision.
Start with the fabric. Is it woven or knit? Is it fine and delicate, or firm and heavy? A sharp point is generally used for woven materials because it pierces the weave. A ballpoint point is recommended for knits because it moves between loops rather than cutting through them. A suitable point can matter as much as diameter when the fabric is vulnerable to snags or damage.
Ask three questions before threading up
What thread is loaded? The thread must pass through the needle eye freely. A fine needle paired with thick thread can add friction and contribute to abrasion or breaks. A larger needle gives heavier thread more room, but the fabric must be able to tolerate the larger penetration point.
How dense is the design? Dense lettering or filled areas make repeated penetrations close together. If the material is already delicate, a dense motif can make a too-large needle especially damaging. If the fabric is firm, the design may also increase the resistance the needle meets.
What job is the stabilizer doing? Stabilizer supports the fabric during stitching, but it doesn't cancel out a mismatch between needle, thread, and material. Choose it for the fabric and design, then reassess whether the needle passes through the combined layers cleanly.
A 75/11 needle is a useful starting point for standard 40-weight thread on stable, medium-weight fabric. If heavier thread, a dense design, or a more resistant material makes that combination struggle, a larger size may be appropriate, provided the fabric can handle it. For a deeper explanation of thread weights, see this sewing thread size guide.
Decision rule: Start with the smallest needle that lets the thread pass freely and penetrates the fabric and stabilizer cleanly. Then test the stitched result before committing to the full design.
Matching Needle Size to Your Project
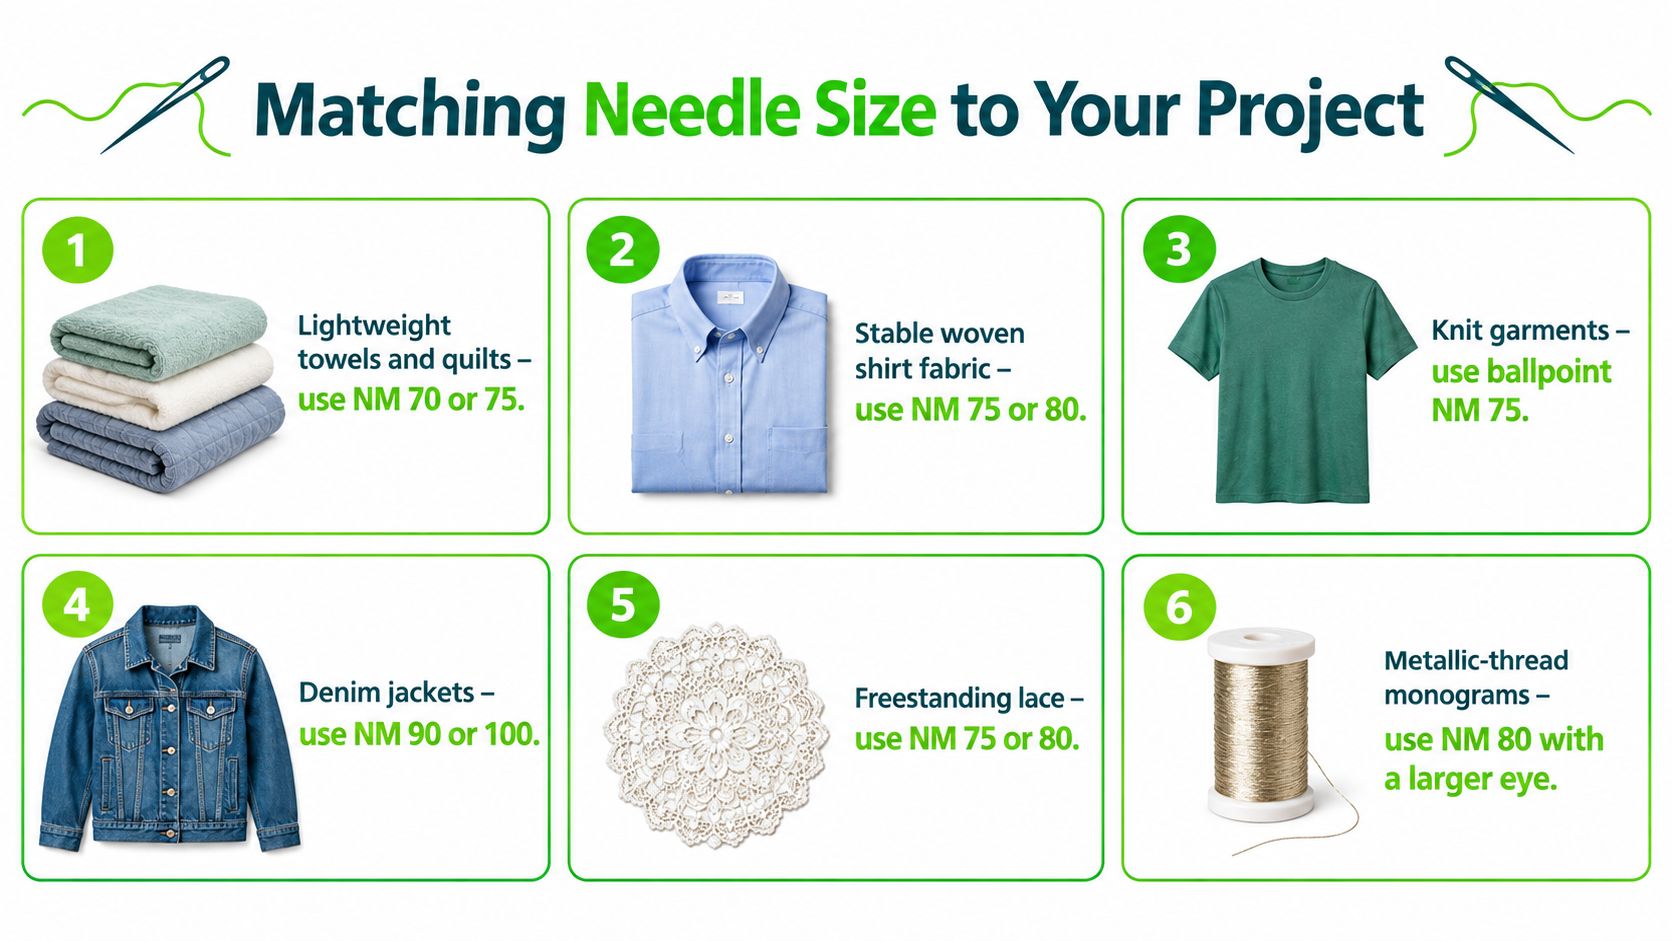
Project examples are starting points, not fixed pairings. The same fabric can behave differently with another thread, stabilizer, or motif, so use each suggestion as a first test rather than a guarantee.
Six useful starting points
| Project | Needle starting point | Point and setup considerations |
|---|---|---|
| Lightweight towels and quilts | NM 70 or 75 | Use a point suited to the material; select stabilizer for the fabric and motif. |
| Stable woven shirt fabric | NM 75 or 80 | A sharp point is the general choice for woven material. |
| Knit garments | Ballpoint NM 75 | Choose stabilizer that supports the knit without stretching it during stitching. |
| Denim jackets | NM 90 or 100 | A robust needle may suit the heavier material, but test the fabric and thread together. |
| Freestanding lace | NM 75 or 80 | Use the stabilizer required to support the stitched lace structure. |
| Metallic-thread monograms | NM 80 with a larger eye | Give the thread room to pass, and test the setup before stitching the finished garment. |
The broad sizing progression is straightforward: fine fabric generally needs a finer needle, while heavier materials may call for a larger diameter. For instance, NM 65/9 is associated with very fine materials, while NM 100/16 is a size used for heavy fabrics such as jeans, leather, or canvas. The thread still matters: a lighter material doesn't automatically call for the smallest possible needle if the thread can't pass through its eye comfortably.
Stabilizer is part of the setup, not an afterthought. Before embroidering a garment or a finished textile, test the intended combination on a similar scrap with the same thread, needle, and stabilizer. The embroidery stabilizer guide can help narrow down the support the project needs.
Troubleshooting the Most Common Embroidery Problems
When a stitch looks wrong, pause before changing tension. Check whether the needle is the right size and point for the thread and fabric, then make one controlled change. That makes it easier to identify what helped instead of changing several settings at once.
| Symptom | Likely needle cause | First change to try |
|---|---|---|
| Thread shredding | Eye too small for the thread, or an unsuitable needle | Try a larger-eye embroidery needle or move up a size if the fabric can tolerate it. |
| Skipped stitches | Point or needle size doesn't suit the material or stitch conditions | On a knit, try a ballpoint; otherwise test a suitable fresh needle for the fabric. |
| Puckering | Needle and fabric combination may be contributing to distortion | Check that the needle isn't unnecessarily large, then test a finer size if the thread still passes freely. |
| Needle striking the hoop | Needle path, hoop setup, or machine compatibility needs checking | Stop stitching and check hoop clearance and machine instructions before continuing. |
| Visible holes | Needle is too large for the fabric | Try a smaller size that still accommodates the thread. |
Change one variable at a time
Consider dense lettering on a knit shirt. If stitches skip, a ballpoint needle is a sensible first test because knit loops need a different point approach than woven fabric. If the thread is also fraying, assess the eye and thread fit separately rather than assuming the point change solved both issues.
A 40-weight thread on a heavy towel may need a larger needle if the fabric resists penetration or the thread doesn't pass freely. But a larger blade isn't automatically the answer: if the towel shows holes, return to the smallest size that carries the thread cleanly. For skipped-stitch causes beyond needle choice, this guide to sewing machine skipped stitches offers another troubleshooting path.
If the needle strikes the hoop, stop the machine. That symptom isn't a reason to keep testing sizes while stitching. Confirm that the hoop is correctly positioned and compatible with the machine, then follow the machine's instructions before restarting.
Specialty Threads and What They Demand
Metallic, 30-weight, and 12-weight threads can need more space in the needle eye than standard thread. Forcing a thicker or more delicate specialty thread through a fine eye can increase friction, causing abrasion or breaks. A larger-size embroidery needle or one with a larger eye may solve the mismatch, but the fabric still needs to tolerate its blade.
A useful starting point is 90/14 for metallic or 30-weight thread, especially when the material or design also adds resistance. Metallic or 12-weight thread may call for a 90/14 or larger needle. These are starting points, not instructions to size up blindly: test the thread and fabric together, since a larger needle can leave damage on a lightweight textile.
Reduce friction before changing everything else
Thread choice is part of the plan, not a last-minute swap. Before beginning a decorative project, check whether the needle eye suits the thread, whether the material can accept the larger blade, and whether the stabilizer gives the design enough support. For more help selecting thread, consult the embroidery thread guide.
If the thread still behaves poorly, try complementary setup changes such as slowing the machine, using a thread net when appropriate, or guiding thread from a cone holder. These steps can improve thread handling, but they don't replace a needle that's too small for the thread.
A titanium-coated or large-eye embroidery needle may be worth considering for demanding thread use, particularly when ordinary needles wear or create friction. Coating alone doesn't fix an unsuitable size or point. Choose by how the thread passes and how the needle penetrates the project, then test before embroidering the finished piece.
Quick Reference Chart and Care Habits
Keep this compact chart by the embroidery machine as a starting guide. The needle point and fabric still need to match, and the thread must pass through the eye without force.
| Needle size | Point type | Suitable material | Thread guidance | Example project |
|---|---|---|---|---|
| NM 65/9 | Point suited to fine fabric | Very fine material | Very fine thread | Delicate fabric embroidery |
| NM 75/11 | Sharp for woven, ballpoint for knit | Ordinary, stable fabric | Standard 40-weight thread is a common starting point | Routine machine embroidery |
| NM 80/12 | Choose for fabric structure | Fine to medium fabric | Match eye to thread thickness | Light garment embroidery |
| NM 90/14 | Point suited to the material | Medium-weight or heavier fabric | Metallic or 30-weight thread may need this size | Dense or heavier embroidery |
| NM 100/16 | Point suited to the material | Heavy fabric | Use when the thread and fabric require the larger eye | Denim or canvas work |
Make needle care part of setup
- Start with a suitable needle: Replace a needle that's bent, damaged, or no longer forming stitches cleanly.
- Keep a project note: Record the needle size, point, thread, fabric, and stabilizer that worked. That makes the next similar project easier to set up.
- Inspect after a strike: If the needle hits the hoop or another hard surface, stop and check it before continuing. A damaged point can affect stitch quality.
Needle life depends on the project and conditions, so a fixed hour count shouldn't replace inspection. When stitch quality changes, the needle is one of the first parts worth checking.
Next Step and Common Questions
A needle display or a hands-on machine session can make size differences easier to understand. B-Sew Inn is an authorized sewing, quilting, and embroidery machine dealer with stores in Tulsa and Oklahoma City, Oklahoma, Springfield, Missouri, Humble, Texas, and Fayetteville, Arkansas. Its in-person classes, machine mastery sessions, service, repair, and trade-ins provide ways to get help choosing supplies or working through machine questions.
Common questions
How should the SCHMETZ color code be read? Treat color markings as identification aids, not a substitute for checking the package size and needle type. Confirm the size and point before placing a needle in the machine.
When is a titanium-coated needle worth considering? It may be useful for demanding work where wear or friction is a concern. It still needs the right size and point for the thread and fabric.
How often should a needle be changed in heavy production? Inspect it frequently and replace it when it's damaged or stitch quality deteriorates. There isn't a single interval that suits every fabric, thread, and machine.
Can a single-needle machine use the same sizes as a multi-needle machine? Size markings describe the needle, but the machine's instructions determine which needle system and types are compatible. Check the manual before buying or installing a needle.
B-Sew Inn also sells and services machines from Baby Lock, Bernina, Bernette, Brother, and Janome, alongside thread, stabilizer, and embroidery supplies. Visit a store to compare options in person, or browse the available supplies online before the next project.
For help matching a needle to your thread, fabric, and stabilizer, visit B-Sew Inn to browse supplies or arrange an in-person store visit. Bring a sample of the fabric and thread, and the team can help you choose a practical starting setup.

