

A baby onesie can look perfect on the machine and still fail the comfort test. The front may show a neat name, animal, or monogram, while the reverse feels stiff, scratchy, or bulky against an infant's skin. After laundering, the knit may ripple, the embroidery may tighten, or tiny stabilizer fragments may remain along the edges.
That's why choosing an embroidery stabilizer for baby clothes isn't only a question of preventing puckering. The backing must support the stitches, preserve the garment's stretch, withstand laundering, and leave a smooth reverse side. It also needs to be traceable as part of the complete embroidery setup, alongside the thread, adhesive, and garment fabric.
Table of Contents
- Why Infant Comfort Dictates Your Stabilizer Choice
- Safety Standards and Skin Contact Requirements
- Comparing Stabilizer Types for Delicate Garments
- Matching the Backing to Stretch and Stitch Density
- Fabric-Friendly Hooping and Placement Techniques
- Machine Settings and Pull Compensation Adjustments
- Testing Your Setup and Sourcing Safe Supplies
Why Infant Comfort Dictates Your Stabilizer Choice
A maker can spend considerable time positioning a design on a small bodysuit, only to discover after stitching that the inside feels more like craft material than baby clothing. A stiff cutaway edge may rub during wear. A torn backing can leave rough fragments. Dense stitching can pull a lightweight jersey inward until the decorated area no longer lies flat.
The reverse side matters because it sits close to the infant's body. A design that looks polished from the front still needs careful inspection from the inside, especially when the garment will be worn against the chest, shoulder, or back. Fabric selection deserves the same attention. Readers comparing soft garment materials may find useful context in Little Venture Co. fabric picks, particularly when planning a project for sensitive skin.
Support without stiffness
Embroidery stabilizer provides temporary or permanent support while the needle penetrates the fabric. It distributes needle movement and thread tension, reducing shifting, puckering, distortion, and registration problems. That mechanical support is essential, but the backing's permanence and texture must match the garment.
Commercial embroidery stabilizers became widely available in the late 1970s, when mechanized and computerized embroidery created greater demands than improvised supports such as muslin and paper could handle. An early embroidery-specific product was a 1.5-ounce cutaway stabilizer made through a wet-laid process, with silicone added to improve needle glide. Manufacturers later developed tearaway, no-show mesh, adhesive, and water-soluble formats for different fabrics and design structures. The history of embroidery stabilizers shows why modern makers have more suitable choices for soft garments than earlier embroiderers did.
Practical rule: The best backing is the lightest construction that keeps the design stable without creating a hard or noticeable area inside the garment.
A finished garment needs two inspections
A suitable setup should leave the embroidered area flat and flexible. The fabric should recover after gentle extension, and no backing edge should feel abrasive from the inside. Thread tails, adhesive residue, and leftover topping deserve attention too.
For readers still sorting out the difference between temporary and permanent support, this explanation of embroidery stabilizer provides a useful foundation. The key decision for baby apparel is not just whether a backing can hold stitches. It's whether the completed garment remains comfortable after the hoop comes off and the laundry cycle begins.
Safety Standards and Skin Contact Requirements
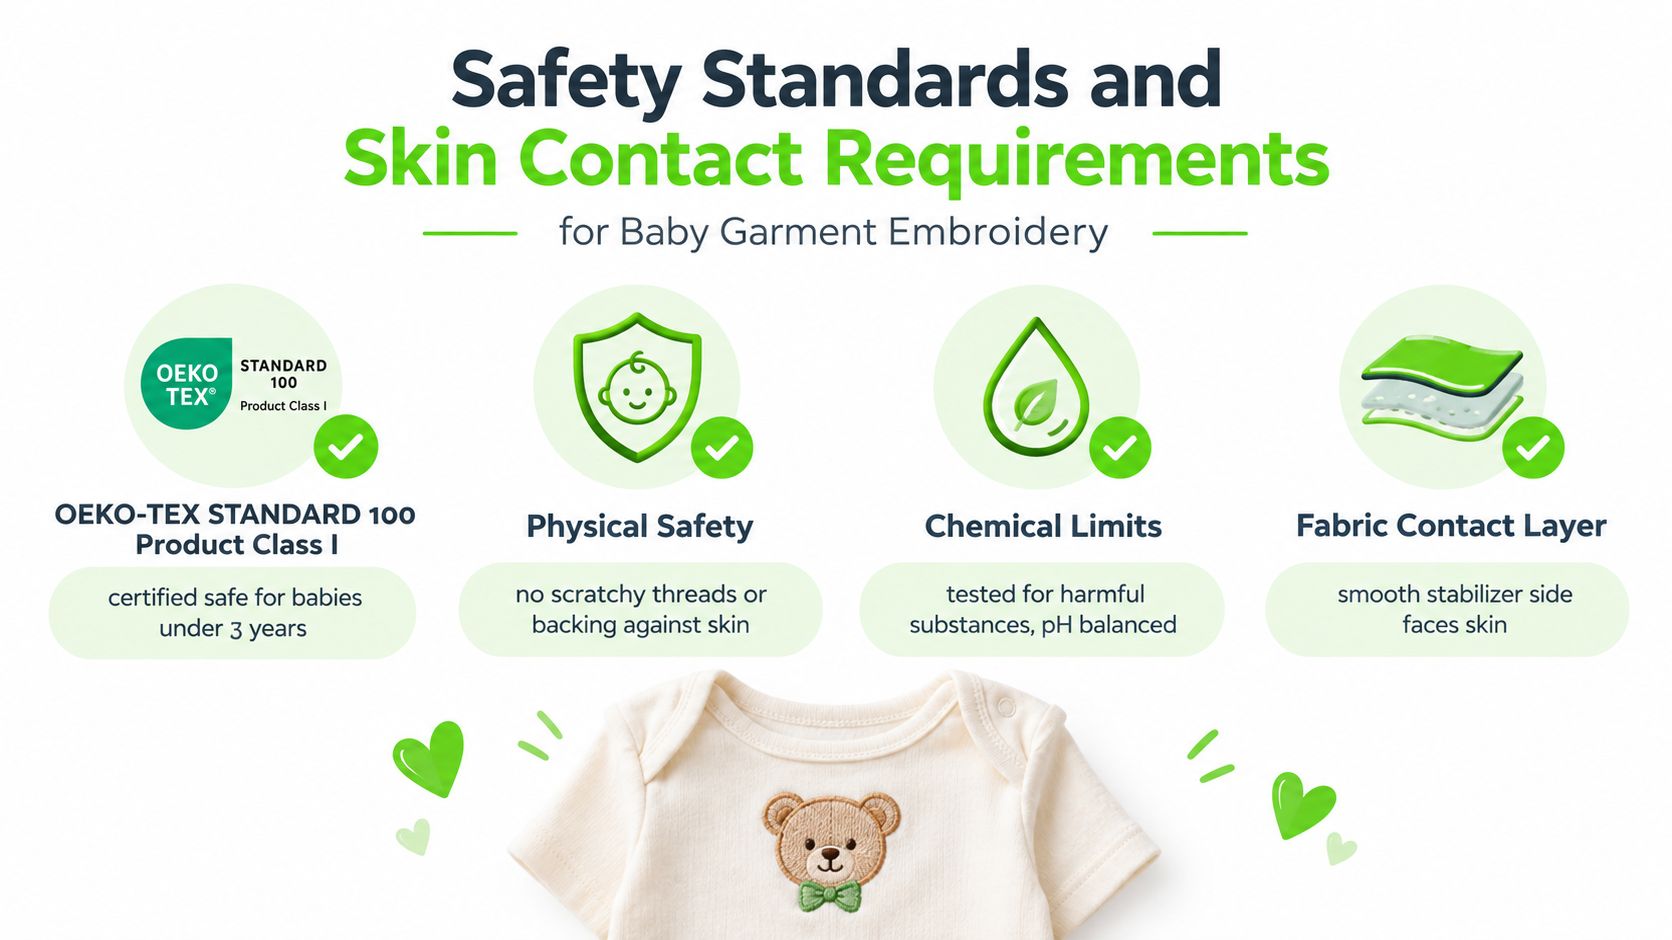
Baby clothing requires a stricter view of materials than a decorative project that hangs on a wall. The garment fabric, stabilizer, thread, adhesive, dyes, and finishing residues form one contact system. A soft fabric certification alone doesn't automatically verify every material added during embroidery.
OEKO-TEX STANDARD 100 Product Class I covers products intended for babies and children up to 36 months, and its assessment applies to the complete article and its components, including sewing materials and embroidery-related accessories. The standard includes sewing and embroidery processes within its scope and prohibits biologically active treatments in baby articles. The OEKO-TEX STANDARD 100 requirements provide the right framework for thinking about the entire finished item rather than the blank garment alone.
What makers should verify
A certification label on a onesie doesn't automatically certify a stabilizer purchased separately. A careful maker should request documentation for each component intended to remain in the garment, especially when the reverse will touch skin.
- Backing suitability: Confirm that the cutaway, tearaway, mesh, topping, or fusible layer is documented for the intended infant application.
- Chemical treatment: Avoid antimicrobial or fragrance-treated stabilizers unless their suitability and testing are clearly documented.
- Adhesive control: Use temporary adhesive sparingly and keep overspray away from the skin-contact area.
- Component traceability: Record the stabilizer, thread, adhesive, and garment materials used for a repeatable project.
- Finished inspection: Check for rigid residues, exposed thread tails, adhesive buildup, scratchy corners, and loose embroidery.
Softness and chemical compliance are separate questions. A backing can feel gentle and still lack evidence of tested limits for harmful substances. Conversely, a technically compliant material can feel uncomfortable if it's too stiff, poorly trimmed, or left with exposed edges.
Physical hazards also deserve attention
A UK government risk assessment reported that clothing, textiles, and fashion items were the third most frequently notified product category in Europe's RAPEX system in 2019, and 63% of those notifications involved drawstrings or cords in children's clothing. The same assessment cited US Consumer Product Safety Commission data covering a 23-year period, during which children's clothing drawstrings were associated with 27 deaths and 70 non-fatal incidents. These figures concern cords, not stabilizers, but the government risk assessment reinforces the broader principle of avoiding loose, detachable, protruding, or uncomfortable components.
US small-parts guidance also restricts components that present choking, aspiration, or ingestion hazards in products intended for children under three. Embroidery should therefore be securely stitched, cleanly trimmed, and inspected after laundering and stress. A water-soluble backing can be useful for decorative work that should leave little or no permanent support, and this guide to water-soluble stabilizer can help makers understand where that format belongs.
Comparing Stabilizer Types for Delicate Garments
The familiar “tearaway for convenience, cutaway for stretch” rule is a useful starting point, but baby garments need more careful judgment. The right choice depends on whether the fabric needs support after stitching, whether the reverse touches skin, how dense the design is, and whether the stabilizer can be removed without leaving rough remnants.
| Stabilizer Type | Best For | Baby Garment Verdict |
|---|---|---|
| Tearaway | Stable woven fabrics and lighter designs | Acceptable when the fabric is stable and the remaining edge is smooth, but use caution on stretchy knits |
| Cutaway | Knits, stretch fabrics, and designs needing lasting support | Usually the strongest choice for baby knits, especially in a soft or no-show mesh construction |
| Washaway or water-soluble | Freestanding work, delicate decorative effects, and topping | Useful when the support should dissolve, but confirm that the garment does not need permanent backing |
| Fusible | Covering the reverse side or adding a soft protective layer | Helpful when compatible with the garment, but adhesive and heat require careful testing |
| Adhesive stabilizer | Small areas that are difficult to hoop | Convenient for placement, but adhesive residue and skin contact need inspection |
Why tearaway isn't always gentler
Tearaway sounds attractive because the maker removes it after stitching. On a stretchy onesie, however, tearing can leave small fragments or jagged edges around the design. Removing the support also removes the structure that resists distortion during wear and laundering.
A lightweight tearaway can work for sparse embroidery on a stable fabric. It becomes a weaker choice when the garment stretches significantly, the motif is dense, or the reverse side rests directly against skin. A soft cutaway stays in place and supports the knit as the garment moves.
The case for soft cutaway
No-show mesh cutaway is often a practical compromise for lightweight baby knits. It provides ongoing support while reducing bulk compared with a rigid backing. The edge still needs to be trimmed carefully, and the finished reverse should be checked by touch rather than judged only by appearance.
Fusible covers can help shield the skin from thread and stabilizer edges, but they shouldn't be added automatically. Heat, adhesive, shrinkage, and stiffness can create new problems if the cover layer isn't compatible with the garment. Makers seeking more detail about stabilizer adhesives and fusible construction can consult this guide from The Fabric Company, then test the complete combination on a fabric sample.
For a closer look at how knit structure changes the decision, this guide to embroidery stabilizer for knits offers a useful reference. The practical verdict is simple: easy removal doesn't automatically mean better comfort. A carefully trimmed soft cutaway may feel better than a torn backing that leaves rough remnants.
Matching the Backing to Stretch and Stitch Density
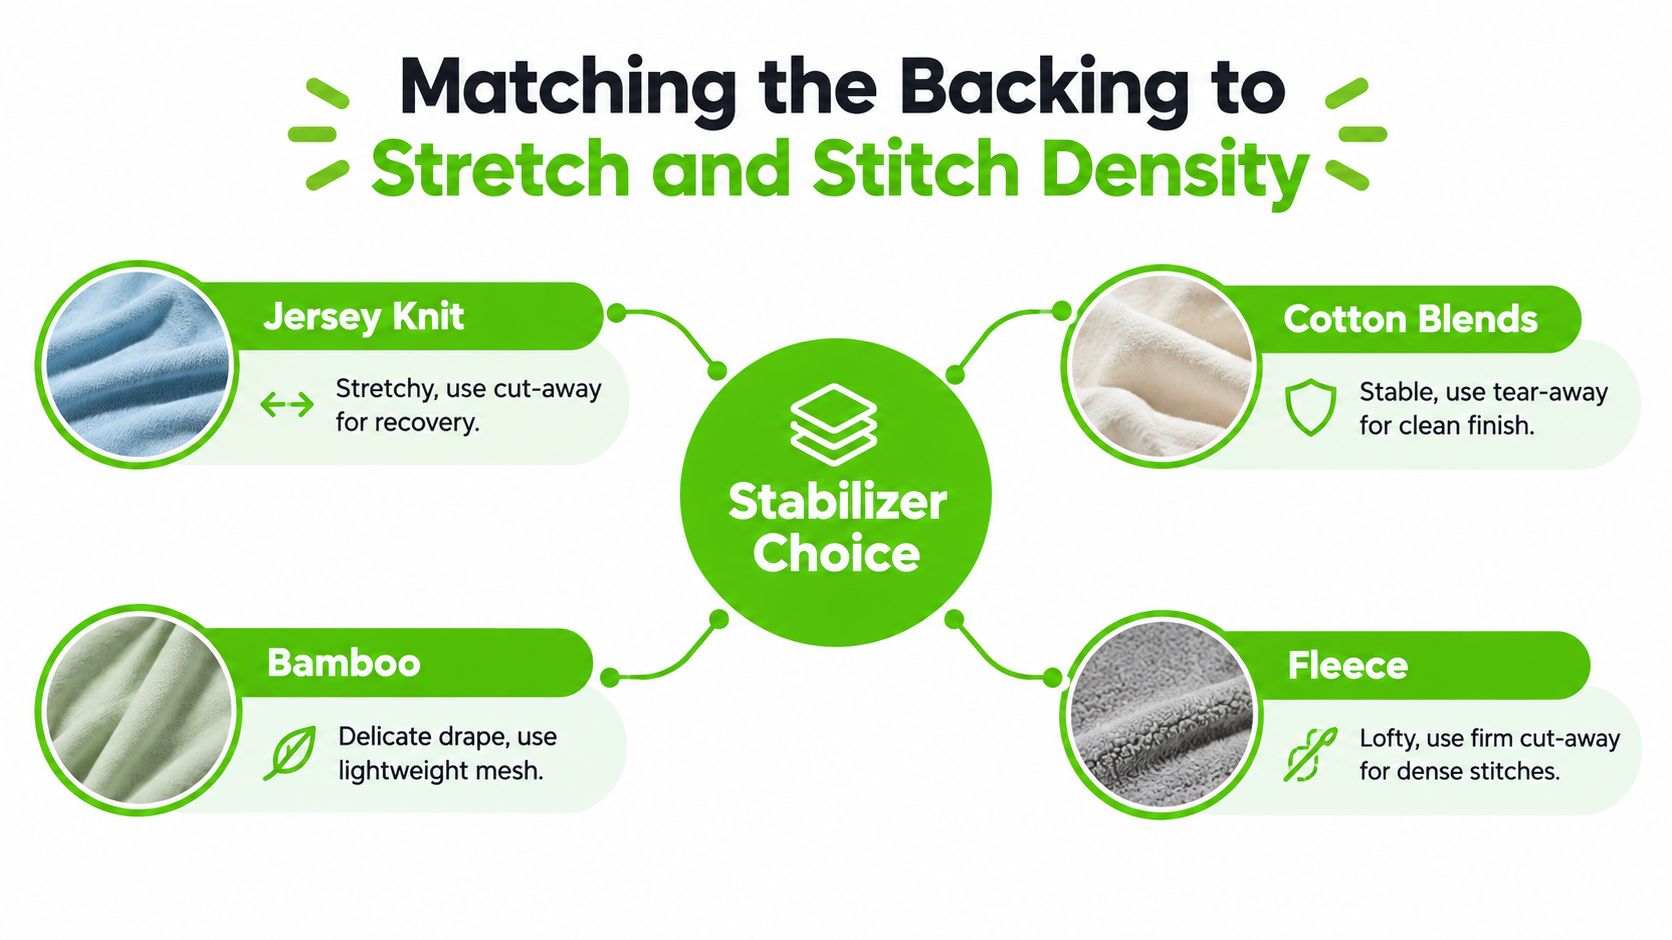
Fabric type alone doesn't determine the backing. A lightweight jersey with sparse lettering may need less support than a stable cotton blend carrying a dense filled motif. Stretch recovery, stitch direction, design density, garment placement, and laundering expectations all affect the result.
A practical matching process
Start with the fabric's movement. Jersey knits, cotton blends, bamboo blends, and fleece can shift or contract as stitches form. A stretchy fabric generally benefits from a lightweight cutaway or no-show mesh cutaway that remains attached during wear and washing. Fleece may need firmer support because its loft allows stitches to sink, especially in a dense design.
Examine the design density. Sparse linework and simple lettering place less stress on a garment than tightly packed fill stitches. A dense motif needs more reliable support, but adding heavier backing isn't the only solution. Reducing stitch load, simplifying overlapping areas, or selecting an open design can preserve flexibility.
Consider the placement. Highly elastic areas, such as necklines and ribbed openings, can lose their natural recovery when carrying dense embroidery. A quieter placement on a stable panel is usually kinder to the garment and more comfortable for the child.
Plan for laundering. A design that looks smooth before washing may reveal a mismatch between the fabric and backing later. A permanent but soft cutaway can help a knit retain shape, while a removable backing may leave the stitched area less supported.
Test the exact combination. A fabric scrap should use the same thread, needle, backing, design file, hooping method, and machine settings planned for the garment. The test should be washed before production, because laundering can expose adhesive bleed, shrinkage mismatch, stiffness, or puckering that wasn't visible immediately.
Four common fabric decisions
- Jersey knit: Choose soft cutaway support for stretch recovery. Add a water-soluble topping when stitches sink into the knit.
- Cotton blend: A stable blend may tolerate lightweight tearaway for a sparse design, provided the remaining edge is smooth and the reverse is comfortable.
- Bamboo blend: Favor lightweight mesh and modest stitch density to protect the fabric's drape.
- Fleece: Use firm cutaway support for dense designs and a topping to keep stitches visible above the loft.
Design-engineering insight: Lowering stitch density can improve comfort more effectively than simply adding a heavier stabilizer.
The acceptance check should be physical, not merely visual. The embroidered area should lie flat without rippling, the fabric should recover after gentle extension, and no stabilizer edge should be detectable from inside the garment. If those conditions aren't met, the design, placement, or backing needs adjustment before the final garment is stitched.
Fabric-Friendly Hooping and Placement Techniques
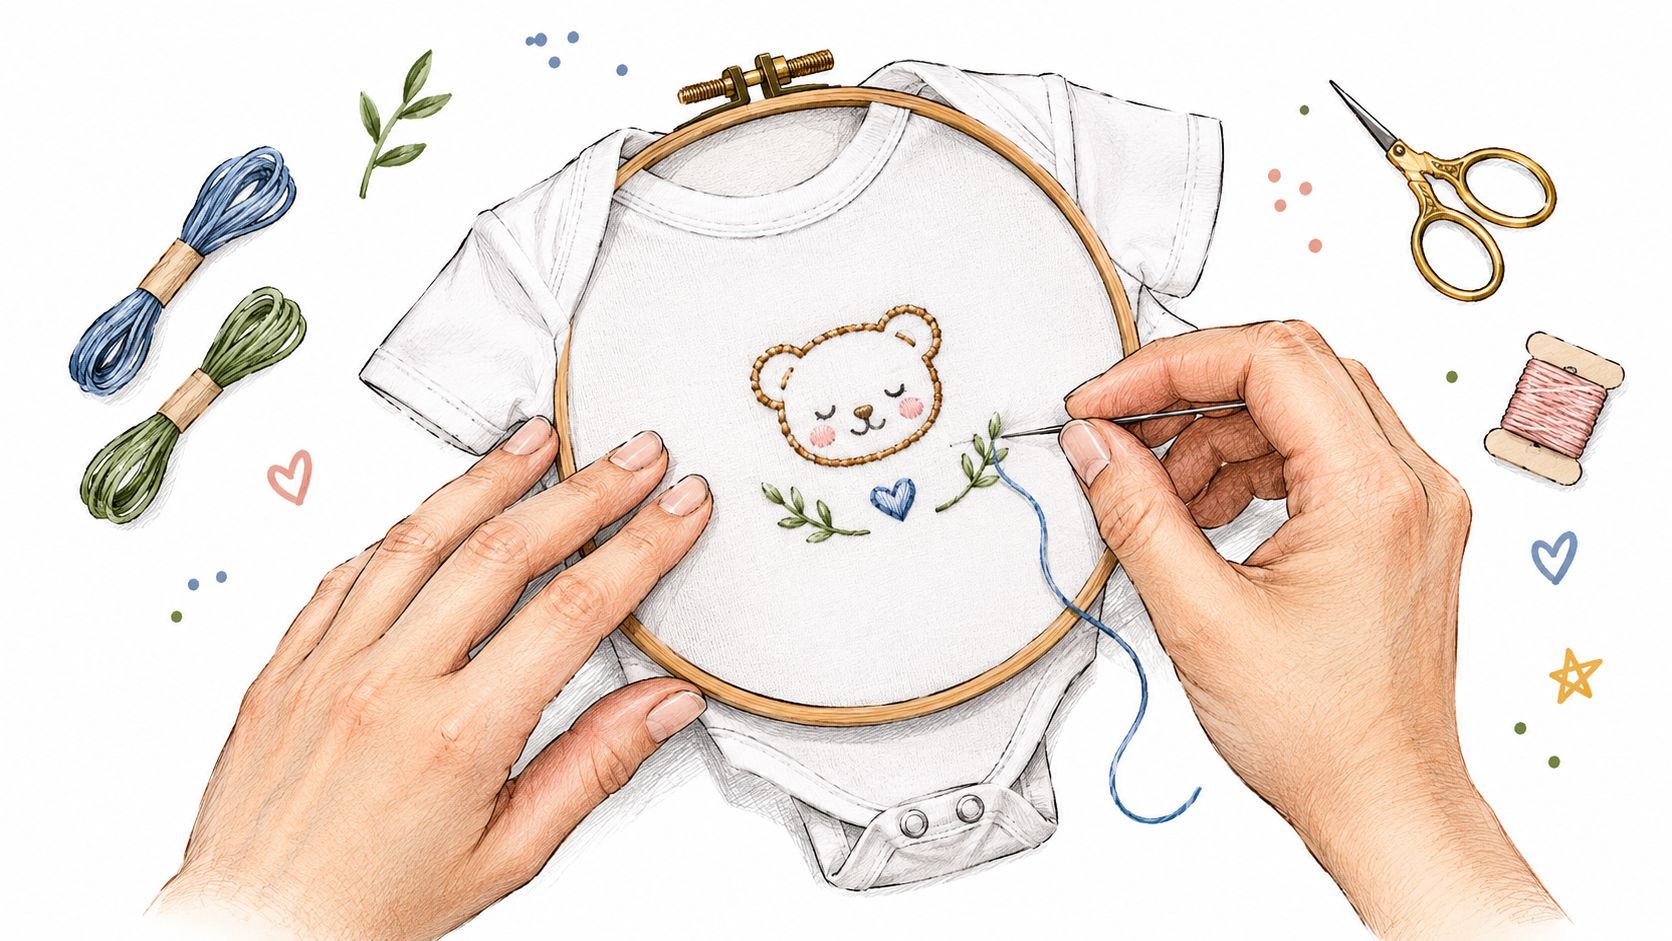
Stretchy baby clothing rarely benefits from being pulled tight in a hoop. When a maker stretches a knit to make it look flat, the fabric can relax after removal and gather around the embroidery. The safer approach is to secure the stabilizer firmly while allowing the garment to remain relaxed.
Floating the garment
- Prepare the stabilizer. Place a soft cutaway on the reverse and hoop it firmly. The stabilizer should be taut without being distorted.
- Position the garment. Float the onesie or shirt over the hooped backing without stretching the knit. Use a placement template, alignment marks, or a light basting method to keep the design centered.
- Apply adhesive carefully. If temporary adhesive is necessary, use a light application on the stabilizer rather than saturating the garment. Excess adhesive can reach the needle, attract lint, and interfere with thread movement.
- Secure loose sections. Turn the garment so sleeves, the back panel, and lower sections stay outside the stitching field. Before starting, check beneath the hoop to ensure the back of the garment hasn't been caught under the front.
- Add a topping when needed. Place water-soluble topping on the face for dense designs or textured surfaces such as fleece and ribbed knits. It helps keep stitches from disappearing into the fabric.
Hooping still needs accurate placement. A small hoop can be useful on baby clothing because it limits the area that must be managed, but the design needs enough clearance from seams, snaps, and openings. The embroidery hoop size chart can help makers select a hoop that fits the design without forcing the garment into an awkward position.
Check the needle tracks
Fine jersey and rib knits are vulnerable to repeated needle perforations. Under stretch, those openings can enlarge, reduce recovery, and create visible needle tracks. A suitable needle, controlled machine movement, and modest stitch density all reduce the strain placed on the fabric.
The design should use the smallest density that preserves legibility. Dense motifs shouldn't cross highly elastic zones, and a design that looks attractive on a large sample may need simplification for a tiny bodysuit. The machine should be paused if the fabric begins gathering, the registration shifts, or thread nests form underneath.
After stitching, the garment should be removed from the hoop without pulling the embroidered area. The topping can be lifted or dissolved according to its material, while permanent backing should be trimmed with rounded corners and no exposed rough edges. A final touch inspection matters more than a quick glance.
Machine Settings and Pull Compensation Adjustments
The stabilizer and the embroidery machine work as one system. A soft backing can't rescue a design with excessive density, poor underlay, unsuitable hooping, or settings that pull the fabric too aggressively. Conversely, a capable machine still needs a fabric-specific sample before it stitches a finished baby garment.
Pull compensation is a software adjustment that offsets the tendency of thread and stitch direction to draw embroidered shapes inward. It isn't a universal percentage. The required amount changes with fabric type, design geometry, stitch structure, density, machine settings, and the quality of the stabilizer setup.
Start with a controlled sample
For stretch fabric, one technical guide gives a typical pull-compensation range of 0.1 to 0.3 mm, while another recommends approximately 0.4 mm for standard jersey cotton. These figures are starting points, not automatic settings for every onesie. The pull-compensation guidance also makes clear that inadequate stabilizer or insufficient underlay can still cause puckering after compensation is increased.
A useful testing sequence looks like this:
- Stitch the design on the same knit or blend used for the garment.
- Keep the same thread, needle, backing, hooping method, and machine speed.
- Examine lettering, satin columns, outlines, and filled areas separately.
- Adjust compensation only after checking hooping, density, underlay, and stabilizer.
- Wash the sample before approving the setup.
Let the machine support the material
Advanced embroidery machines, including models such as the Baby Lock Meridian 2 or Radiance, can provide precise digital control for delicate projects. Their technology can help manage placement, design editing, hoop selection, and stitch execution, but it doesn't eliminate the need for a compatible backing and a relaxed garment.
Small garments also require careful physical management. A machine should never stitch with the back panel trapped beneath the front, and the needle should be replaced when it becomes dull or unsuitable for the knit. Thread tension changes should come after the basic setup has been checked, because stabilizer mismatch and distorted hooping can look like tension problems.
A smooth sample is evidence, not a guarantee. Laundering and gentle stretching reveal whether the garment still has the comfort and recovery expected from baby clothing.
Testing Your Setup and Sourcing Safe Supplies
A test scrap is the most reliable purchasing filter for an embroidery stabilizer for baby clothes. It shows whether a backing feels acceptable, whether the design stays flat, whether the reverse remains smooth, and whether the materials continue to behave after laundering. The same test can expose an adhesive residue or stiffness problem before it reaches a finished gift.
The final inspection should ask practical questions:
- Does the design lie flat? Ripples and puckering indicate a mismatch in density, support, hooping, or machine settings.
- Does the knit recover? Gentle extension shouldn't leave the embroidered area permanently distorted.
- Is the reverse comfortable? No backing edge, thread tail, adhesive residue, or topping remnant should feel abrasive.
- Is the material traceable? The stabilizer, thread, adhesive, and garment should be documented for future projects.
- Does laundering change the result? A washed sample is more informative than an unwashed one.
Makers can compare cutaway, tearaway, and wash-away categories, along with embroidery needles, bobbin thread, topping, and placement notions, through machine embroidery supplies. A local sewing and embroidery dealer can also help match supplies to the machine, hoop system, garment fabric, and design density instead of treating the stabilizer as an isolated purchase.
For hands-on guidance, B-Sew Inn offers machines and supplies from Baby Lock, Bernina, Bernette, Brother, and Janome, as well as in-person machine mastery sessions and classes. Readers can see and test equipment at retail stores in Tulsa and Oklahoma City, Oklahoma, Springfield, Missouri, Humble, Texas, and Fayetteville, Arkansas. That in-person time is especially useful when a machine purchase needs to handle delicate knits, small hoops, and repeatable garment embroidery.
B-Sew Inn carries embroidery machines, stabilizers, needles, thread, notions, and in-person classes that can help makers build a safer baby-garment setup. Visit B-Sew Inn to browse supplies, arrange service, or visit a store and test a machine before the next embroidered onesie is stitched.
