

Choosing the brightest spool isn't a reliable way to choose white embroidery thread. A brilliant blue-white can look harsh on cream linen, while a softer white can look cleaner and more deliberate. Searching for “embroidery thread white” brings up a color category, but a successful purchase requires decisions about fiber, weight, fabric undertone and laundering.
The right choice starts with the finished item, not the spool display. A towel headed for frequent washing needs a different balance of durability and appearance than a decorative heirloom panel. A small stitch-out on the actual fabric is more useful than a color name, a screen image or a promise of universal compatibility.
Table of Contents
- Match White Thread Fiber to Your Project
- Why the Same White Looks Different on Your Fabric
- Pair Thread Weight, Needle Size and Tension
- Test Color Fastness Before You Stitch the Whole Run
- Diagnose Breaks, Dull Whites and Yellowing
- Store and Care for White Thread Over Time
- Test Your White Thread in Store Before You Buy
Match White Thread Fiber to Your Project
Polyester suits items washed often or handled hard, such as uniforms, towels and children's clothing; rayon or cotton suits decorative, low-wash pieces where sheen or softness matters most. Fiber should be the first buying decision because a beautiful finish won't compensate for care requirements the finished item can't tolerate.
For 40-weight thread tested using ASTM D2256 or ISO 2062 single-strand methods, TextileTuts' embroidery construction guidance reports breaking tenacity of approximately 4.0–5.5 grams per denier for polyester, compared with 2.0–2.5 for rayon, with typical elongation of 20–30% and 15–25%, respectively.
White thread fibers compared for strength and use
| Fiber | Strength and elongation | Light and bleach behavior | Wash durability | Best uses |
|---|---|---|---|---|
| Polyester | 4.0–5.5 g/denier; 20–30% elongation | Generally strong in sunlight and bleach | High, suits frequent laundering | Uniforms, logos, towels, children's clothing |
| Rayon | 2.0–2.5 g/denier; 15–25% elongation | Choose for appearance rather than demanding sunlight or bleach exposure | Lower than polyester | Decorative lettering, heirloom and tone-on-tone work |
| Cotton | No comparable strength figure given here | Use protected display and nonchlorine care | Needs gentler laundering than polyester | Quilting, linens, low-wash heirloom pieces |
Polyester for demanding use
Polyester is the durability benchmark for machine embroidery that must withstand regular handling. Its greater elongation also gives it more room to stretch before breaking, although that doesn't excuse excessive tension or a poorly stabilized design.
Coats' embroidery guidance identifies polyester's advantages over rayon in wet and dry strength, abrasion resistance and shade retention, and rates trilobal polyester highly for sunlight and bleach fastness. The trilobal cross-section creates a reflective surface that gives white satin stitches a bright, defined appearance.
Bleach resistance is a thread property, not permission to bleach every embroidered article. The fabric, backing and other trims still have to tolerate the treatment.
Rayon and cotton for decorative character
Rayon gives lettering and tone-on-tone motifs a silky, glossy finish. Madeira Rayon 40wt Embroidery Thread 220yd is a viscose rayon option for machine embroidery, decorative stitching and other embellishment; its soft, glossy character suits projects where appearance takes priority over demanding care.
Cotton provides a quieter, more natural-looking surface for quilting and linens. It can be a better visual partner for matte cloth than a highly reflective thread, but the finished piece needs a compatible, gentle care routine.
Buying rule: Decide how often the finished item will be washed before choosing thread by sheen.
For an heirloom panel, softness may justify extra care. For a frequently washed logo, durability usually deserves the deciding vote.
Why the Same White Looks Different on Your Fabric
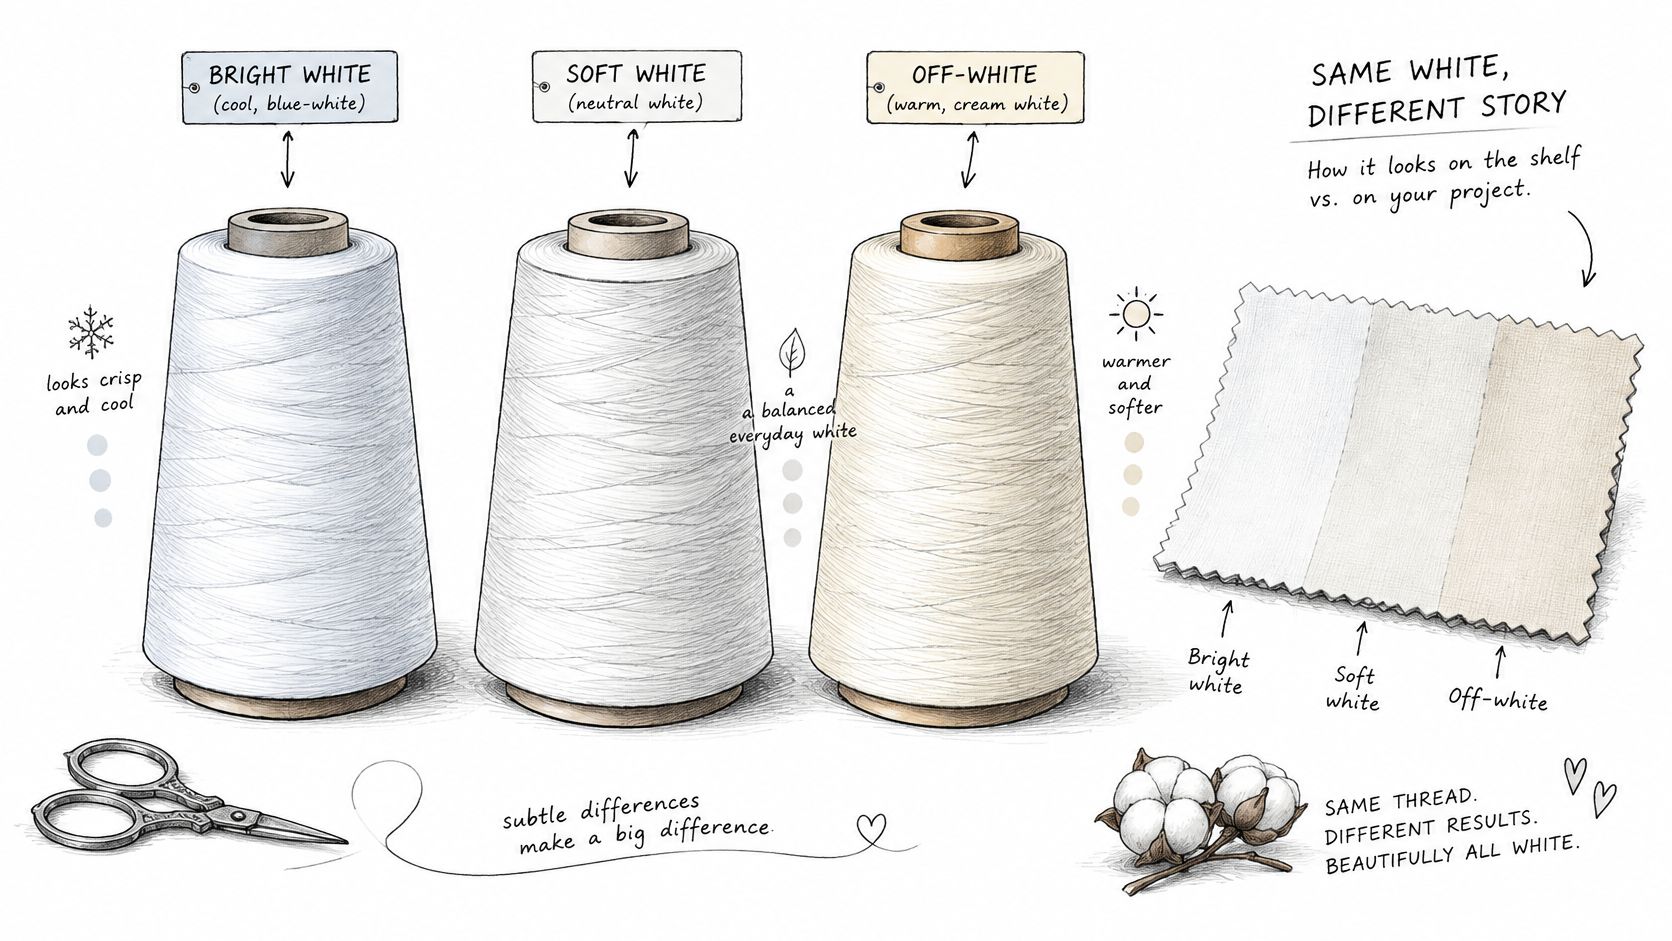
A spool that looks clean on the shelf can read gray, yellow, or blue against the project fabric. White depends on thread, fabric, and lighting together. Bright, cool blue-white, soft white, and off-white or ivory are useful visual categories, not consistent specifications across brands.
Judge the undertone on the cloth
Blue-white can look crisp on a cool white garment and stark against cream or unbleached linen. On aged textiles, it can draw attention to discoloration and make the surrounding cloth seem dingy. Soft white often blends more naturally without looking distinctly cream.
Consider a cotton napkin with an ivory cast. Soft-white lettering can look clean and intentional, while brilliant white may make the fabric around the monogram appear yellow. The napkin has not changed; the contrast has.
Compare the thread on the actual fabric:
- Loose thread: Lay several strands across the cloth instead of judging the wound spool alone.
- Window daylight: Check whether the shade reads blue, neutral, or warm.
- Indoor light: Repeat the comparison under the lighting where the finished item will be used.
- Stitched coverage: Compare a satin area with a fine line. Stitch direction and coverage change how light reflects.
Fabric coordination tips for Atlanta homeowners offer a useful approach to judging colors together. An embroidery thread color guide can also help organize shade comparisons before choosing.
Brightness isn't simply more white
Optical brighteners affect perceived whiteness. A study of optical brighteners and textile fastness explains that they absorb ultraviolet radiation and re-emit it in the blue-violet region. Chemistry and concentration influence the effect, while laundering colorfastness generally declines with accumulated washing.
For a natural or aged fabric, compare soft white and ivory alongside bright white before choosing. Judge the stitched sample under both daylight and the room lighting where the item will be used, then consider how repeated washing may affect the pairing.
Practical check: Keep a stitched sample beside the fabric and compare both under the light in which the finished piece will be seen.
The fabric's undertone guides the visual choice; a wash test helps determine whether the pairing suits the item's intended use.
Pair Thread Weight, Needle Size and Tension
For common machine embroidery thread, a lower weight number generally means a thicker thread. The number is a useful starting point, but thread construction and the manufacturer's recommendations still matter.
Thread weight, typical use and needle pairing
| Thread weight | Look | Best for | Typical needle |
|---|---|---|---|
| 30-weight | Bold, heavier sheen | Lettering, satin fills, monograms | 90/14 |
| 40-weight | Standard machine embroidery sheen | Most designs and garment work | 75/11 |
| 60-weight | Fine, delicate detail | Fine lines, small motifs, heirloom work | 65/9 |
These pairings are practical starting points, not fixed settings for every machine and fabric. The thread weight chart provides another reference when matching the thread to the design.
Match thickness to the design
Standard-weight thread is the sensible baseline for most garment embroidery and designs digitized for ordinary machine embroidery. It offers useful coverage without requiring an unusually large needle hole.
Heavier thread builds bold satin stitches and substantial monograms. It also takes up more space between stitches, so substituting it into a dense design without adjusting the design can create a stiff, crowded result. A larger needle eye helps it travel without scraping.
Fine thread suits delicate lines, small lettering and restrained heirloom details. It won't automatically improve a poorly digitized small design, however. Fine thread needs suitable stitch spacing, a compatible fine needle and, when necessary, a slower speed to produce clean detail.
For free-motion machine embroidery, New Mexico State University recommends 75/11 as the usual needle starting point and emphasizes that thread should pass easily through the eye without fraying. The university also explains that embroidery generally needs looser upper tension than ordinary sewing.
Balance the stitch rather than chasing a dial number
The bobbin thread should draw the upper thread toward the underside so the stitch balances near the back. Excessively loose upper tension can leave loops underneath. Bobbin thread showing on top can indicate excessive upper tension, although threading and bobbin problems also deserve inspection.
A good sample uses the same fabric, stabilizer, needle and design intended for the finished item. Testing only on spare quilting cotton won't reveal how a stretchy shirt or thick towel behaves.
- Start with the machine's recommended setup: Avoid carrying over settings from an unrelated sewing task.
- Run at the intended working speed: A sample stitched slowly may hide trouble that appears during normal operation.
- Inspect both faces: Check coverage, loops, bobbin show-through and fabric distortion.
- Record the successful combination: Note fiber, weight, needle, stabilizer and tension setting.
A white fill can make uneven coverage especially noticeable. The remedy is balanced setup and suitable stabilization, not increasing density until the fabric disappears.
Test Color Fastness Before You Stitch the Whole Run
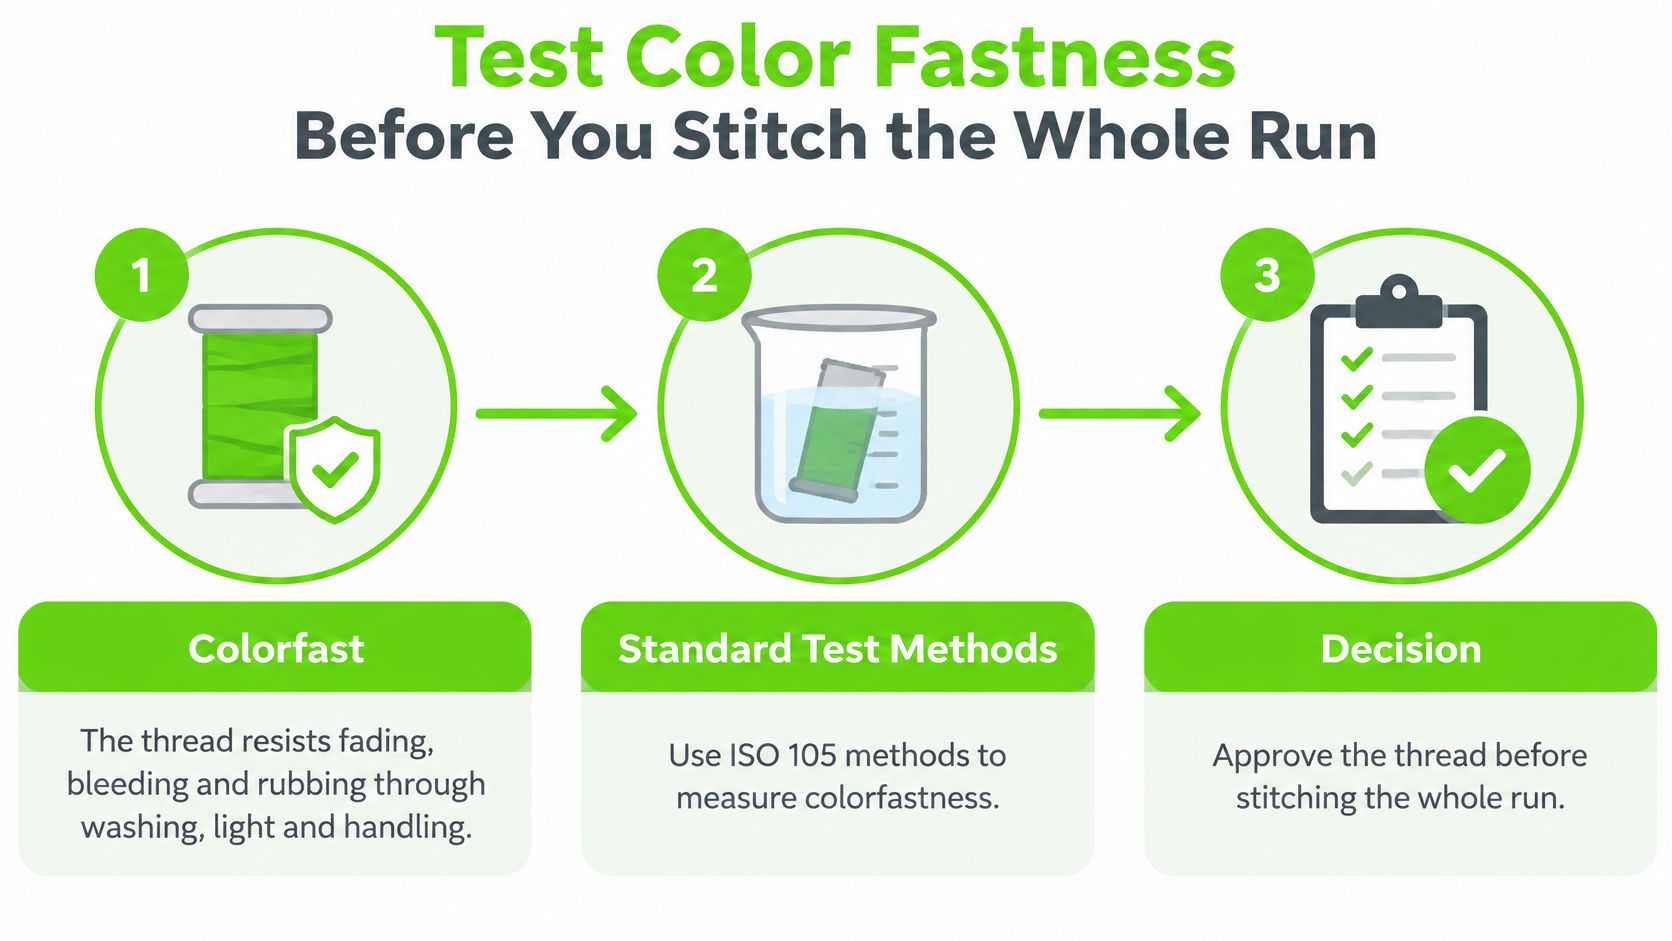
A home screening can reveal whether a thread suits your project's fabric and care routine, but it does not provide a laboratory rating. White is not one category: fiber, thread weight, fabric undertone and laundering all affect the match. The brightest spool may look wrong on natural or aged textiles.
Colorfast thread resists fading, bleeding and rubbing through washing, light and handling. Standardized washing and light tests assess different properties, with higher ratings indicating better performance within the relevant scale.
The Ethiopian draft embroidery-thread standard specifies a uniform bleached finish for white embroidery thread. For thread declared colorfast, it sets washing ratings of 4 or better under ES ISO 105-C10, light fastness of 5 or better under ES ISO 105-B04, and organic-solvent resistance of 3 or better.
Build a practical home comparison
Use the same thread, fabric and care method planned for the finished work. A small, consistent comparison can catch an unsuitable match before you stitch a full run.
- Stitch a representative sample. About 5 cm across is a workable starting size. Use the intended thread, needle, stabilizer and fabric, and include both a filled area and an edge or fine detail.
- Keep an untreated matching sample in a closed drawer as a control. Compare the samples directly in daylight rather than relying on photographs, which can alter how white appears.
- Repeat the intended wash routine. For an initial screening, wash the test sample at least five times using the planned cycle and detergent. Skip stain treatments unless they are part of normal care.
- Dry the sample flat out of direct sun, then compare it with the control. Check the surrounding fabric as well as the stitches.
- Screen for light-related change separately. Tape half of a fresh sample to a sunny window for two weeks and cover the other half with an opaque material. Keep adhesive away from the comparison area.
- If the planned care includes bleaching, test a separate scrap with the exact product and dilution. Never mix cleaning chemicals.
- Approve the whole result. The thread should still read as the intended white, and the fabric, stitches and backing should remain acceptable.
The sample size, wash repetitions and exposure period are practical screening choices. They do not recreate controlled laboratory equipment, standardized illumination or a full service-life test.
Define failure before production
Look for a dull logo, a mismatched monogram, puckering after laundering, or a roughened stitch surface. These changes can make an otherwise sound design unsuitable for the item, even when the thread has not yellowed.
Production checkpoint: Approve the spool only after it passes the care routine intended for the finished piece.
For household linens, this comparison may be enough to decide whether to proceed. Garments or children's items expected to face demanding washing and sunlight call for a more defensible benchmark: laboratory results identifying the tested thread and method, rather than a general durability claim for a product range.
Diagnose Breaks, Dull Whites and Yellowing
A brighter spool will not fix a mechanical fault, and it may look too stark against natural or aged fabric. Diagnose thread breaks separately from color changes: the first calls for a setup check, while the second may involve laundering, light or storage.
The American & Efird embroidery-interruption guide lists incorrect tension, unsuitable needle-to-thread sizing, incorrect needle installation, bent or burred needles, lint or adhesive buildup, and poor needle quality as possible causes of breaks. It also describes seating the needle fully in the needle bar, with the scarf facing the stitch-forming device. Follow the machine manual for the required needle orientation.
Symptoms, causes and fixes for white thread
| Symptom | Likely cause | Fix |
|---|---|---|
| Thread breaks repeatedly | Incorrect threading or tension, incorrect needle installation, or unsuitable needle size | Rethread, test tension on a sample, fully seat the needle in the specified orientation, and match needle size to thread |
| Thread breaks with a new needle | Bent, burred or lint-coated needle | Inspect a new needle for burrs and check that it is fully seated. Replace it if damaged, and clear lint or adhesive from the needle area |
| Dull or gray after many washes | Optical-brightener performance may have declined through repeated laundering | For replacement work, choose thread suited to the intended wash routine and follow gentle care instructions |
Separate a mechanical fault from a color problem
A new needle still needs inspection and correct installation. The scarf is the recessed area above the eye; its position depends on the machine's stitch-forming arrangement. Use the machine manual to confirm orientation rather than relying on a universal front-or-back rule.
Work through the setup in a consistent order: raise the presser foot and rethread, inspect the needle, clean the accessible thread path, then stitch a sample. Change one setting or component at a time so you can identify which correction resolved the break. The guide to thread breaking at the needle offers further troubleshooting steps. If breaks persist with suitable thread and a correctly installed needle, arrange machine inspection instead of tightening tension beyond the recommended setting.
Read discoloration in context
Compare the embroidery with a retained, untreated sample of the same fabric and thread. Detergent residue, a change in the surrounding cloth and differences in reflected light can all make white stitching appear duller. The fabric's undertone matters too: a cool, bright white can look gray or harsh beside a warmer natural white, even when the thread itself has not changed.
Yellowing has different possible causes. Heat, sunlight, chlorine bleach and acidic storage materials can contribute to yellowing or fiber damage. Check where the change appears before choosing a remedy:
- Localized change: Check for contact with packaging, adhesive or a storage surface.
- Change across the whole piece: Review laundering products, drying and display conditions.
- Change limited to the stitching: Compare the finished work with an unused length from the same spool.
Check storage and care conditions before replacing the thread. If the same conditions remain, a new spool may show the same discoloration.
Store and Care for White Thread Over Time
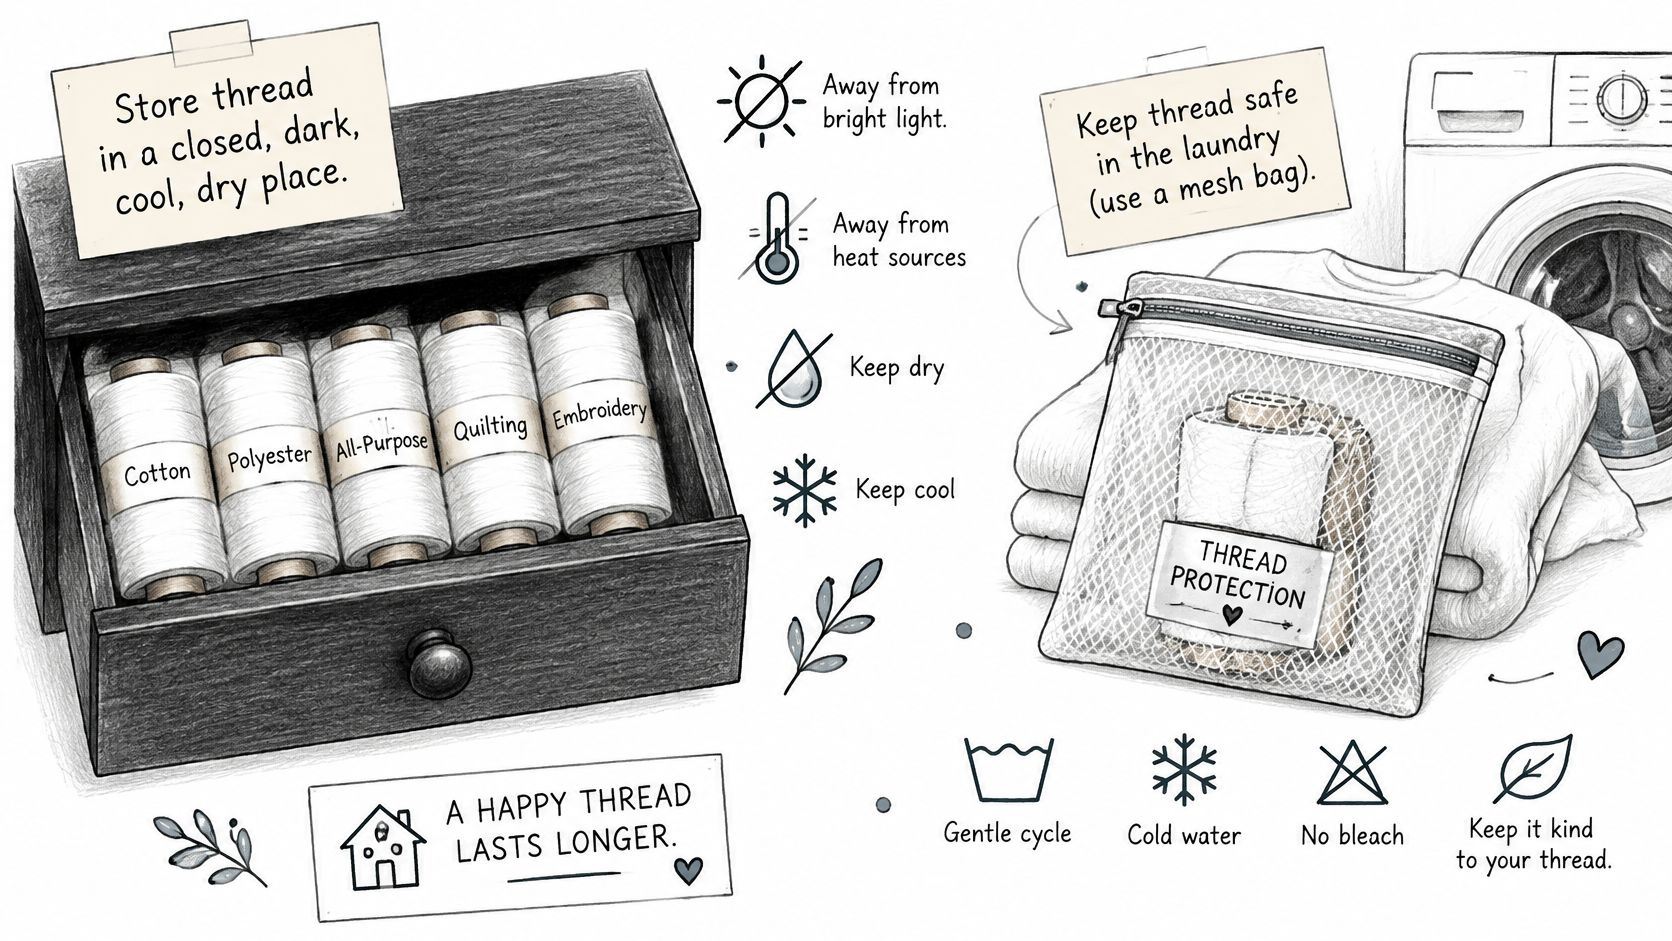
White thread needs protection in the spool drawer and the laundry. A clean spool can become dusty before stitching, while carefully stored embroidery can still suffer from an unsuitable wash routine.
Storage should make the correct thread easy to identify without leaving it exposed. Closed drawers, covered organizers and clearly labeled compartments work better than a permanently sunlit display.
Protect spools and unfinished work
A cool, dry, dark location away from windows and heating equipment is a sensible home for thread. Spools shouldn't sit directly against acidic cardboard or unidentified paper packaging. Unfinished panels deserve the same protection, particularly when a project will remain set aside for a while.
Labels should preserve the manufacturer's color reference as well as fiber and weight. A written label is more dependable than trying to distinguish nearly identical whites under evening light. The embroidery thread cards guide offers a way to organize references without depending on memory.
Mixed textile storage also needs attention. For sewing rooms that hold wool or cashmere alongside embroidery projects, Cashmere Boutique's advice to keep cashmere moth-free addresses the separate concern of protecting animal-fiber textiles.
Thread ends should be secured without tightly winding them around the spool body. Loose ends can tangle with neighboring spools, while dust-coated thread shouldn't be pulled straight into a machine.
Give the finished embroidery compatible care
For ordinary washable work, a gentle cycle and mild detergent provide a cautious starting point, provided the base fabric permits washing. Chlorine bleach shouldn't be the default just because the embroidery is white. The most vulnerable component of the finished article sets the care limit.
Drying flat out of direct sun helps protect shape and avoids unnecessary exposure. Pressing from the reverse, on a suitable padded surface, helps preserve raised stitches; a pressing cloth offers additional protection when direct contact can't be avoided.
A compact care routine keeps the important decisions visible:
- Store spools in a closed, dark drawer.
- Label each spool with its fiber and weight while retaining its color reference.
- Wash gently with a compatible mild detergent and skip routine chlorine bleaching.
- Dry flat away from direct sunlight.
- Press from the back, using a pressing cloth when needed.
Some gradual dulling after repeated use is different from sudden discoloration. Careful handling can slow visible change, but it can't make a frequently used textile remain visually untouched forever.
For an important gift, heirloom or matching set, washing the stitched test sample first is cheaper than discovering an incompatible care routine on the finished piece.
Test Your White Thread in Store Before You Buy
The brightest spool is often the wrong choice for natural or aged fabric. Compare the thread against the actual project material, since white varies with fiber, weight, fabric undertone and laundering. Check it under both daylight and indoor lighting, then judge the stitched result rather than the spool alone.
Bring the materials and details that affect the match:
- Bring the fabric: Include lining, trim or existing embroidery that must coordinate.
- Bring the project details: The design, intended use and wash routine help narrow the choice.
- Identify the machine: Needle compatibility and setup matter alongside shade.
- Ask about a stitched comparison: A sample makes color and stitch appearance easier to judge than a screen image.
Make the visit practical
B-Sew Inn sells sewing and quilting thread, embroidery thread and serger thread. Its guide to shopping for embroidery threads online can help you narrow choices before buying. B-Sew Inn also sells sewing, embroidery, serger and coverstitch machines, so bring the machine model if compatibility is part of your decision.
If white thread breaks or loops, note the thread, needle and fabric used, along with the machine settings. Those details help make a conversation about the problem more specific. A test stitch on the project fabric can reveal whether the thread's shade, weight and behavior suit the work before you commit to the full run.
Choose the white that fits the textile, not the spool that looks brightest by itself.

