

The most common advice for sewing machine bobbin problems is also the most misleading. Readers are told that loops underneath, a bird's nest, or messy stitches on the bottom mean the bobbin tension needs adjusting, so the bobbin-case screw gets turned first. That order causes many secondary problems. A nest underneath often means the upper thread isn't seated in the tension disks, the presser foot was down during threading, or the bobbin was loaded backward. Turning the small screw on the case can't correct any of those errors, and it creates a new variable to undo later.
A better approach puts diagnosis before adjustment. Match the symptom, run the first check in the table below, then test on scrap fabric before changing anything else. Change one variable at a time, in a fixed order. That's slower for five minutes and much faster overall, because the true cause stays visible instead of getting buried under a new tension setting.
Table of Contents
- Symptom, Cause and Fix at a Glance
- Why Bobbin Trouble Often Starts Upstream
- Check, Wind and Load the Bobbin Correctly
- Clean the Bobbin Area and Inspect for Burrs
- Tell Tension Faults From Bobbin Faults
- Decide When to Stop Sewing and Book a Service Visit
Symptom, Cause and Fix at a Glance
Start with the top row that matches the symptom. Run that first check before touching any screw, then sew a short test seam on scrap fabric with the same thread, needle, and fabric planned for the project.
| Symptom | Likely cause | First check |
|---|---|---|
| Looping or bird's nest underneath | Upper thread not seated in tension disks, or bobbin inserted backward | Rethread the upper path with the presser foot raised and confirm bobbin direction |
| Skipped stitches | Wrong bobbin class, bent or damaged bobbin, or lint under the bobbin carrier | Confirm the class in the manual, try a freshly wound bobbin, clean the race |
| Lower thread breaks mid-seam | Burr beneath the throat plate, trapped lint under the tension spring, or overfilled bobbin | Inspect the plate, clean the area, rewind to a lower fill |
| Bobbin drops or spins out | Loose winding or spring seated incorrectly | Rewind firmly and check that the thread sits under the spring |
| Uneven stitches on long runs | Uneven winding or fill above the recommended level | Rewind and compare with a known-good bobbin |
| Bobbin will not seat | Bobbin type does not match the machine | Stop, confirm the class, and do not force it |
Which Rows Are Quick Fixes
The first, fourth, and fifth rows usually resolve in minutes. Rethreading with the presser foot raised, reversing a backward bobbin, or rewinding a lumpy bobbin costs nothing and changes no factory setting. Those checks also answer a useful question. If a freshly wound, correctly loaded bobbin sews cleanly, the original bobbin or its winding was the fault, not the machine's timing or tension.
Skipped stitches sit in the middle. A wrong bobbin class or lint under the carrier is a home fix. Skips that continue with the correct class, a clean race, and a fresh needle point toward hook timing or needle bar issues that home checks can't settle.
Practical rule: A symptom that disappears with a known-good bobbin was a bobbin problem. A symptom that follows every bobbin needs a wider diagnosis.
Which Rows Justify Service
The second and sixth rows deserve caution, and repeated lower-thread breaks do too. A burr beneath the throat plate, a grooved tension spring, or thread trapped under the plate won't improve with more sewing. Forcing a bobbin that won't seat can damage the case, the hook, or both. Those findings justify stopping and booking service rather than sewing through the resistance to test whether it clears.
Use the table in order, not all at once. Fix the matched row, test, and only move to another row if the symptom changes or remains. Stacking several fixes together hides which one worked, and that knowledge matters the next time the same symptom appears mid-project, with different fabric and thread in the machine.
Why Bobbin Trouble Often Starts Upstream
The strongest reason to leave the bobbin-case screw alone comes from how the two threads behave during stitch formation. A peer-reviewed sewing-engineering study found that bobbin-thread pretension can affect measured needle-thread tension when the take-up lever releases the loop, while sewing speed, fabric thickness, thread linear density, and thread pretension also affect tension peaks. Readings shift with the work itself. A seam that drifts out of balance is not proof that a setting is wrong.
The symptom that gets misdiagnosed most often looks like this. The seam sews clean for several inches, then loops of needle thread bloom on the underside of the fabric, then clear again on their own. Intermittent looping that comes and goes mid-seam almost never traces to the bobbin case. It traces to the thread sitting wrong somewhere between the spool pin and the needle eye: out of the take-up lever, behind one guide instead of through it, or resting on the edge of a tension disk rather than seated between the disks. The thread can be half a millimeter out of position and produce exactly this pattern.
The screw stays tempting anyway. Move it and the original balance is gone unless the starting position was marked first, so even after the fault gets corrected, the stitch may stay off because a working setting was sacrificed chasing a symptom.
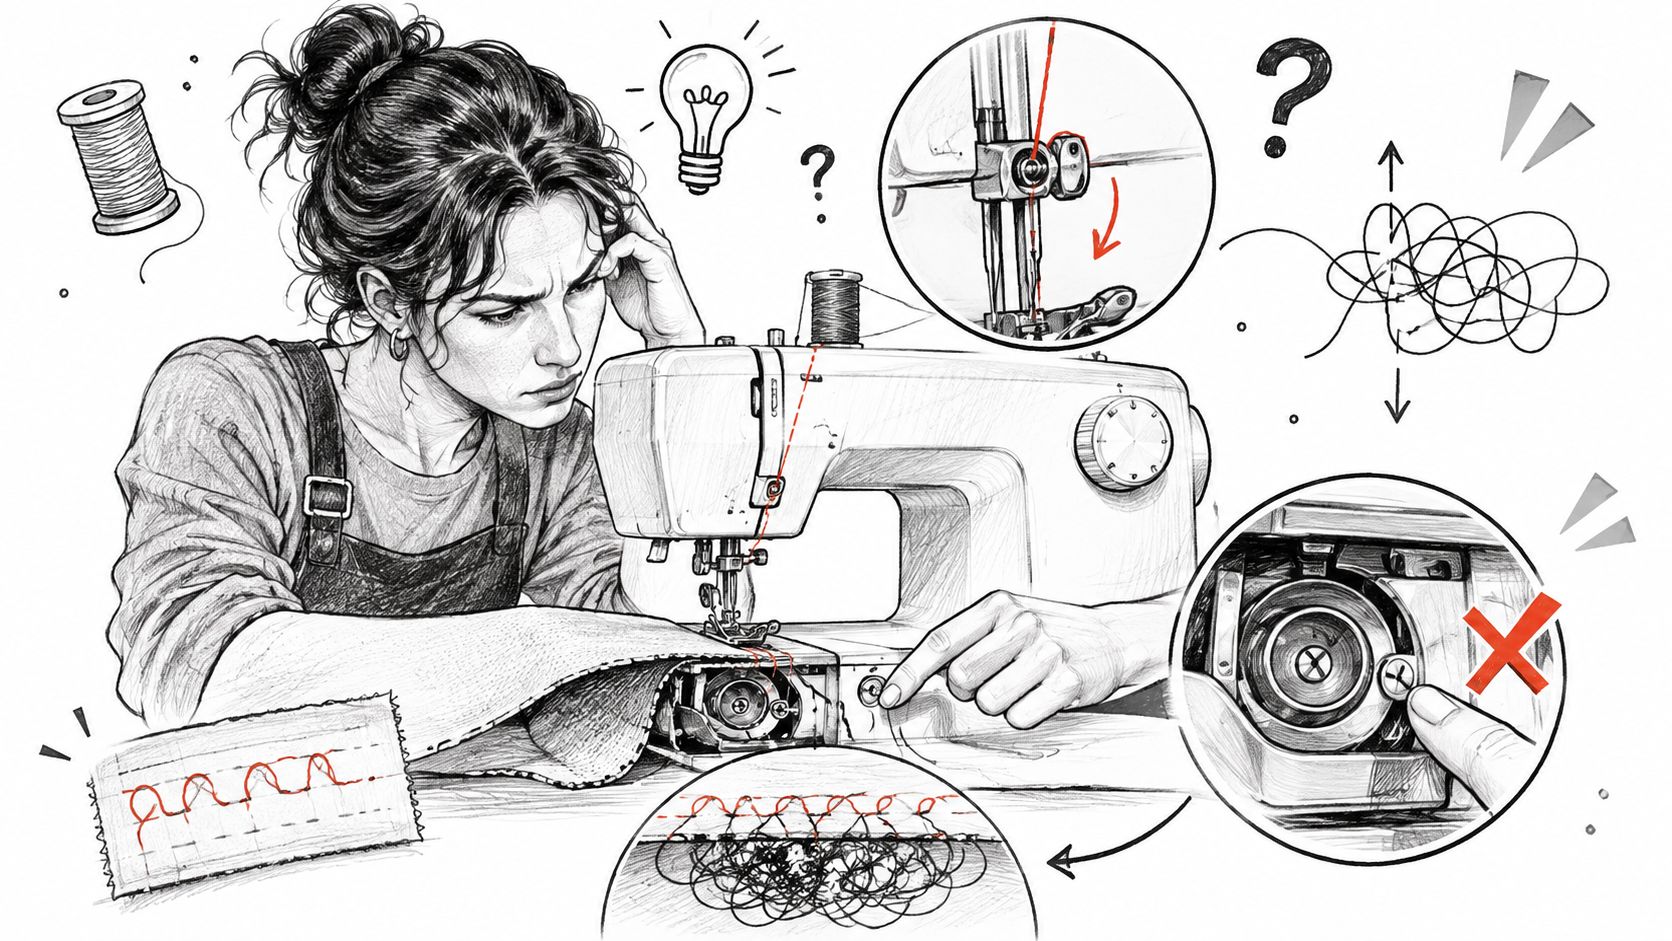
That is why the controlled test comes before any adjustment. Rethread the entire upper path, following the sequence in this guide on how to thread a sewing machine, with the presser foot raised so the tension disks open and accept the thread fully. Then run a test seam with one fabric, one thread, and one needle at moderate speed. Changing several variables at once recreates the problem the study describes: the measurements move for reasons that have nothing to do with the bobbin.
Nearly every case resolves inside three areas. The upper thread path, from spool pin through the tension disks and take-up lever to the needle. The bobbin and case, covering class, winding, direction, and spring seating. The stitching conditions, meaning speed, fabric layers, thread weight, and needle choice. Quilters and embroiderers change that third group constantly, moving from single layers to quilt sandwiches or dense designs, so a combination that sewed well an hour ago may not suit the current work. Working through the three in order keeps the cheapest, most reversible checks first and reserves the screw for the fault it can fix.
Check, Wind and Load the Bobbin Correctly
Compatibility comes before winding, loading, or tension. A bobbin that drops into the cavity isn't automatically the right bobbin. It may sit too low, stand too tall, or release thread at the wrong height, and the resulting looping or skipped pickup looks exactly like a tension fault.
Similar-looking formats such as Class 15, Class 15J, L-style, and Featherweight bobbins differ in height, diameter, and flange shape, and even a small dimensional difference can change how the thread feeds or catch on the hook. The correct class, part number, and model compatibility come from the machine manual or the manufacturer's documentation, not from the label on an inexpensive multipack.
Four Compatibility Checks
1. Find the specified class. Check the manual's parts list or the manufacturer's documentation for the exact model. The common slip is trusting appearance. Two bobbins can look identical on a table and differ enough in flange shape or height to sew badly.
2. Compare markings and dimensions. Match the bobbin in hand against that listing, including whether the machine specifies metal or plastic. Unmarked bobbins from mixed storage are a frequent source of trouble, because visually similar formats end up in the same box. When a bobbin's origin is unknown, set it aside rather than testing it in the machine.
3. Inspect the bobbin itself. Roll it on a flat surface and look for wobble. Check for cracks, chipped flanges, warped sides, rough edges, and a bent center barrel. Press the wound thread with a thumbnail. Firm wraps that barely give are correct. Spongy wraps that shift under light pressure were wound too loosely and will feed unevenly.
4. Test with a freshly wound bobbin of the confirmed class. This step separates a bad bobbin from a machine fault. If the symptom vanishes, discard or segregate the suspect bobbin and keep sewing. If the symptom stays, the bobbin itself is cleared and attention moves to loading, cleaning, or the upper path.
A bobbin that won't seat is giving information, not resisting out of stubbornness. Forcing it risks the case and the hook for the sake of a part that costs very little to replace.
Wind Slowly and Stop Short of Full
5. Wind at a controlled speed and guide the thread evenly. Fast winding builds a bobbin that's fat in the middle and thin at the edges, or stacked toward one flange. The detailed steps in this guide on how to wind a bobbin cover the winder path and tension disk used during winding, which many skipped stitches trace back to. Route the thread through the bobbin-winding tension disk exactly as the manual shows. Bypassing that disk is the most common winding slip and produces soft, uneven wraps.
6. Stop at roughly 85 to 90 percent capacity. A technical industrial-maintenance training document recommends filling a bobbin to approximately 85 to 90% capacity, because an overfull bobbin can cause its outer wraps to drag against the bobbin case and restrict thread delivery. Thread should stay below the flange edges, never bulging past the sidewalls. That same source notes that uneven winding creates changing spool diameter and localized snags, producing stitch-length variation, looping, or sudden lower-thread breaks as resistance fluctuates.
7. Check the finished wraps before loading. Good winding looks flat and even from flange to flange, with no loops sticking out and no soft spots. A lumpy bobbin should be stripped and rewound, not sewn down to the problem area. Say a bobbin is wound in a hurry before a long quilting run. The first rows sew cleanly, then stitch length starts varying halfway through as the uneven section feeds. Rewinding takes two minutes at the start and saves a long unpicking session at the end.
Machines with on-screen guidance, such as the Baby Lock Radiance Sewing & Embroidery Machine, still can't flag a warped flange or a soft winding, so the physical checks above apply to every machine.
Load in the Correct Direction
8. Confirm the unwinding direction, then route the thread through the slot and under the tension spring. Every machine specifies whether the bobbin unwinds clockwise or counterclockwise, and the manual's diagram is the authority. A backward bobbin feeds thread against the spring's intended path, which produces erratic tension that no screw setting can stabilize. The thread must pass beneath the tension spring, not over it. Thread resting on top of the spring has almost no resistance, so the bobbin can spin freely and dump thread into the stitch.
Finish with a static pull test. With the bobbin installed and the thread routed under the spring, pull the thread by hand. Correct feeding feels like smooth, controlled resistance, steady rather than grabby or free-spinning. Grabby resistance usually means a trapped fiber or a rough spot in the thread path. Free-spinning means the thread missed the spring entirely. The training document linked above describes a service heuristic in which one small hemostat clipped to the thread should not allow the bobbin to unspool, whereas two should. That test isn't a universal factory specification, and it shouldn't override the manual. Its value is comparison. Pull a known-good bobbin, feel the resistance, then pull the suspect bobbin. A clear difference between the two, after cleaning, points to the case latch, the spring, or trapped thread in the lower mechanism.
Signs of a damaged bobbin during sewing include thread catching at the same point in each rotation, tangling that starts without any threading change, and skipped pickup where the needle thread fails to draw the bobbin thread up. Any of those signs earns the bobbin a retirement. Bobbins are consumables, and keeping a questionable one in rotation costs far more in ruined seams than a replacement pack of the correct class.
Clean the Bobbin Area and Inspect for Burrs
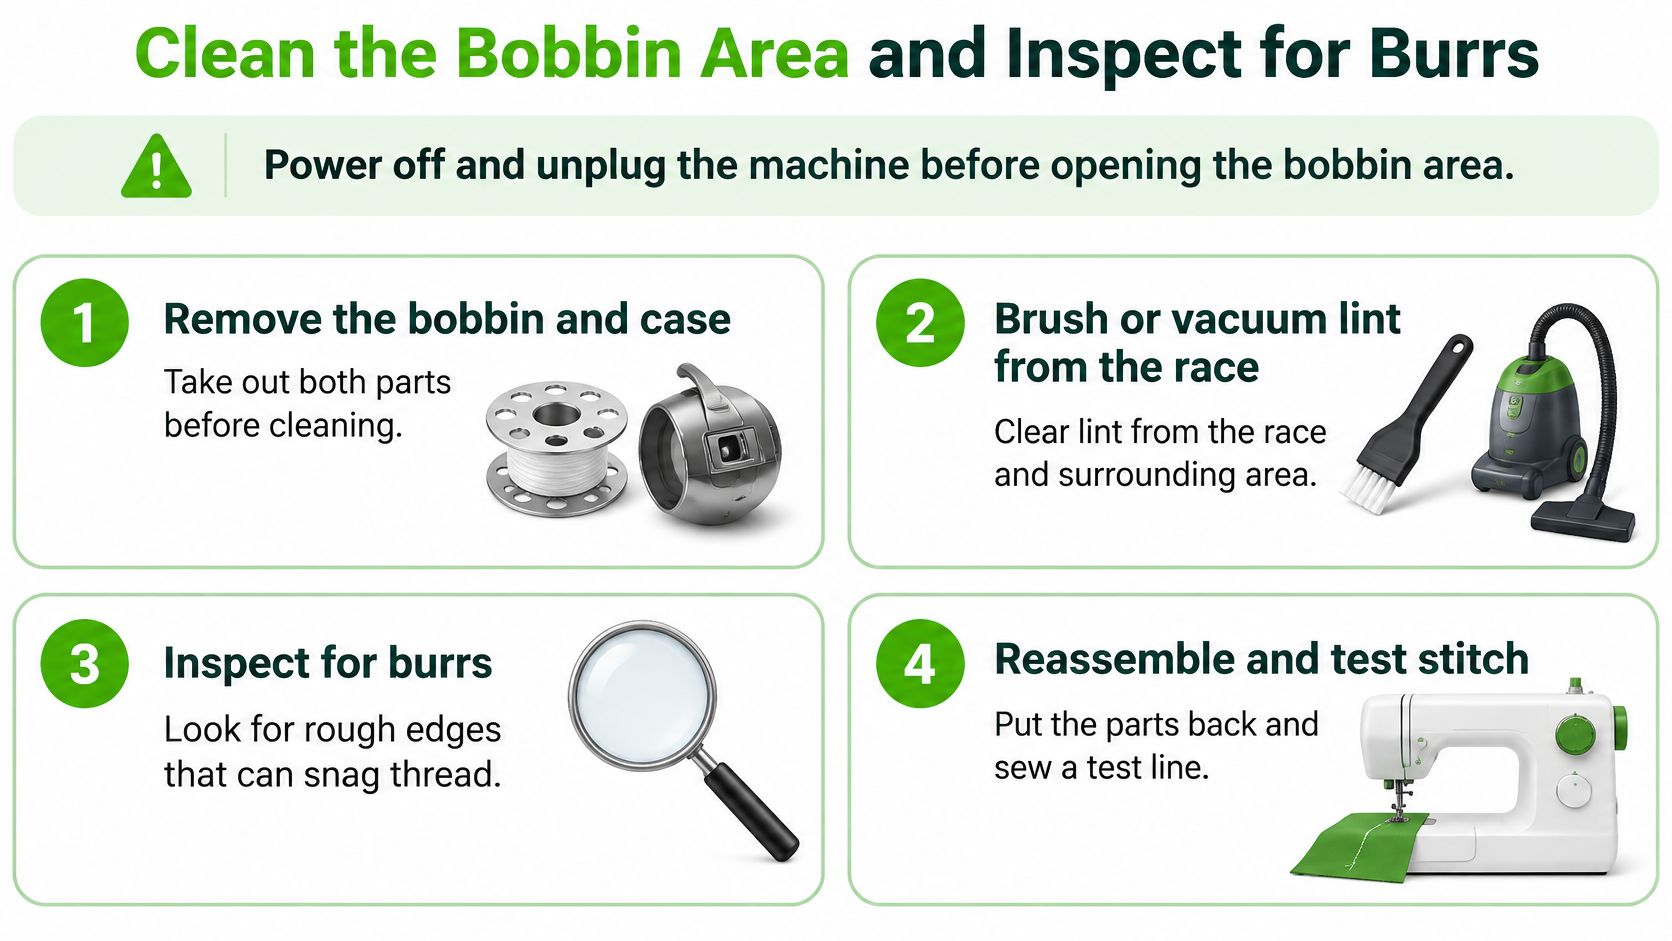
Power off and unplug the machine before opening the bobbin area. That sequence protects fingers from an accidental start and protects the machine's electronics while metal parts are being handled. Remove the bobbin and, where the design allows, the case. Set them on a clean cloth in the order they came out, which makes reassembly straightforward.
The Clean and Inspect Routine
- Brush or vacuum the race: Clear lint from the bobbin race and the surrounding area with the machine's brush or a small vacuum. Compressed air pushes lint deeper into the mechanism, so it isn't the right tool here.
- Check under the tension spring: Slide a corner of thin paper or a business card gently under the case spring to lift out trapped fibers. A wad of lint there changes the spring's pressure, so tension drifts even though nobody turned the screw.
- Run a fingertip around the throat plate: Move slowly across the needle hole and plate edges, or inspect under magnification. A burr feels like a tiny snag or rough catch. Needle strikes leave exactly these defects.
- Inspect the case spring surface: Look for a shiny, sharp groove worn into the spring where thread passes. A grooved spring saws at every thread that crosses it.
Lint load depends heavily on fabric. Cotton batting, flannel, and fleece shed far more than quilting cotton, and anyone sewing plush fabrics will recognize how fast the race fills. This resource on cleaning minky lint from your machine covers that heavier end of lint management, and the frequencies there are worth adopting for any high-shed project. A fuller routine for the whole machine appears in this guide on how to clean a sewing machine.
Why Lower Thread Keeps Breaking
Lower-thread breakage is usually a mechanical feed or friction problem rather than a tension problem alone. New Mexico State University Extension identifies six high-value causes: incorrect bobbin-case threading, excessive tension, uneven or overfilled winding, a worn bobbin-case spring with a sharp groove, a burr beneath the throat plate, and lint or thread trapped under the tension spring.
That list explains why turning the tension screw alone so often disappoints. Reducing tension can soften the symptom while a damaged spring or plate keeps abrading every inch of thread that passes. Long quilting and embroidery runs make the defect obvious, because intermittent abrasion that a short seam survives becomes a break every few minutes.
Replacement rule: A scratched case or grooved spring gets replaced, not filed or sanded, unless the manufacturer specifies a repair procedure. Precision spring surfaces don't forgive improvised grinding.
Drop-in designs simplify part of this routine because the area is visible from above. The Baby Lock Joy Sewing Machine uses a drop-in bobbin and free-arm configuration suited to a variety of projects, and that top access makes a quick brush-out between projects easier to keep up. After any jam, on any design, rethread from the very beginning rather than pulling the tangle free and resuming. Jams dislodge thread from guides, and resuming on a partially threaded path guarantees a second jam.
Tell Tension Faults From Bobbin Faults
First, identify the machine design. The drop test applies only to front-loading machines with a removable, bullet-style bobbin case that comes out in the hand. Drop-in systems, where the bobbin sits in a fixed cavity under a clear cover, have no separate case to test, so the test gets skipped on those machines and the threading and loading checks carry the diagnosis instead.
For a removable case, the procedure is short. Thread the case correctly, hold the thread end, and give it one short, sharp downward jerk, like starting a yo-yo, then hold still and watch what the case does.
| Test result | What it suggests | Next step |
|---|---|---|
| Case drops freely | Bobbin tension likely too loose | Check winding and spring seating before any screw change |
| Case moves about 1-3 inches, then stops | Tension in the expected range | Tension is probably fine; check the upper path and the bobbin |
| Case does not move | Tension likely too tight | Look for trapped thread or lint, then adjust the screw in small steps as the manual describes |
The expected result is specific. This stitch-reading guide describes the case moving approximately 1 to 3 inches and then stopping as the tension spring holds it, with a free drop suggesting tension that's too loose and no movement suggesting tension that's too tight. The middle result is the most informative of the three. It clears the bobbin case and sends the diagnosis back to the upper path, the needle, or the stitching conditions, where the fault very often sits.
The Order of Work
Rule out upper threading and bobbin orientation first, because both mimic tension failure and neither requires a tool. Run the drop test second, on machines where it applies. Only then consider the case screw, and turn it in small increments, testing on scrap after each move. A quarter turn is a large change on most cases. Marking the screw's starting position with a fine pen before turning gives a way back to the original setting.
The background and limits of screw adjustment are covered in this guide to tension adjustment on a sewing machine, which is worth reading before the screwdriver comes out. If tension stays inconsistent after correct threading, correct loading, and a passing drop test, service adjustment is the right call rather than wider screw turns.
Consider a common trap. A quilter winds a bobbin completely full for a long binding run, the outer wraps drag, stitches tighten and break, and the case screw gets loosened to compensate. The seam improves briefly, then worsens as the bobbin empties and the drag disappears, leaving tension too loose. Rewinding to a sensible fill would have solved the original problem without touching the screw at all. That sequence, symptom mistaken for tension, compensation applied, new fault created, accounts for a large share of persistent sewing machine bobbin problems that arrive at a service counter.
Decide When to Stop Sewing and Book a Service Visit
Home troubleshooting has a clear boundary. It holds while the problem matches a row in the symptom table and one fix resolves it on a test seam. Past that boundary, continued sewing stops being diagnosis and starts becoming damage.
Stop-Use Thresholds
- Thread trapped beneath the throat plate: Power off and inspect rather than pulling the fabric free by force.
- Jams that recur after correct loading: Repetition after a confirmed correct class, direction, and clean race points below the surface.
- A bobbin that will not seat: Forcing it risks the case and the hook.
- A scratched or grooved case: Running a damaged case can snag the upper thread, break needles, and degrade stitch quality. A scratched bobbin case calls for replacement, and matching the new case to the model is best done at a service counter.
Bringing the right items makes a service visit faster and more conclusive. Pack the machine's model information, the exact bobbin that causes trouble, samples of the fabric and thread involved, and a short note describing the symptom and when it appears, such as only on long runs or only at high speed. The overview of sewing machine service and repairs explains what a technician checks beyond the home routine, including hook timing and internal wear that no amount of rethreading can reach.
Stocking the correct consumables prevents a share of these visits. The Baby Lock Class 15 Bobbins, Pack of 12, is priced at $11.69 USD, a small cost compared with a service call caused by a warped bobbin kept in rotation. B-Sew Inn's machine categories include sewing, embroidery, serger and coverstitch, and long arm quilting machines, with pre-owned options across those categories as well, and its machine and software tutorials cover much of the same ground a technician walks through on a first inspection. The practical move this week is simple. Run the table's first checks, and if a stop-use threshold applies, book the service appointment instead of sewing one more test seam through a mechanical fault.
Bring the problem bobbin, a fabric and thread sample, and a note about when the symptom appears, and let a technician separate a five-minute loading fix from a worn case or a timing fault. Visit B-Sew Inn to book a service appointment, browse the correct bobbins and machine accessories for the model, or find class and store details.
