

Getting to know your sewing machine inside and out is the secret to creating incredible custom designs. Once you can name the parts, you can troubleshoot problems with confidence and finally tackle those complex patterns you've been eyeing. Every piece—from the needle and presser foot to the bobbin and hand wheel—works together to create that perfect stitch. At bsewinn.com, we believe that empowering crafters starts with mastering their tools, and this guide is your first step towards replicating beautiful, tangible designs with precision and creativity.
Your Essential Sewing Machine Parts Atlas
Welcome to your machine’s command center. Before you can jump into creating the amazing projects and custom designs showcased in our bsewinn.com online classes, you’ve got to get familiar with your equipment. Your machine isn't just one single object; it's a whole system of interconnected parts, and each one has a job to do.
Understanding this system is what separates a beginner from a seasoned pro. It turns sewing from a frustrating guessing game into a precise art form, allowing you to replicate intricate designs from our how-to guides. Suddenly, you'll feel empowered to make tiny adjustments, fix common hiccups, and pick the right accessories for whatever you're working on. This is the foundation we build on in all our training and extensive resources, so you can follow any project guide like you've been doing it for years.
Navigating Your Machine with Confidence
To get started, let’s go over the most critical components. The quick-reference table below is your cheat sheet for fast lookups, breaking down each part's name and its main function. It's like a visual map that will help you start navigating your machine like an expert. Getting these terms down will make our more advanced tutorials and project guides much easier to follow.
Here at B-Sew Inn, we're committed to empowering crafters through custom sewing machine designs and the support to create them. Our online classes, training, and extensive resources are all geared towards one thing: helping you master your machine so your creativity can flourish.
This atlas is designed to be the guide you keep coming back to. Whether you're trying to figure out a weird stitch or setting up for a new project, knowing your way around the take-up lever, stitch selector, and feed dogs is absolutely essential. Let's start by exploring the anatomy of a standard machine.
Here's a quick look at the parts you'll be using most often.
Key Sewing Machine Components at a Glance
| Part Name | Primary Function | Importance |
|---|---|---|
| Hand Wheel | Manually controls the needle's movement. | Allows for precise, slow stitching and initial needle placement. |
| Spool Pin | Holds the spool of upper thread. | The starting point for the entire upper threading system. |
| Needle Clamp | Secures the needle in place. | Ensures the needle is stable and properly aligned for stitch formation. |
| Presser Foot | Holds the fabric down against the feed dogs. | Provides consistent pressure for even fabric feeding and stitch length. |
| Feed Dogs | Pull the fabric through the machine. | Determines the stitch length and moves the fabric forward as you sew. |
| Bobbin Case | Holds the bobbin and sets the lower thread tension. | Crucial for forming the bottom half of a balanced lockstitch. |
| Stitch Plate | Covers the bobbin area and has guidelines. | Provides a smooth surface for fabric and helps maintain straight seams. |
| Take-Up Lever | Pulls thread from the spool to form the stitch. | A key component in the upper threading path that controls thread flow. |
Bookmark this page! You'll find yourself referring back to this chart as you build your skills and get more comfortable with all the amazing things your machine can do.
The Complete Needle and Threading System
The journey your thread takes from the spool all the way down to the fabric is what makes every single stitch possible. Getting the hang of this upper threading system is absolutely essential if you want to create clean, strong seams for your designs. The path is incredibly specific, and every little part has a job to do in controlling the thread's flow and tension before it even gets close to the needle. It's a skill we drill down on in our online classes at bsewinn.com because once you master it, you'll be producing professional-quality work.
It all starts at the spool pin, which just holds your spool of thread. From there, the thread weaves its way through one or more thread guides. These are simple but critical pieces that keep the thread moving smoothly and stop it from tangling on its way to the tension assembly. Think of them as the traffic cops for your thread.
The Heart of Stitch Formation
Next up, the thread slips between the tension discs, which squeeze it to regulate how easily it can be pulled through the machine. This is what your tension dial controls, and it's a huge factor in your stitch quality. Then it goes up to the take-up lever—that's the moving arm that pops up and down with every stitch. This little lever does two things: it pulls fresh thread from the spool and then cinches the stitch tight after it's formed. A super common mistake is missing this lever when you're threading, which almost guarantees a tangled mess under your fabric that we call "bird nesting."
Finally, the thread travels down to the needle clamp, which holds your needle securely in place. Threading the eye of the needle is the very last step before the magic begins. Every single part in this chain has to be threaded correctly to get a balanced, beautiful stitch.
This flowchart shows you the basic relationship between the Hand Wheel (your manual control), the Needle (the action), and the Stitch Plate (the foundation).
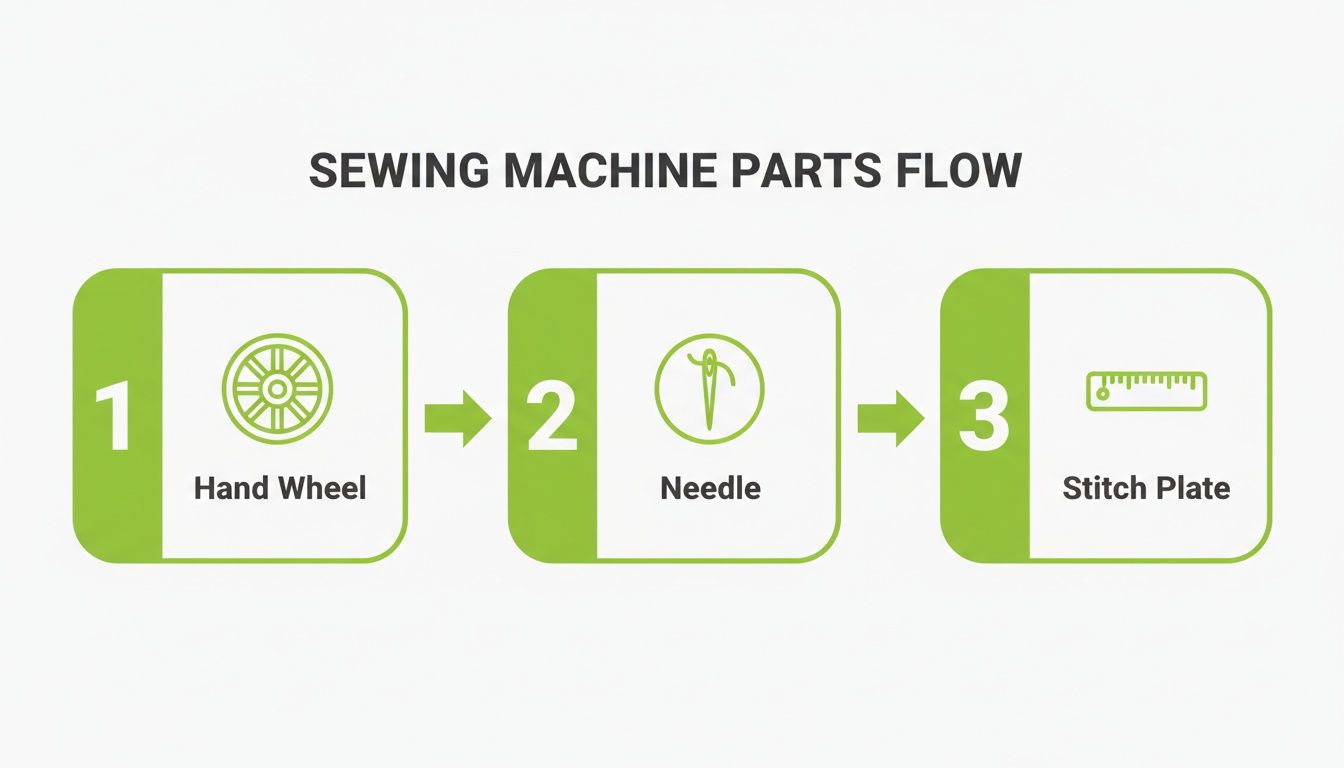
It's a great visual for how these core components work together to create even one perfect stitch.
Why Your Needle Choice Matters
The needle itself is one of the most important—and most overlooked—parts of your sewing machine. Seriously. Using the wrong type of needle or, even worse, a dull one can completely ruin your project. For example, if you use a standard sharp needle on a knit fabric, you’ll end up piercing and tearing the delicate fibers, which leaves little holes. A tangible example is trying to sew a t-shirt with a denim needle; the result will be skipped stitches and damaged fabric.
Here's a simple rule I live by: change your needle after every 8-10 hours of sewing time. A dull needle is the number one cause of skipped stitches, shredded thread, and snags in your fabric.
Picking the right needle for your fabric is a non-negotiable for success. Here are a few common examples:
- Universal Needles are your go-to for most woven fabrics like cotton or linen.
- Ballpoint Needles have a rounded tip that gently pushes the fibers of knit fabrics aside instead of cutting through them.
- Denim (or Jeans) Needles have a much stronger shank and a super sharp point designed to punch through thick, dense fabrics without snapping.
Making the right choice here will save you so much frustration and really elevate the quality of your finished piece. If you want to dive deeper, check out our guide on the different types of sewing machine needles to find the perfect match for whatever you're working on next.
Understanding Your Bobbin and Hook Assembly
Tucked away beneath the needle plate is the magic little world where the bottom half of every stitch comes to life. This is home to the bobbin and hook assembly, a crucial duo that has to work in perfect time with the needle to form a solid lockstitch. Getting to know this mechanism is the key to solving some of the most common—and frustrating—sewing headaches.
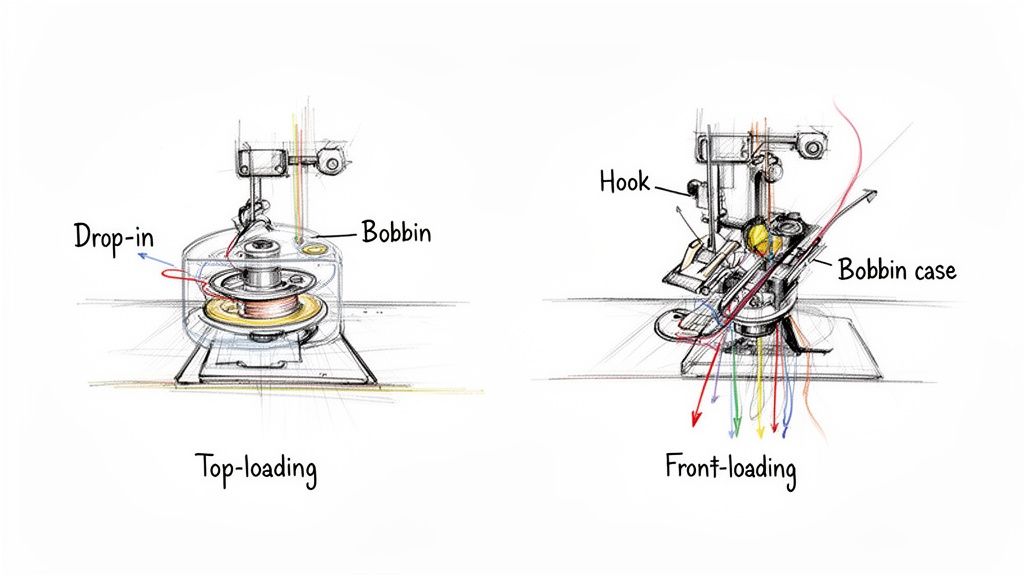
When you understand how the bobbin thread actually locks with the needle thread, you can troubleshoot issues yourself and keep your projects moving. The two main systems you'll come across are top-loading and front-loading bobbins, and each has its own personality.
Top-Loading vs. Front-Loading Systems
Each bobbin setup has its own quirks and benefits, and knowing which one your machine has is the first step to mastering it.
- Top-Loading (Drop-in) Bobbins: You’ll find these in most modern, computerized machines. It's as easy as it sounds: you just pop off a little clear plastic cover and drop the bobbin straight in. The biggest perks are how simple it is to load and that you can see how much thread you have left at a glance. No more thread-chicken!
- Front-Loading Bobbins: This system uses a separate metal bobbin case. You open a little door on the front of the machine, take out the case, pop the bobbin inside it, and then slide the whole thing back into the machine. It’s an extra step, for sure, but this design is a workhorse known for its durability, making it a staple in many heavy-duty mechanical and industrial machines.
Of course, how you wind your bobbin is just as important as how you load it. If your bobbin is wound too loosely, too tightly, or all lumpy and uneven, you're just asking for stitch problems. For a foolproof method every time, check out our guide on how to wind a bobbin.
Troubleshooting Common Bobbin Issues
If your stitches start looking funky, the bobbin area is always the first place you should investigate. Those dreaded "bird's nests" of tangled thread, skipped stitches, or little loops on either side of your fabric almost always point to a problem with that lower thread.
A classic sign of trouble is seeing loops of thread on the top of your fabric. This is a dead giveaway that the bobbin was inserted incorrectly or the bobbin case tension is off.
Before you start fiddling with tension dials, go back to basics. Unthread your machine completely—top thread and bobbin. Take the bobbin out, give the whole area a quick clean to get rid of any lint, and then pop it back in, making sure it's turning the right way (your manual will show you which). Re-thread the top of the machine, too. Seriously, 90% of the time, this simple reset fixes the problem and gets you back to sewing.
Mastering the Fabric Feed and Presser Foot System
Getting control over your fabric is the secret sauce for perfectly straight seams, graceful curves, and projects that just look right. The two parts responsible for this magic are the feed dogs and the presser foot. They work together in a beautiful rhythm to guide your material through the machine, making sure every single stitch lands exactly where you intend it to.
It all starts with the presser foot, which holds the fabric down with steady, even pressure against the stitch plate. Just below, the feed dogs—those small, toothed metal bars—pop up through slots in the plate. They grip the fabric from the bottom and pull it backward with each stitch, acting like a tiny, precise conveyor belt. How far they pull the fabric determines your stitch length, a setting you can easily change for different looks and techniques.
The Power of Specialized Presser Feet
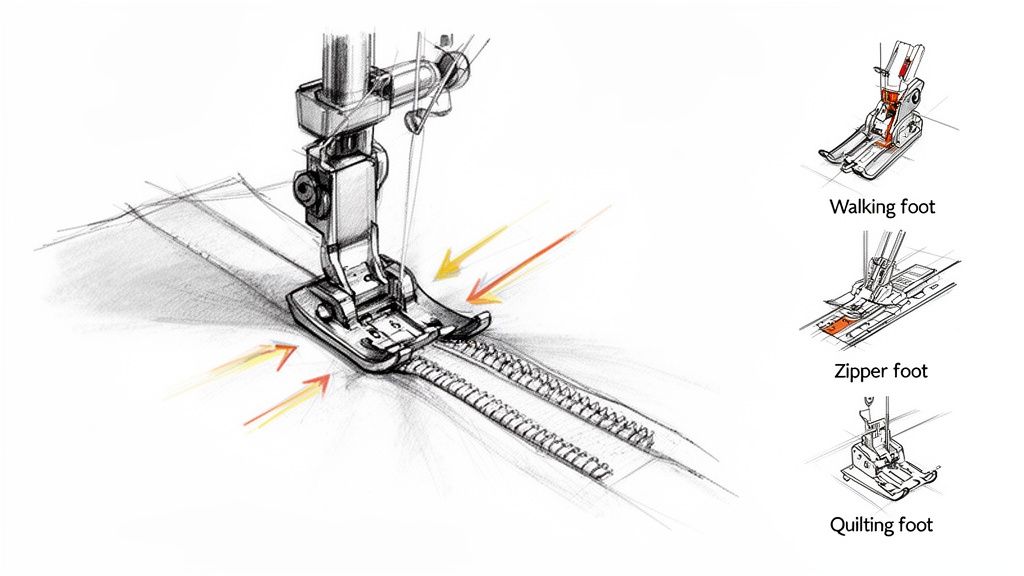
Your standard presser foot is a great all-rounder, but swapping it out for a specialized one is one of the fastest ways to level up your sewing game. Seriously. The right foot can transform a tricky, frustrating task into something simple and clean. It’s a concept we drill down on in our B-Sew Inn online classes because the right accessories unlock so much creative potential for any project you can imagine.
Think of it like this: trying to install a zipper on a pillowcase with a standard foot is possible, but it’s clumsy. A dedicated zipper foot, however, glides right along the zipper teeth, giving you a perfectly straight, professional-looking seam every time. This is a tangible example of how the right tool elevates a project from looking "handmade" to looking "hand-crafted."
Investing in a few key presser feet is one of the smartest moves a crafter can make. It's not about having dozens of accessories, but about having the right tool for the job. This is how you build skills and confidence to tackle more complex designs.
Once you start exploring different feet, a whole new world of techniques opens up. From quilting through thick layers without puckering to sewing the most delicate rolled hems, there’s a foot designed to make the process smoother and your results more accurate. You can see just how many options there are in our comprehensive sewing machine feet guide.
Common Presser Feet and Their Applications
To give you a better idea of what these specialized feet can do for you, let's take a look at some of the most common and useful ones you'll encounter. Having just a few of these in your toolkit can make a massive difference in the quality and variety of projects you can confidently take on.
Here’s a quick breakdown of the essentials:
| Presser Foot Type | Primary Use Case | Recommended Projects |
|---|---|---|
| Zipper Foot | Allows the needle to stitch extremely close to the edge of a zipper's teeth. | Garment construction (pants, skirts, dresses), bag making, and home decor like cushion covers. |
| Walking Foot | Features its own set of feed dogs to grip and move the top layer of fabric. | Quilting (to prevent layers from shifting), sewing with slippery fabrics like velvet, or matching plaids and stripes. |
| Buttonhole Foot | Creates perfectly sized and consistent buttonholes, often with automated features. | Any project requiring buttons, such as shirts, blouses, coats, and children's clothing. |
| Blind Hem Foot | Guides the fabric to create a nearly invisible hem on garments. | Finishing hems on professional-looking trousers, skirts, dresses, and curtains. |
| Overcast Foot | Sews a seam and finishes the raw edge simultaneously to prevent fraying. | Seam finishing on medium-weight woven fabrics when you don't own a serger. |
Each of these feet is designed to solve a specific problem, saving you time and preventing headaches. When you match the right foot to the task, you're not just sewing—you're engineering a better result from the ground up.
How to Achieve Perfect Stitch Tension
Nothing is more frustrating than finishing a seam only to find it's puckered and ugly, or worse, so loose it's barely holding together. Unbalanced tension is one of the most common headaches for sewists, but mastering that little dial on your machine is a game-changer. This how-to skill turns that confusing knob into a tool you can control with total confidence.
A truly perfect stitch is a thing of beauty. It's formed when the thread from your needle (the upper thread) and the thread from your bobbin meet right in the middle of your fabric layers. They create a perfect "lockstitch" that looks identical on both sides.
This perfect balance is controlled by two key players: the upper tension assembly and the bobbin case tension. That dial you see on your machine adjusts the upper tension, which is basically a set of tiny discs that squeeze the thread as it passes through.
Diagnosing Tension Problems Visually
The first step to fixing any problem is learning to "read" your stitches. It's a skill that will serve you well for years to come. Before you even think about touching that tension dial, grab a scrap of the fabric you're using for your project and sew a quick test line.
Now, take a close look at that line of stitching. Here's what you're looking for:
- Loops on the Bottom: Do you see tiny loops of the top thread showing on the underside of your fabric? This is a classic sign that your upper tension is too loose. The bobbin thread is basically winning the tug-of-war and pulling the top thread right through.
- Loops on the Top: If you see the opposite—little dots or loops of the bobbin thread peeking through on the top side of your fabric—your upper tension is too tight. The top thread is yanking the bobbin thread up through the material.
Getting beautiful tension is less about finding a single "magic number" on the dial and more about creating harmony between your thread, needle, and fabric. It's all about understanding that relationship, which is something we focus on heavily in our bsewinn.com classes.
Making Precise Adjustments
Once you've diagnosed the problem, the fix is usually pretty simple. For the vast majority of tension issues, you'll only need to adjust the upper tension dial. The key is to make small, deliberate changes. I recommend adjusting by only half a number at a time, then sewing another test seam to see the result.
Here's the simple process I follow every time:
- Check for Loops: Figure out if the loops are on the top or the bottom of your fabric scrap.
- Adjust the Upper Dial: If the loops are on the bottom, you need to increase the tension by turning the dial to a higher number. If the loops are on the top, you'll decrease the tension by turning it to a lower number. Easy, right?
- Test Again: Sew another line of stitches right next to your first one. Did the adjustment work? If not, adjust by another half-step and try again.
By following this methodical approach, you can confidently dial in your tension for any combination of thread and fabric. It's the key to making sure every project you tackle is built on a foundation of strong, perfect stitches.
Common Questions About Sewing Machine Parts
Diving into the world of sewing machine parts can feel a bit overwhelming. Whether you're trying to fix a problem or just curious about an upgrade, you’re bound to have questions. Getting good, clear answers is the key to feeling confident and keeping your projects moving forward.
Think of this section as your go-to FAQ. We've gathered the most common questions we hear from sewists and crafters, and the answers are based on years of hands-on experience. Knowing this stuff will make you so much better at maintaining your machine and making smart choices about its care.
How Often Should I Change My Sewing Machine Needle?
As a general rule, you should pop in a new needle after every 8 to 10 hours of sewing. If you don't track your hours (who does?), a much easier habit is to simply start every new project with a fresh needle. It’s one of the cheapest and most effective ways to guarantee beautiful stitches.
Why is this so important? A dull or slightly bent needle is the number one cause of skipped stitches, puckered fabric, and shredded thread. Pushing a worn-out needle can even damage delicate fabrics or, worse, throw your entire machine's timing out of whack. And remember, using the right type of needle for your fabric is just as crucial.
Can I Use Any Brand of Bobbin in My Machine?
Nope! This is a big one. You should only use bobbins made specifically for your sewing machine's make and model. They might all look pretty similar, but even microscopic differences in size, shape, or weight can cause a world of trouble. An incompatible bobbin is probably the most common reason for poor stitch quality.
The wrong bobbin can completely throw off your tension balance and jam up the hook mechanism. That leads to those dreaded thread nests, skipped stitches, and inconsistent seams. Over time, it can even cause permanent damage to the bobbin case itself. Do yourself a favor and check your machine's manual to find the exact bobbin class you need.
What Is the Difference Between a Serger and a Sewing Machine?
A standard sewing machine creates a lockstitch using two threads: one from the needle and one from the bobbin. It's the classic stitch for constructing garments and piecing things together. A serger, on the other hand, is a completely different beast. It uses anywhere from 3 to 5 threads and a set of loopers (no bobbin!) to create an overlocking stitch.
A serger’s main job is to trim the fabric edge and wrap it in thread all in one go, giving your projects a clean, professional finish that won't fray. Because their jobs are so different, their parts are absolutely not interchangeable. Sergers have their own special needles, presser feet, and cutting blades that you'll never find on a regular sewing machine.
At bsewinn.com, we want you to feel empowered by your tools. Getting a handle on these key differences helps you pick the right machine and parts for what you want to create. Our goal is to set you up for success, and our deep dives and online classes are here to guide you every step of the way.
Why Are the Feed Dogs Not Moving My Fabric?
If your fabric has suddenly stopped moving, don't panic! This is one of the most common hiccups, especially for new sewists, and the fix is usually incredibly simple. Before you assume it's a major mechanical issue, run through this quick checklist.
- Is the Feed Dog Switch Engaged? Most machines have a switch or lever that lets you drop the feed dogs for things like free-motion quilting. Check to make sure that switch is in the "up" position.
- What's Your Stitch Length? If your stitch length is set to zero, the feed dogs will still pop up and down, but they won't actually pull the fabric forward. Double-check that dial!
- Is the Presser Foot Down? It's an easy mistake to make. The presser foot has to be all the way down to apply pressure, which allows the feed dogs to grip the fabric and do their job.
If you've checked all three things and you're still stuck, it might be time to look into a professional service, as it could be an internal issue.
At B-Sew Inn, we’re here for your whole creative journey. From finding the perfect part to learning a new skill in our online classes, we've got your back. Explore our collection at https://www.bsewinn.com and find exactly what you need to bring your vision to life.

