

A sewing thread sizes chart is one of those tools you'll wonder how you ever lived without. It's the secret decoder ring that matches your thread weight, fabric type, and needle size, heading off frustrating issues like skipped stitches or awful puckering before they start. Honestly, just using the right thread thickness for your fabric is half the battle for strong, clean, professional-looking seams. This guide is your new go-to reference to make every project a success, serving as a comprehensive "how-to" for making smart material choices.
Your Essential Quick Reference Sewing Thread Chart
Let's be real: navigating the world of thread sizes can feel like learning a new language. You've got Tex, Weight (Wt.), Denier... it's enough to make your head spin. A good sewing thread sizes chart cuts through all that confusion. No more guessing! At B-Sew Inn, we're all about empowering crafters through our extensive resources and support. We want to turn those tricky choices into simple, successful steps so you can create beautiful projects with your custom sewing machine designs.
Think of it like this: every project has three core building blocks—fabric, thread, and needle. This chart helps you see how they all work together.
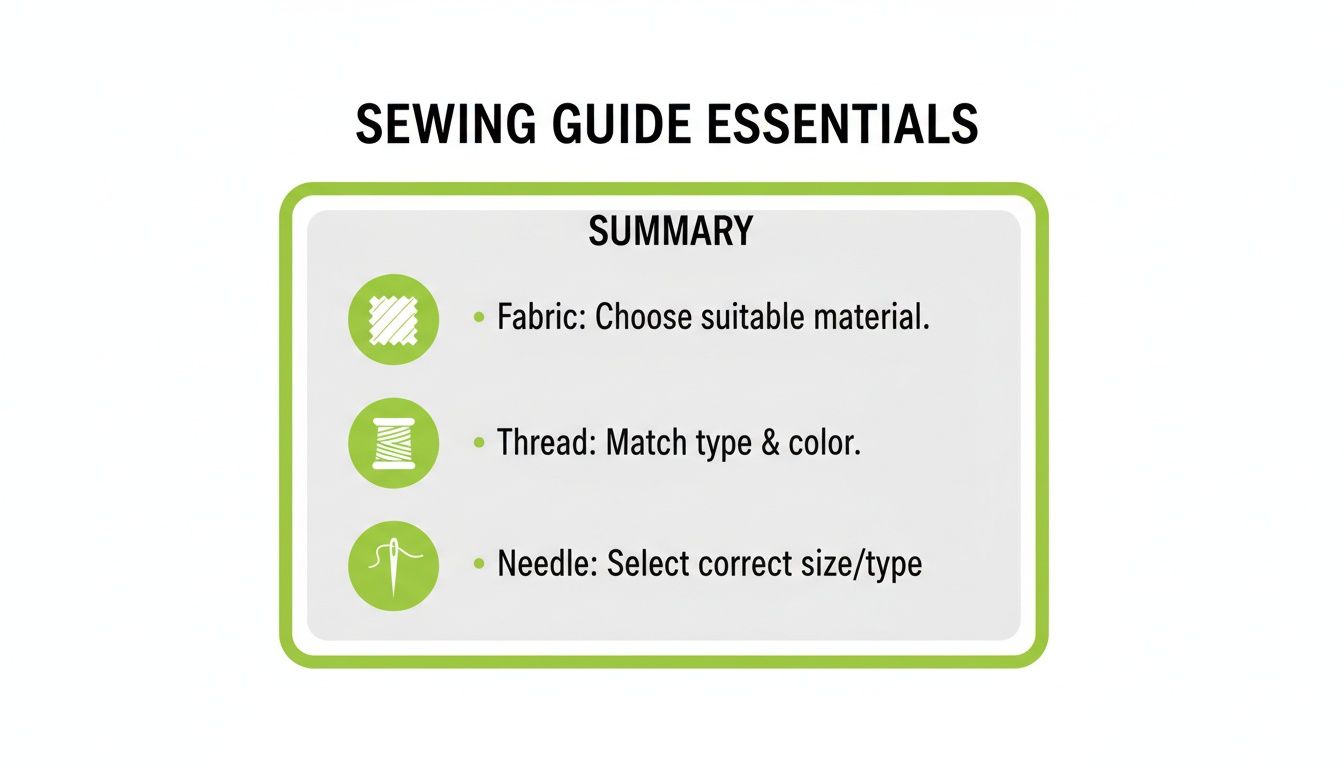
The graphic above really drives home how these three elements are completely interconnected. Get them right, and you're set up for a great sewing outcome.
Matching Your Materials for Success
This idea of matching components for a perfect result isn't unique to sewing. It’s a principle that applies to many detailed crafts. When you align all your materials correctly, you get flawless results, whether you’re stitching delicate silk or wrestling with heavy-duty canvas. It's the foundation for creating tangible examples of beautiful work that you can replicate time and again.
It's a huge market out there! The global sewing thread industry recently hit USD 3.66 billion, supplying everyone from high fashion houses to technical textile manufacturers. This massive growth means we sewists have access to incredibly specific threads.
For instance:
- Making an everyday suit? Tex 50-70 thread paired with an Nm 80/12-90/14 needle is your sweet spot.
- Working on a lightweight knit project (under 4 oz/yd²)? You’ll want a Tex 25-40 thread to prevent that dreaded puckering.
If you want to go even deeper on thread types, make sure to check out our full guide right here: https://www.bsewinn.com/blogs/inspiration/sewing-thread-size-guide.
For those of you who just want a quick cheat sheet, I've put together a simple table to get you started. It's a great jumping-off point for the most common projects we all tackle.
Quick Guide To Matching Thread Fabric And Needles
| Fabric Weight (oz/yd²) | Common Projects | Recommended Tex Size | Recommended Needle Size (Nm/Singer) |
|---|---|---|---|
| < 4 oz | Lingerie, blouses, scarves, sheer curtains | Tex 18-27 | 60/8 - 70/10 |
| 4-6 oz | Quilting cottons, shirting, light dresses | Tex 27-40 | 70/10 - 80/12 |
| 6-8 oz | Light trousers, structured shirts, home decor | Tex 40-50 | 80/12 - 90/14 |
| 8-10 oz | Denim, canvas bags, light upholstery | Tex 50-70 | 90/14 - 100/16 |
| 10-12 oz | Heavy denim, jackets, tote bags, upholstery | Tex 70-90 | 100/16 - 110/18 |
| > 12 oz | Heavy canvas, outdoor gear, leatherwork | Tex 90-135+ | 110/18 - 120/20 |
Think of this table as your starting point. As you get more experience, you'll develop a feel for what works best, but this will steer you right every time.
B-Sew Inn is committed to empowering crafters. Our custom sewing machine designs, online classes, training, and extensive resources are all here to support you, every single stitch of the way.
Understanding Different Thread Sizing Systems
To really get the hang of sewing, you have to speak the language of your materials, and thread is a big one. The numbers on a spool can look like a secret code at first, but they’re just different ways of measuring thread thickness. Getting a handle on these systems is the first step to making sense of any sewing thread sizes chart.
Think about it like this: you could measure a string in two ways. You could take a fixed length—say, 1,000 meters—and weigh it. Or, you could take a fixed weight—like one gram—and measure how much length you get. That’s the basic difference between the main sizing systems out there. Here at B-Sew Inn, we want to clear up the confusion so you can pick the perfect thread for whatever project you're dreaming up on your custom sewing machine.
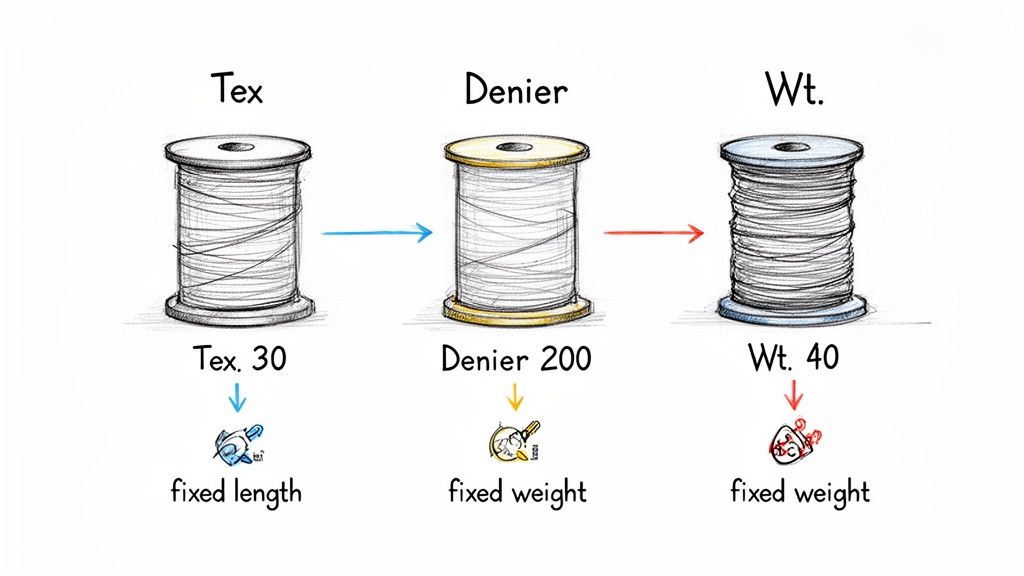
This split between fixed-length and fixed-weight systems is the key, because it tells you whether a bigger number means a thicker or thinner thread.
Fixed-Length Systems: Tex and Denier
With fixed-length systems, a specific length of thread is weighed. It's a direct measurement, which makes things pretty simple: the bigger the number, the heavier and thicker the thread. Easy peasy.
- Tex: This is the most modern system and the one used most consistently around the world. It’s simply the weight in grams of 1,000 meters of thread. So, if 1,000 meters of thread weighs 25 grams, it’s labeled Tex 25.
- Denier (D): You’ll see this one a lot with silk and synthetic filaments, especially embroidery thread. Denier is the weight in grams of 9,000 meters of thread. That means a 120D thread is way finer than a 300D thread.
Because the relationship is so direct, Tex and Denier are incredibly reliable. A Tex 40 thread from one brand should be the exact same thickness as a Tex 40 from another, which is the kind of consistency we all need in our craft room.
Fixed-Weight Systems: Weight and Number
On the flip side, fixed-weight systems measure how many hanks (a set length) of thread you need to reach a certain weight. This is an indirect system, and this is where the logic gets flipped: a higher number means a thinner thread.
This inverse relationship is probably the biggest point of confusion for sewists. Just remember that a 60 Wt. thread is actually much finer than a 30 Wt. thread, because it takes a lot more length to add up to the same weight.
- Weight (Wt.): This system is super common, especially in the quilting and embroidery worlds. It tells you how many kilometers of thread it takes to weigh one kilogram. A "40 Wt." thread means it takes 40 kilometers of that thread to weigh a single kilogram.
- Number/Ticket (No./Tkt.): Often found on threads from Europe, this system works a lot like the weight system. But, it can be based on different fixed weights and lengths depending on the material, which makes it a little less consistent to rely on.
Nailing these fundamentals is key to choosing your supplies with confidence. That's why we've packed our site with resources and online training at B-Sew Inn—to help you build that foundational knowledge for flawless results every time.
Matching Thread To Your Fabric Weight
Once you can make sense of what's written on a thread spool, the real fun begins: pairing that knowledge with your fabric stash. I've always followed one golden rule, and it's served me well: the thread should be just as strong as the fabric it's holding together, but no stronger.
It's a simple concept, but it's crucial. A thread that's too heavy can create bulky, obvious seams or even tear through delicate fabrics. On the flip side, a thread that's too light is just asking to snap under pressure. This is exactly why a good sewing thread sizes chart becomes your most trusted tool, helping you create tangible examples of excellent craftsmanship that you can replicate on any project.
Think of it as a partnership. Your thread and fabric have to work in harmony to create a seam that not only lasts but also blends seamlessly into your finished piece.
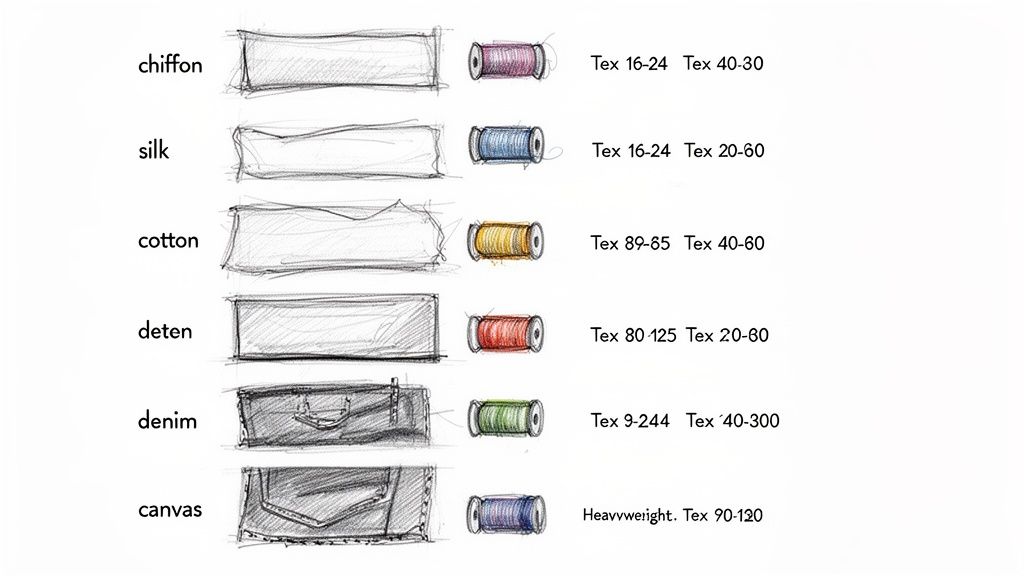
Thread Choices For Lightweight Fabrics
When you're working with those beautiful but tricky lightweight and sheer fabrics—like chiffon, organza, voile, and delicate silks—your main goal is to avoid puckering. You want to preserve that gorgeous, natural drape. For that, a fine thread is an absolute must.
- Recommended Thread Size: You'll want to reach for a Tex 16-24 (which is about a 60 Wt.).
- Why It Works: This thread is so fine it won't pull or distort the delicate fabric fibers. The result is flat, practically invisible seams that let the fabric shine.
- Project Examples: Perfect for lingerie, formal wear, sheer blouses, and elegant scarves.
Selecting Thread For Medium-Weight Fabrics
This is the category most of us sew with day-to-day. We're talking about quilting cottons, linen, chambray, and flannel. These are the workhorses of the sewing world, and they need a solid, all-purpose thread that can keep up. You're looking for something with enough strength to hold seams securely without adding any bulk. If you want to explore this more, check out our guide on the best threads for sewing various projects.
- Recommended Thread Size: A Tex 27-40 (or a 50 Wt.) is usually your sweet spot.
- Why It Works: This size gives you the perfect balance of strength and flexibility for standard garment construction and most quilting projects.
- Project Examples: Think dresses, button-up shirts, tote bags, and patchwork quilts.
Heavyweight Fabrics And Strong Thread
Now for the tough stuff. When you're tackling robust materials like denim, canvas, upholstery fabric, or even leather, seam strength is everything. These fabrics are built to take a lot of stress and abrasion, and your thread needs to be just as tough. Using a standard thread here will almost certainly lead to popped seams down the road.
This is where you really see the value in a heavy-duty thread. For a pair of jeans made from 10-14 oz/yd² denim, you need something much stronger, like a Tex 60-135 thread, to match the material's durability.
- Recommended Thread Size: Look for a heavy-duty thread in the Tex 60-135 range (around a 30 Wt. or even lower).
- Why It Works: These thicker, stronger threads create incredibly durable seams that can handle all the tension and wear you can throw at them.
- Project Examples: This is your go-to for making jeans, sturdy canvas bags, outdoor gear, and reupholstering furniture.
Pairing The Right Needle With Your Thread
Picking out the right thread is a huge step, but it’s only half the story when it comes to getting that perfect stitch. The partnership between your thread and your sewing machine needle is just as crucial, and when it’s a bad match, you’re in for a world of frustration. Honestly, getting this right is a cornerstone of any good sewing thread sizes chart.
Think of the needle’s eye like a tiny tunnel. If that tunnel is too tight for the thread, you'll get a ton of friction. That friction is what causes your thread to shred, fray, or just snap altogether. On the flip side, if the tunnel is way too big, the needle punches a hole in your fabric that's much larger than the thread filling it. The result? A sloppy-looking, unprofessional seam.
What you're aiming for is a perfect match where the thread glides effortlessly through the needle's eye with almost no resistance. This is the secret to smooth stitch formation that protects both your thread and your fabric.
Matching Thread Weight To Needle Size
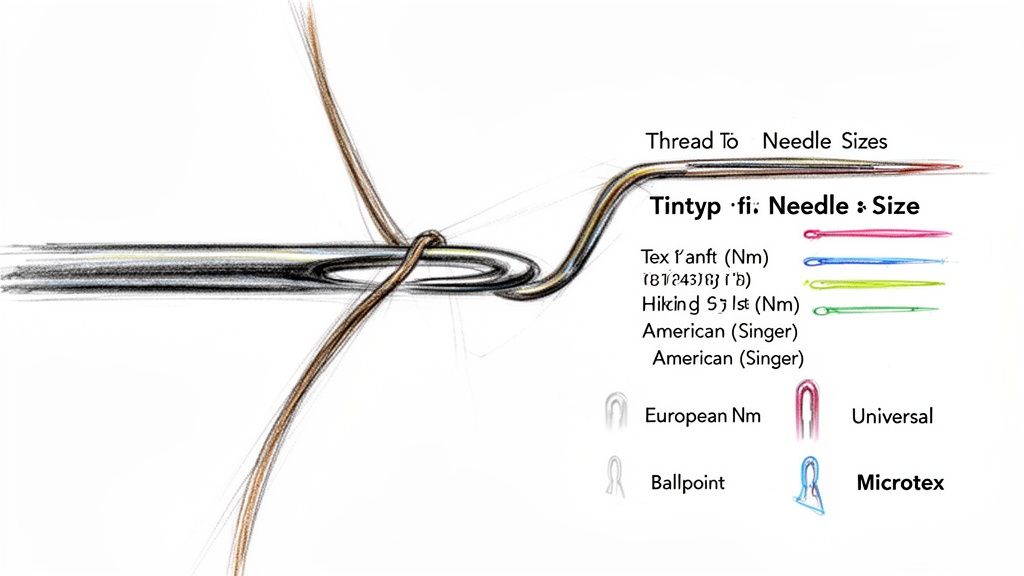
As a general rule of thumb, the needle’s eye should be about 40% larger than the diameter of your thread. You definitely don’t need to pull out a caliper to measure this! You can just rely on the tried-and-true pairings that sewers have been using forever. Needle sizes usually show two numbers, like 80/12. The first number is the European size (Nm) and the second is the American (Singer) size; in both systems, the bigger the number, the bigger the needle.
Here's a quick at-home test I love: Unthread your machine and hold a single strand of your thread at a 45-degree angle. Try to slide the needle down the thread. If it glides down smoothly on its own, you've got a great match. If it gets stuck or doesn't move at all, your needle is too small.
This little chart is a lifesaver for pairing common thread sizes with the right needle.
| Thread Size (Tex) | Thread Size (Wt.) | European Needle (Nm) | American Needle (Singer) |
|---|---|---|---|
| Tex 18-24 | 60-80 Wt. | 60 - 70 | 8 - 10 |
| Tex 27-35 | 50 Wt. | 70 - 80 | 10 - 12 |
| Tex 40-50 | 40 Wt. | 80 - 90 | 12 - 14 |
| Tex 60-70 | 30 Wt. | 90 - 100 | 14 - 16 |
| Tex 90+ | < 30 Wt. | 110 - 120 | 18 - 20 |
Considering The Needle Type
Beyond just the size, the type of needle point you use is a game-changer. A Universal needle is a solid workhorse for most woven fabrics. But if you’re working with knits, a Ballpoint needle is designed to gently push between the fibers instead of piercing them, which prevents snags and runs. For those really dense materials like denim or microfiber, a super-sharp Microtex needle is your best friend.
At B-Sew Inn, we're committed to empowering you with both the tools and the know-how to succeed. Our online classes and resources, like our deep dive into the different needles for sewing, are there to help you nail these details. When you get the supplies paired up just right, you can get those professional-looking results you’re after, no matter the project.
Putting It All Together for Professional Results
Knowing what the numbers on a sewing thread sizes chart mean is a great start, but the real magic happens when you translate that knowledge into beautiful, professional-looking projects. It’s about more than just picking a thread that matches your fabric; it's about creating a perfect harmony between your thread, needle, fabric, and machine. Here at B-Sew Inn, our whole mission is to help you do just that by providing comprehensive how-to guides and tangible examples that you can replicate.
Let's ditch the theory and see how these choices actually look in the real world. When you get the combinations right, your work transforms from "homemade" to "handmade," and you end up with something you can’t wait to show off.
Quilting a Wall Hanging
When you're working on a decorative quilting project, you want your stitches to be defined and your seams to be durable. The thread should be strong enough to hold everything together but not so overpowering that it distracts from your intricate piecing. The goal is a thread that's both tough and good-looking.
- Ideal Thread: A top-quality corespun polyester in a 40 Wt. (Tex 40-50) is a fantastic choice. You get the strength of a polyester core with the smooth, low-lint performance of a cotton wrap, which keeps your machine much happier.
- Needle Choice: Pair it with a 90/14 Quilting or Topstitch needle. These needles have a slightly rounded point that glides through multiple layers and a bigger eye that keeps your thread from shredding.
Embroidering a Denim Jacket
Embroidering on something as tough as denim is a completely different ballgame. Your thread has to be strong enough to handle the friction of high-speed stitching but also deliver vibrant color and a nice sheen. The wrong choice here leads to constant thread breaks and a whole lot of frustration.
- Ideal Thread: Go for a 40 Wt. polyester or rayon embroidery thread (Tex 27-30). This is the industry standard for decorative work because it gives you great coverage and a beautiful luster that really pops against rugged denim.
- Needle Choice: You'll want a 90/14 Embroidery needle. It’s designed with a larger eye and a special scarf that protects the thread as it forms each stitch, preventing annoying fraying and breakage.
The global demand for specialized threads just keeps climbing, with the market for clothing threads expected to grow at a 6% CAGR through 2030. For those of us crafting at B-Sew Inn, this is great news—it means better access to precise materials like corespun polyester in 2/40s (Nm 20, Tex 50), which is perfect for durable quilt seams. Big apparel makers rely on precise sizing like Tex 75-100 for denim to avoid breakage on 8-10 oz fabrics, and that’s a principle we can easily adopt at home for stronger projects. You can explore more about these market trends and how they affect the materials we get to use.
Getting these project-specific combinations right is a skill you build with practice. It’s exactly why our online classes at B-Sew Inn are built around hands-on projects. We walk you through the exact steps to master new techniques on our custom sewing machine designs, with all the support and resources you need to succeed.
Troubleshooting Common Thread And Needle Issues
We’ve all been there. Even the most seasoned sewist eventually runs into those head-scratching moments when thread starts breaking, shredding, or creating a tangled mess of loops. More often than not, the culprit is a simple mismatch between your thread, needle, and fabric. Think of these hiccups not as failures, but as your machine’s way of telling you that one of the components isn't playing nicely with the others.
Before you get too frustrated, take a deep breath and start with the basics. It's surprising how many sewing headaches can be cured by simply re-threading the machine from scratch. At B-Sew Inn, our commitment to empowering crafters includes teaching these essential troubleshooting skills. Our online classes and resources are designed to give you this exact kind of practical knowledge.
Diagnosing Common Stitching Problems
Let's break down some of the most frequent issues and what they're trying to tell you. By connecting the problem to a potential cause, you can find a solution fast using the sewing thread sizes chart and other info in this guide.
-
Shredding or Fraying Thread: This is a classic sign that your needle's eye is too small for the thread you're using. As you sew, the constant friction is literally tearing your thread to bits. The fix is usually as simple as switching to a needle with a larger eye—just make sure it’s still the right type for your fabric.
-
Skipped Stitches: If your needle just isn't forming a stitch, it could be a few things. An old, dull, or slightly bent needle is the most common cause. It could also mean the needle is too small for the thread, which stops the hook from properly catching the thread loop to form the stitch.
-
Thread Breaking: While shredding is a friction problem, a clean snap often points to a tension issue. Your top tension might just be cranked too high for the thread. Of course, a needle that’s too small can also cause the thread to snap under the stress of trying to pull it through the fabric.
Creating A Perfect Stitching Environment
When you're trying to figure out what's wrong, always check your components in a logical order. First, change your needle—it’s the most common and cheapest fix by far. Next, unthread your machine completely and re-thread it from the beginning, making sure the presser foot is up.
The ultimate goal is to create a low-friction path for your thread. A perfectly matched needle and thread combination, guided by our charts, will glide through your fabric, resulting in smooth, even, and strong stitches every single time.
Finally, adjust your tension, but only as a last resort. Make small, incremental changes and test on a scrap piece of your project fabric until the stitches on both sides look balanced. Mastering these simple diagnostic steps turns sewing frustrations into learning opportunities, helping you become a more confident and capable crafter. This commitment to practical, ongoing support is at the heart of everything we do.
Your Thread Size Questions, Answered
Even with a detailed sewing thread chart in hand, you're bound to run into questions once you sit down at your machine. The world of thread can feel a little complicated at first, but once you get a few key ideas down, it all starts to click. Let's tackle some of those common questions that pop up.
Here at B-Sew Inn, we know that being a confident crafter comes from having the right knowledge, not just the right tools. We are committed to empowering creators through our extensive resources, including our online classes and tutorials which are always there to help you turn any confusion into a finished project.
What Is The Most Common Sewing Thread Size?
If you're looking for one thread that does a lot of things well, you'll want a medium 50 Wt. thread, which is about the same as Tex 30. This is the go-to for most general, all-purpose sewing projects, making it a must-have for every sewing kit.
It hits that sweet spot between strength and fineness, perfect for a massive range of light- to medium-weight fabrics. We're talking about quilting cottons, linens, poplins, and many polyester blends. This is the thread you'll reach for again and again for dresses, shirts, and everyday mending.
Does A Higher Thread Number Mean Thicker Or Thinner?
This is a fantastic question and, honestly, one of the biggest points of confusion for sewists. The answer completely depends on which sizing system you're looking at.
- In the Weight (Wt.) system, a higher number means a thinner thread. So, a 60 Wt. thread is much finer than a 40 Wt. thread.
- In the Tex and Denier systems, it's the opposite: a higher number means a thicker thread. For example, a Tex 40 thread is quite a bit heavier and stronger than a Tex 25.
This is exactly why having a conversion chart handy is so important. It's always a good idea to glance at the spool, see which system is being used, and then you'll know exactly what you're working with.
Can I Use Embroidery Thread For Regular Sewing?
It’s tempting, especially with all those gorgeous colors, but it's really not a good idea to use embroidery thread for construction seams. Embroidery thread, whether it’s rayon or polyester, is engineered for looks—its job is to have a beautiful high sheen for decorative stitching.
It just doesn't have the strength and durability needed to hold a garment together through the stress of being worn and washed. Using it for seams will likely lead to them popping or wearing out way too fast. When you need a seam to be strong and reliable, always stick with a dedicated sewing thread.
How Do I Know If My Needle And Thread Are Mismatched?
Don't worry, your sewing machine will give you some pretty obvious clues when your needle and thread aren't getting along. Learning to read these signs is a huge part of troubleshooting.
The number one sign of a mismatch is your thread shredding, fraying, or breaking over and over. This almost always means the eye of the needle is too small for the thread, causing too much friction and literally tearing the thread apart as you sew.
You might also see other red flags like:
- Skipped stitches: This often happens when the needle is too small or dull to properly connect with the bobbin hook to form a stitch.
- Noticeable, large holes in your fabric: This is a dead giveaway that your needle is too big for the weave of your fabric.
When you get the pairing right, you’ll be rewarded with smooth, even stitches and a beautiful, pucker-free seam. Our charts are the best place to start to find that perfect match and make sure your projects turn out just right.
At B-Sew Inn, we're here for your whole creative journey. From providing the highest quality custom sewing machine designs to offering extensive online training and resources, we are committed to empowering you to achieve professional-level results you can be proud of. Take a look at our full range of products and educational opportunities to take your craft to the next level.
See how we can help your creativity flourish at https://www.bsewinn.com.

