

Stay stitching is one of those simple, foundational techniques that can absolutely make or break a garment. At its core, it's just a straight stitch sewn through a single layer of fabric, but its purpose is huge: it stops that fabric from stretching out of shape while you're handling it.
Think of it as the secret weapon for getting crisp, professional-looking seams, especially on tricky curved or angled edges like necklines, armholes, and waistlines. It's a key skill for any crafter looking to create beautiful, replicable designs with their sewing machine.
Your Essential Guide to Perfect Seams
Have you ever cut a pattern piece perfectly, only to find it's somehow warped and misshapen by the time you sit down to sew? It’s a frustratingly common problem, especially with delicate fabrics or any piece cut on the bias. The simple act of moving the fabric from the cutting mat to the sewing machine can cause it to stretch, leading to gaping necklines and uneven seams.
This is exactly why understanding what is stay stitching in sewing is a game-changer. It acts as a line of reinforcement, locking the fabric's grain in place before any distortion can ruin your project. It's a small, proactive step that ensures your pattern pieces keep their original shape all the way through construction.
By running a quick line of stitches just inside the seam allowance, you create a stable edge that holds its form. This makes the final assembly so much smoother and far more accurate.
At bsewinn.com, our commitment is to empower crafters like you. Through our custom sewing machine designs, extensive resources, and supportive online classes, we provide the tools you need to succeed. Mastering techniques like stay stitching and learning how to press seams correctly are the building blocks for creating beautiful, high-quality garments you can be truly proud of.
Why Stay Stitching Is Your Secret Weapon

So, what’s the big deal about a single, simple row of stitches? Honestly, it’s one of the biggest game-changers for getting a professional-looking finish. Think of stay stitching like a painter using masking tape to get a perfectly crisp edge. It’s a small prep step that makes a world of difference, holding everything exactly where it should be while you tackle the trickier parts of a project.
Without it, things can get stretched out—literally.
Fabric, especially along curved or bias-cut edges like necklines and armholes, is surprisingly easy to distort. Just moving a pattern piece from your cutting table to your sewing machine can be enough to stretch it out of shape. That’s because the threads of the fabric are most exposed and have the least support along those raw, cut edges.
Preserving Your Pattern's Shape
This is where stay stitching swoops in to save the day. It provides a bit of structural support right where your fabric is most vulnerable. You’ll want to sew this single line of stitches on a single layer of fabric right after you cut it out, before you do any other sewing. This simple move locks the fabric grain in place and keeps the piece in its original, perfectly cut shape.
Taking this extra minute prevents some of the most frustrating problems that can pop up later:
- Gaping necklines that just won’t lie flat, no matter how much you press them.
- Stretched-out armholes that lead to a wonky fit across the shoulders and bust.
- Wavy, rippling seams on collars, facings, or pocket openings.
This foundational technique is one of the key things that elevates your sewing from looking "homemade" to beautifully handmade. It's how you ensure your finished garment fits just like the pattern designer dreamed it would.
The Technical Details of Stay Stitching
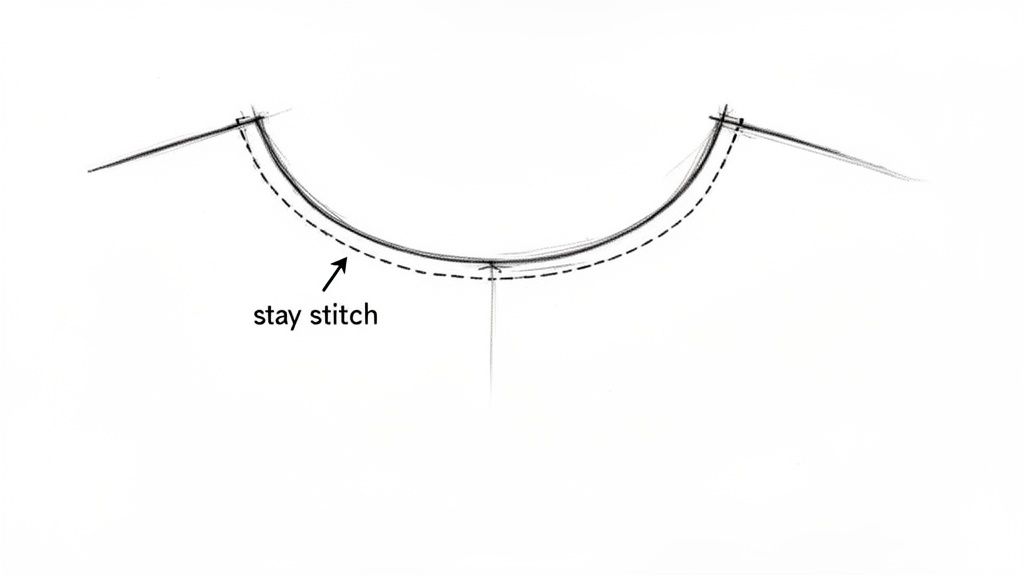
At its core, stay stitching is just a single line of straight machine stitching. You sew it on one layer of fabric, just inside the seam allowance line.
Most sewing pros recommend placing this row of stitches about 1/16" to 1/8" away from your seam line, toward the raw edge. For most commercial patterns that use a 5/8" seam allowance, this means you'll be stitching about 1/2" from the fabric's edge.
When and Where to Use Stay Stitching
Knowing the right time and place to add a line of stay stitching is one of those little secrets that makes a huge difference in your final garment. The biggest rule of thumb—and trust me on this—is to stay stitch immediately after cutting out your pattern pieces.
Seriously, do it before any other sewing, pressing, or even a lot of handling. Think of it as locking in the fabric's intended shape right from the get-go, stopping any accidental stretching before you even start the fun part of construction.
This proactive step becomes absolutely essential when you're working with certain types of fabrics that just love to misbehave and distort.
Fabrics That Need a Little Extra Support
Some materials just have a looser weave or a natural drape that makes them super vulnerable to stretching out of shape. If you're sewing with any of these, consider stay stitching your best friend:
- Lightweight Wovens: I'm talking about fabrics like voile, rayon challis, and silk crepe de chine. They can so easily warp and stretch along curved or angled edges.
- Loosely Woven Fabrics: Materials like linen, tweed, and some gauzes have more space between the threads, which gives them plenty of room to shift and stretch when you least expect it.
- Anything Cut on the Bias: This is the big one. Any piece of fabric cut at a 45-degree angle to the grainline will have a ton of natural stretch. It creates a beautiful drape, but that stretch needs to be controlled with stay stitching to keep your garment from growing. If you're just dipping your toes into these fabrics, our guide on how to sew stretch fabrics has some great tips to help you get beautiful results.
Key Garment Areas to Reinforce
While your fabric choice is a huge factor, the shape of the pattern piece is just as important. You’ll want to focus your stay stitching on any areas with curves or diagonal lines, as these are the most unstable parts of a pattern piece.
Here’s a quick cheat sheet for the most common spots that need stay stitching—tangible examples you can apply to your next sewing machine project.
Stay Stitching Quick Reference Guide
| Garment Area | Why It Needs Stay Stitching | Best For These Fabrics |
|---|---|---|
| Necklines | Prevents gaping and makes sure the neckline lays flat and smooth against your body. | Voile, Rayon, Linen, Bias-Cut Silks |
| Armholes | Stops the armscye from stretching out, which can throw off your sleeve fit entirely. | Most Wovens, especially Lightweight Cottons |
| Princess Seams | Supports those long, curved seams that go over the bust, giving you a smooth, contoured fit. | Tweed, Poplin, Wool Crepe |
| Slanted Pockets | Keeps pocket openings from sagging or looking distorted after a few wears. | Denim, Twill, Linen Blends |
| V-Necks | Reinforces the sharp point of the "V" to keep it crisp and prevent any rippling. | All Wovens, from Cotton to Silk |
Pinning this little guide near your cutting table can be a great reminder. Getting into the habit of stay stitching these key areas will honestly level up your sewing and save you a lot of headaches down the road.
A Step-by-Step Guide to Perfect Stay Stitching
Alright, let's put this technique into practice. Getting the hang of stay stitching is a lot easier than you might think once you break it down into a few simple moves. This comprehensive how-to guide will walk you through the whole process, step-by-step, to make sure your curved and angled edges stay perfectly stable and true to your pattern.
Before you even touch your fabric, we need to get your sewing machine set up just right. The good news is you don't need any fancy stitches for this—a good old straight stitch is all it takes. The real trick is getting the stitch length correct to provide support without causing any distortion.
Prepping Your Machine and Fabric
Getting the stitch length right is your crucial first step. You might be tempted to use a really short, tight stitch for strength, but that can actually work against you. My experience, and that of many sewing educators, shows that a regular stitch length of about 2.0–3.0 mm is the sweet spot. This gives you plenty of stability without pulling too much on the thread, which can cause annoying puckers on more delicate fabrics.
With your machine set, grab your fabric piece. And remember, this is important: stay stitching is always done on a single layer of fabric. You want to do this right after you cut your pieces out, before you sew any other seams. It's all about locking that shape in from the very beginning.
The Stay Stitching Process
Follow these steps, and you'll be stay stitching like a pro in no time. The goal is simple: create a line of stitches just inside your seam allowance. This is key because it means your stay stitching will be completely hidden inside the finished garment.
-
Find Your Seam Allowance: Most patterns use a 5/8" (1.5 cm) seam allowance. You'll want to place your stay stitching about 1/8" (0.3 cm) inside this line, meaning closer to the raw edge. So, you'll be sewing roughly 1/2" (1.2 cm) away from the fabric's edge.
-
Stitch in the Right Direction: This really matters! To keep the fabric from stretching while you sew, always stitch from a wider point toward a narrower one, or from the highest point down. On a neckline, for example, that means stitching from each shoulder down toward the center front.
-
Sew a Gentle Line: Guide the fabric smoothly under the needle. Don't pull or stretch it—let the machine do all the work. Here’s a big difference from regular sewing: do not backstitch at the start or finish. Backstitching can create a little knot of thread that adds unnecessary bulk to your seam allowance.
This little map gives you a great visual of the key places where stay stitching works its magic: necklines, armholes, and pockets.
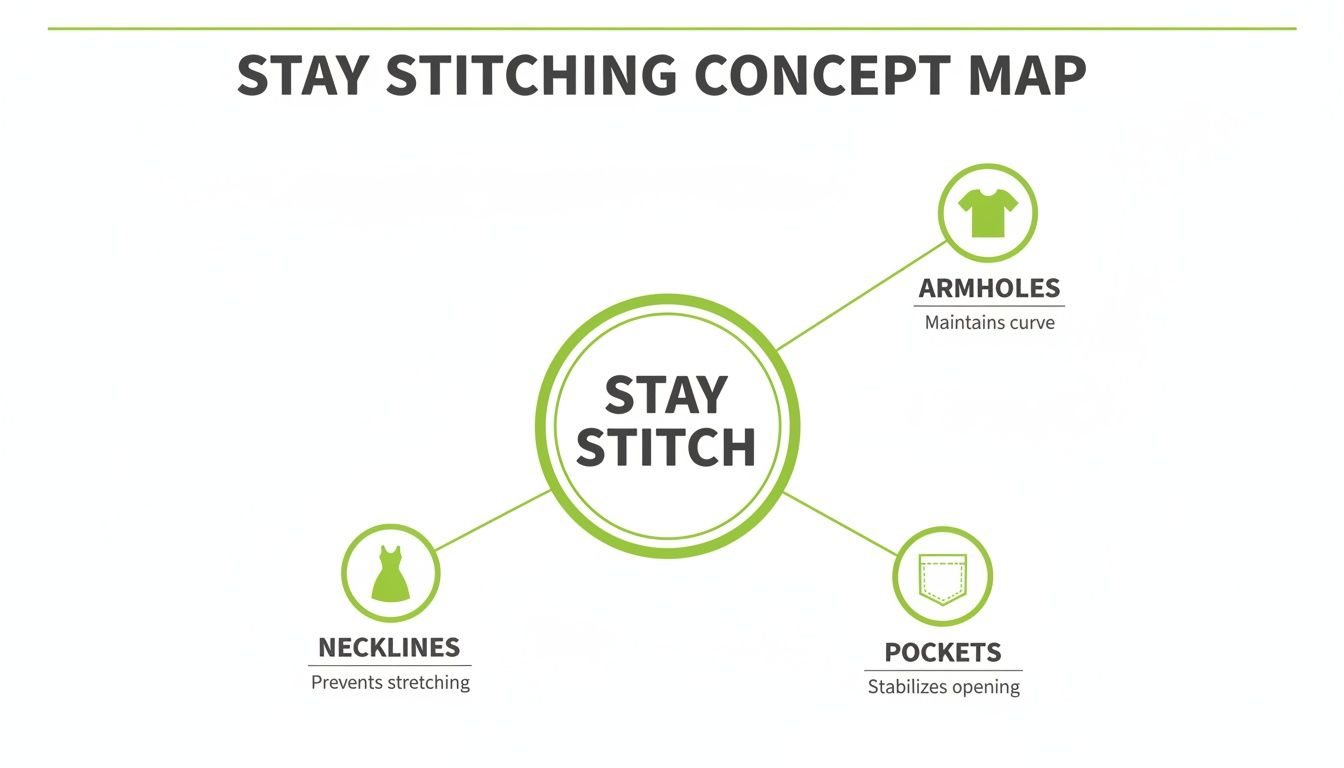
As you can see, it's a foundational technique for adding structure to the most vulnerable parts of a garment.
Of course, having a machine that handles this kind of precision work beautifully, like one of our custom-designed B-Sew Inn models, makes it even more of a breeze. It's also easy to mix this up with similar-sounding stitches. If you want to learn more about temporary stitches, check out our guide on the basting stitch for your sewing machine.
Common Mistakes and How to Fix Them

Even with a simple technique like stay stitching, it’s easy to make a few little mistakes that can throw off your whole project. Knowing what to watch out for ahead of time can save you a world of frustration and make sure your stitches do their job perfectly.
One of the biggest culprits is accidentally stretching the fabric as you sew. It’s so tempting to push or pull it through the machine, but you have to resist! Always let the feed dogs do the work. If you notice the edge is already looking a little wavy, just give it a gentle press to get it back into shape before you start stitching. This tiny step makes a huge difference.
Another common slip-up is stitching right on the seam line. Remember, your stay stitching needs to be tucked away just inside the seam allowance. A good rule of thumb is to sew about 1/8 inch away from your final seam line. That way, it’ll be completely invisible when your garment is finished.
Troubleshooting Your Stitches
Using the wrong stitch length can also cause some headaches. If your stitches are too short, they can create tension and make the fabric pucker. On the flip side, stitches that are too long won’t give you the stability you need. I’ve found that sticking to a standard length of 2.0-2.5 mm usually gives the best results.
And if you do make a mistake? Don't panic! We've all been there. Just grab your seam ripper and carefully pick out the stitches. Take it slow, especially with delicate fabrics, so you don’t snag the material.
It's really important not to get stay stitching mixed up with other techniques. Basting uses long, temporary stitches just to hold layers together, while stay stitching is a permanent, stabilizing stitch on a single layer of fabric. They have totally different jobs and you can't swap one for the other.
At bsewinn.com, we are dedicated to supporting crafters by providing extensive resources and training to help avoid these common pitfalls. Our custom sewing machine designs and expert guidance are here to make your creative time more successful and enjoyable.
Your Stay Stitching Questions, Answered
Let's tackle some of the questions I hear all the time about stay stitching. Once you get these details down, you'll feel much more confident using this skill to make sure your next project turns out just right.
Do I Really Need to Stay Stitch Every Curved Edge?
While you don't need to stitch every single edge on a project, I strongly recommend it for any curved or angled cut on woven fabric—especially necklines and armholes that get handled a lot during sewing. If you're using a very stable fabric like quilting cotton on a perfectly straight grain, you can probably get away with skipping it.
But honestly, it’s such a quick, easy step that prevents major headaches and fit problems down the road. I like to think of it as a cheap insurance policy for my garment's final shape. It’s a best practice that really elevates your sewing to a more professional level.
What Is the Difference Between Stay Stitching and Basting?
This is such a great question because it's easy to get these two mixed up! The key difference is their purpose and permanence. Stay stitching is permanent. It's a single line of stitching on one layer of fabric, done with a regular stitch length, and its only job is to stop that fabric from stretching out.
Basting, on the other hand, is always temporary. It uses a long stitch length to hold two or more pieces of fabric together while you work, maybe for a fitting or to wrangle a tricky seam. You always pull out basting stitches later, but your stay stitching stays put, hidden forever inside the seam allowance where it keeps doing its job.
Think of it this way: Stay stitching is for stabilization, while basting is for temporary placement. One becomes part of the garment's structure, and the other is a tool you remove when you're done with it.
Should I Remove Stay Stitching When the Garment Is Finished?
Nope, never! Since you sew the stay stitching just inside the seam allowance (usually about 1/8" from your main seam line), it gets completely enclosed within the seam once you've sewn everything together. It continues to provide support to that vulnerable edge and does zero harm by staying right where it is.
Can I Use a Serger for Stay Stitching?
I really wouldn't recommend it. A serger stitch is designed to have some stretch, which is the opposite of what you want for stabilizing a curve. A standard lockstitch from your sewing machine provides that firm, no-stretch support you need.
Plus, a serger's blade trims the fabric edge as it sews, and you definitely want to keep your full seam allowance intact at this stage. Your regular sewing machine with a simple straight stitch is absolutely the best tool for this job.
Nailing foundational skills like this is the secret to creating beautiful clothes that last. Here at B-Sew Inn, we are committed to empowering crafters on their sewing journey. We provide support through our custom sewing machine designs, tons of resources, and expert-led online classes designed to help you create tangible designs you can replicate with total confidence.
Come see our full range of machines and supplies at https://www.bsewinn.com and let us help you take your craft to the next level.

