

A quilter can choose log cabin blocks, cut a stack of fabric, and still be unsure what the finished quilt should look like. A compact repeatable design may suit a first machine-piecing project, while a larger statement quilt demands a different plan for block size, fabric placement, borders, quilting, and finishing.
The best quilting patterns for log cabin blocks match the maker's piecing confidence with the fabric's behavior and the intended scale. Straight layouts offer dependable structure. Angled, nested, offset, medallion, and specialty-fabric variations reward more deliberate planning. A 1/4-inch presser foot, accurate rotary cutting tools, consistent thread, and a machine that feeds layered fabric evenly make every version more predictable.
A finished block can be small and precise or large enough to anchor an entire room. Published patterns show finished log cabin blocks ranging from compact formats to larger repeatable modules, including 6-inch, 9-inch, 12-inch, 14-inch, and 18-inch examples (Quilted Haven pattern references, Portland Community College pattern, AllPeopleQuilt modern log cabin). B-Sew Inn's stores, product selection, in-person classes, and service department give quilters a practical place to test equipment and refine a finishing plan.
Table of Contents
- 1. Classic Straight Log Cabin
- 2. Courthouse Steps
- 3. Pineapple Log Cabin
- 4. Asymmetrical Log Cabin
- 5. Double Log Cabin
- 6. Offset Log Cabin
- 7. Log Cabin Medallion
- 8. Log Cabin Sparkle
- 8-Pattern Log Cabin Quilt Comparison
- Turn a Pattern Choice Into a Finished Quilt
1. Classic Straight Log Cabin
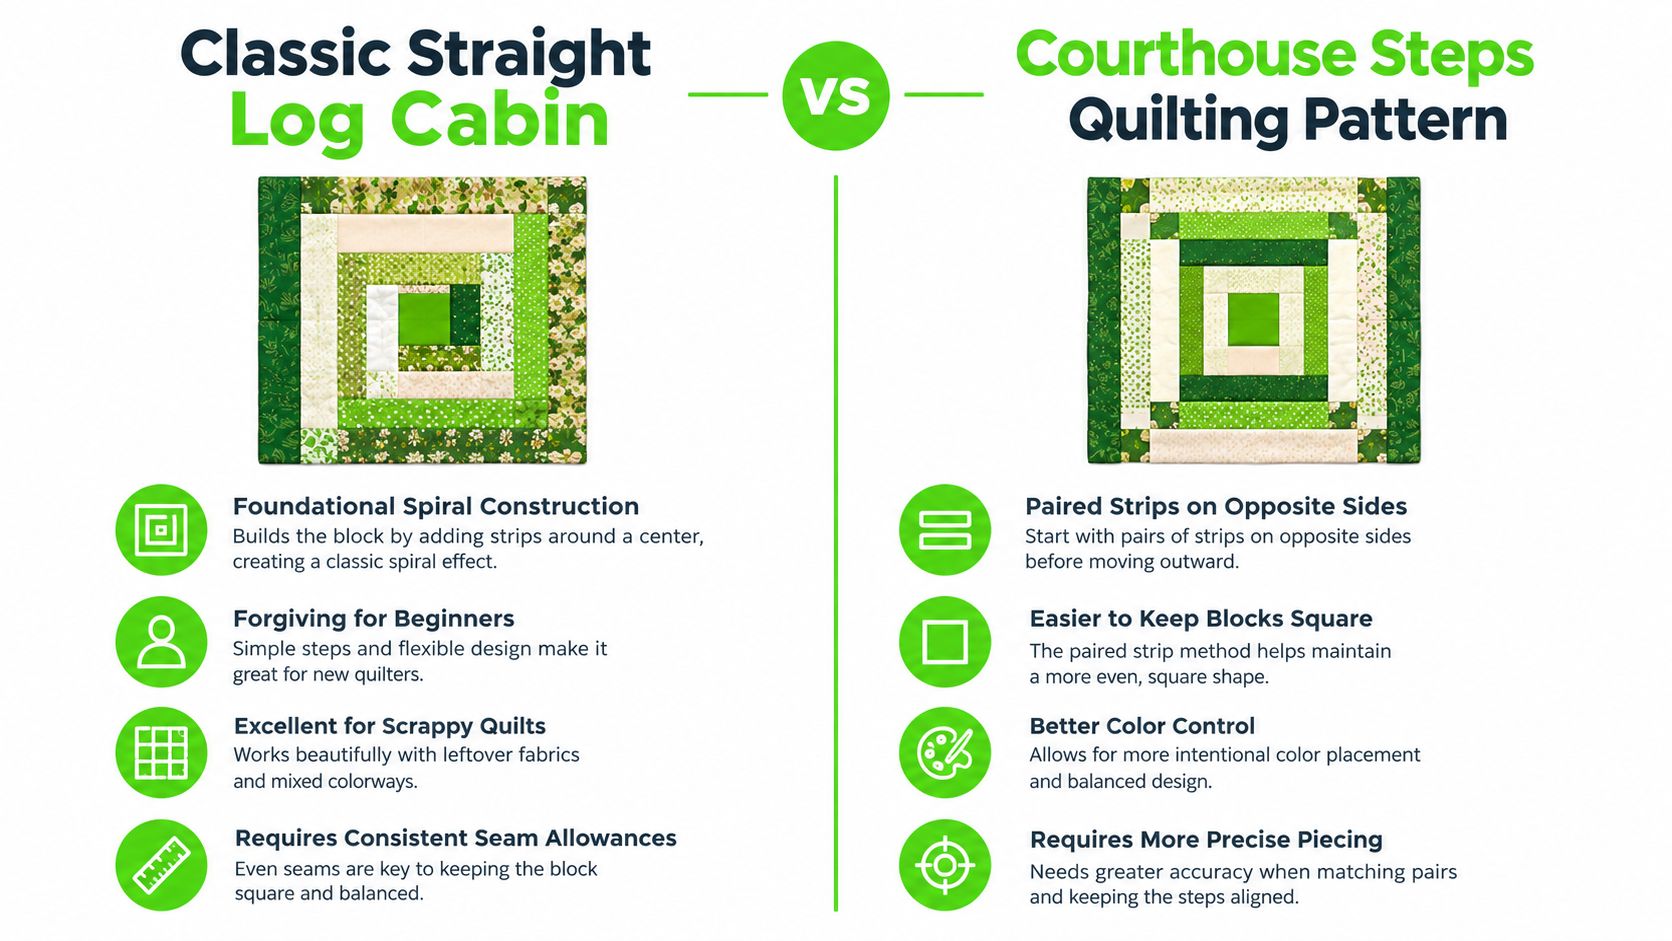
The classic straight log cabin is the clearest starting point. A center square anchors narrow fabric strips, or “logs,” that grow outward in a clockwise or counterclockwise spiral. Each new strip shares an edge with the developing block, producing concentric rectangular frames and a familiar stair-step effect.
Traditional construction uses a consistent 1/4-inch seam allowance. One tutorial describes an 8-inch traditional block beginning with a 2.5-inch center square (Create Whimsy's log cabin tutorial). Another published chart uses a 1.5-inch center square with 1-inch strips for a finished 4-inch block, while a 12-inch block uses a 3.5-inch center square with 2-inch strips (SewCanShe's log cabin pattern). These differences show why a quilter should follow one cutting chart from beginning to end rather than combine measurements from separate patterns.
Fabric placement creates the movement
Dark strips on one side and light strips on the other can produce the high-contrast look associated with Amish-inspired quilts. Scrappy prints create a livelier surface, while repurposed clothing fabrics connect the block to the pattern's history of textile reuse. A red center can also carry the traditional hearth symbolism often associated with log cabin quilts (American Quilter's log cabin history).
A rotary cutter, quilting ruler, cutting mat, and walking foot make the most difference at the machine. The walking foot helps feed the growing block evenly, while pressing after each addition prevents accumulated distortion. For accurate measuring and squaring, quilters can review how to use quilting rulers.
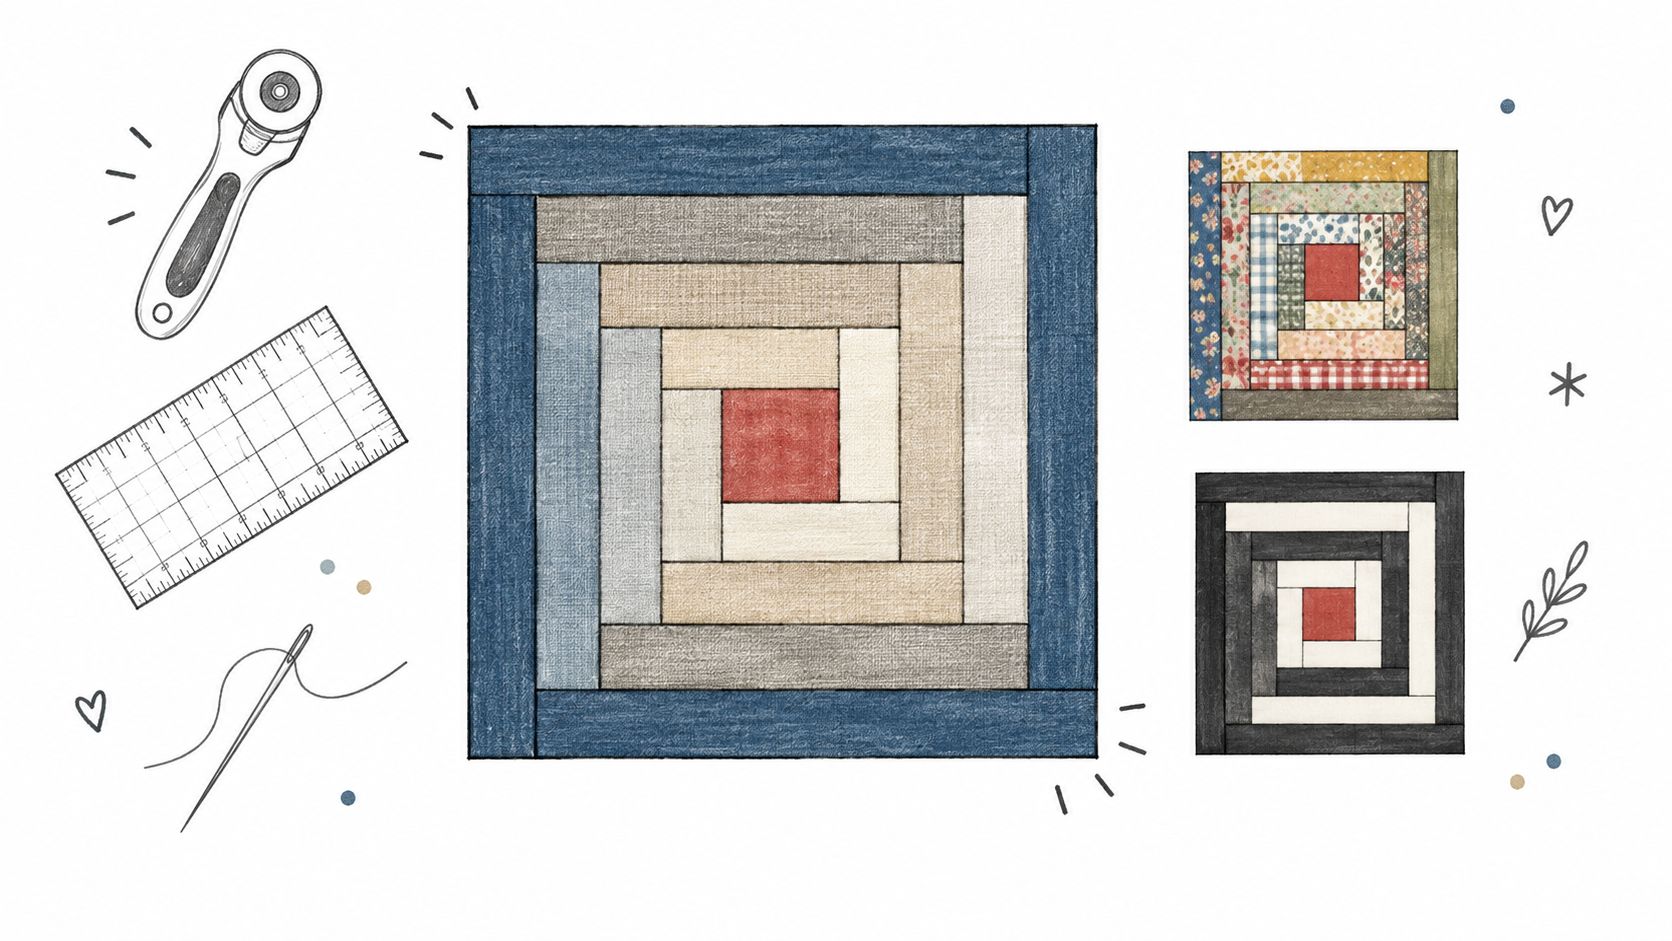
Practical rule: Keep the strip width, pressing direction, and stitching order consistent until the block is complete. Small errors become more visible as the frames expand.
2. Courthouse Steps
Courthouse Steps uses the same center-outward logic but replaces the continuous spiral with pairs of strips sewn on opposite sides. That decision gives the block a more architectural appearance, with balanced horizontal and vertical frames rather than a directional staircase.
This pattern works particularly well when fabric placement needs to stay controlled. An ombré progression can move from pale strips near the center to deep strips at the edges. A red, white, and blue arrangement can create a structured patriotic effect, while a two-tone design can place light fabric on one axis and dark fabric on the other.
Accuracy comes from working in pairs
Cutting all strips for each round before sewing reduces the chance of reversing the intended placement. After each pair is added, pressing toward the outer edge keeps the block open and makes the next seam easier to handle. Spray starch can help stabilize soft fabric, although it should be tested first on a scrap because some fabrics respond differently to moisture and heat.
The machine setup benefits from both a 1/4-inch presser foot and a walking foot. The 1/4-inch foot establishes the seam, while the walking foot helps prevent the long paired strips from shifting. A quilter should check the block after every pair instead of waiting until the final round. Guidance on how to square up quilt blocks is useful when the block begins to bow or lose its intended proportions.
A courthouse steps block suits a quilter who wants a calm, repeatable layout with clear value control. It's often easier to plan than a scrappy spiral because each side has a defined job. The trade-off is that irregular placement stands out quickly, so accurate cutting matters more than it does in a deliberately wonky design.
3. Pineapple Log Cabin
Pineapple log cabins build diagonal geometry around a central square. Their strips usually follow 45-degree angles, producing a crosshatched surface and strong secondary patterns when blocks meet. The design suits projects where the finished quilt should look intricate, even with a restrained fabric palette.
Plan the scale before cutting. Narrow strips create a compact, detailed block with more seams, while wider strips produce a larger, clearer motif and reduce the number of rounds. Two-tone fabrics make the diagonal structure easy to read. Rainbow placement emphasizes movement from the center outward, while small traditional prints support a dense, Victorian-inspired effect. Contrast matters more than print style if the points need to remain visible.
Foundation paper piecing controls the angles
Foundation paper piecing provides numbered sections and printed seam lines, which helps keep repeated diagonals aligned. It is a practical choice for a first pineapple block because the paper records the construction order while you work. Compact 4-inch to 6-inch practice formats are documented in this foundation paper piecing pattern guide, making it easier to test fabric value and machine settings before committing to a larger quilt.
Cut strips slightly wider than the finished sections when the pattern permits. Sew, press, and trim after each section so the next angle has a reliable edge. A shorter stitch length perforates the paper cleanly, but it can make thread removal harder if set too short. Replace a dull needle, and reduce presser-foot pressure if the paper drags beneath the foot.
Keep the paper attached while joining the blocks or assembling the quilt top. Remove it afterward along the perforated seams, taking care not to stretch the bias edges. A 1/4-inch presser foot, accurate needle position, and a flat pressing surface support cleaner points. For finishing, stabilize the completed top with suitable batting before quilting, since dense seam intersections can add bulk and affect how the quilt feeds through the machine.
4. Asymmetrical Log Cabin
Asymmetrical log cabins keep the essential center-and-strip construction but abandon equal visual weight. One side may use wide neutral strips, while the other carries narrow accent pieces. Strip widths can vary, and color can be concentrated on one half to create a gradual shift rather than a centered frame.
This variation suits modern minimalist quilts and expressive scrap projects equally well. A neutral field with a small amount of saturated color can look deliberate and gallery-like. A collection of random prints can feel energetic, particularly when blocks are rotated so the color movement travels across the quilt instead of repeating in a predictable direction.
Design before cutting
A quick sketch or digital arrangement prevents an experimental idea from becoming a pile of unrelated strips. A design wall is especially valuable because the effect often changes when blocks are placed beside one another. Directional prints should be handled intentionally, while non-directional prints can provide visual relief around them.
Cutting widths such as 1-inch, 1.5-inch, and 2-inch strips creates obvious variation, but the exact mix should follow the desired finished scale. Wider strips make a block grow quickly and keep the design readable from a distance. Narrow strips add texture but create more seams and more opportunities for the block to drift out of square.
The color wheel can help separate warm and cool fabrics, identify an accent color, or prevent a scrappy palette from becoming visually flat. B-Sew Inn's resource on the quilting color wheel supports that planning stage. A modern quilt design class at a B-Sew Inn store can also help a quilter refine composition before cutting expensive fabric.
A walking foot remains useful, but asymmetry places more emphasis on design-wall decisions than on specialized machine features. Pressing after each addition keeps the block serviceable without forcing every irregularity into perfect symmetry.
5. Double Log Cabin
A double log cabin nests one spiral inside another. The inner section may be completed first and then surrounded by a second set of logs, or the color plan may create two distinct spirals that meet within one block. The result has more depth than a standard block because the eye reads two centers and two directions of movement.
Warm inner strips surrounded by cool outer strips make the nested structure easy to see. A solid inner spiral with printed outer logs produces a different balance, with the center acting as a quiet architectural core. A gradual color transition can soften the boundary between the two sections, but it also demands careful value selection.
Nesting requires disciplined pressing
The inner block must be squared before the outer spiral begins. If the first section is slightly tilted, the second section magnifies the problem. A 2-inch center square provides a practical starting scale for the innermost area when the surrounding strips need room to remain visible.
Precision cutting and a design wall are more important here than improvisation. The quilter should label strip sets, keep the sewing order visible, and press after every addition. A 1/4-inch foot supports seam consistency, while a walking foot helps control the increased bulk as the block expands. A machine with adjustable presser-foot pressure can be useful when the outer rounds become dense.
Rotary cutting must remain accurate even if the color arrangement is adventurous. B-Sew Inn's guide to how to use a rotary cutter can help quilters review blade handling, ruler placement, and safe cutting habits before preparing multiple strip sets.
This pattern belongs to the intermediate or advanced end of the list because it combines ordinary log cabin seams with a demanding visual sequence. An advanced piecing class can help with nesting, pressing, and block correction before the quilter commits to a full set of repeated units.
6. Offset Log Cabin
The offset, or wonky, log cabin uses irregularity as a design feature. Strips may lean slightly, vary in width, or meet the center at uneven angles. The finished block can look primitive, playful, or contemporary, depending on the fabrics and how much squaring the maker allows.
A small center square makes the irregularity more noticeable. Centers in the 1-inch to 1.5-inch range can create a lively focal point, while larger centers produce a calmer, more graphic result. Reproduction fabrics associated with historical styles support a folk-art mood. Solids paired with bold modern prints make the same technique feel current, and mismatched scraps preserve the charm of a utility quilt.
Let the design guide the correction
A strict cutting chart isn't the purpose here. Strips can be cut by eye or in varying widths, then sewn slightly off angle. The key is intentional variation. Random mistakes can look accidental, but a controlled range of angles and colors gives the quilt a coherent personality.
A rotary cutter still has a role, even without rigid measurement. Loose cutting can create the irregular edges, while a ruler can trim only the most disruptive areas. Blocks don't need to be forced into identical dimensions immediately. Arrange them on a design wall first, then decide whether a small amount of trimming will help the final assembly.
Wonky piecing should feel relaxed, not careless. The maker still controls the palette, seam security, and overall balance.
A standard sewing machine with a reliable feed system is sufficient. A walking foot can help when uneven edges create shifting layers, but excessive correction defeats the style. Pressing remains worthwhile because flat seams make the blocks easier to join, even when the outer shapes stay organic.
This is a good choice for fabric collections that are too varied for a formal value plan. It's also a sensible way to use strips left from other projects, provided the fabric weights are reasonably compatible.
7. Log Cabin Medallion
A log cabin medallion builds from the center outward, so the finished quilt reads as one coordinated composition rather than a field of repeated blocks. The center can be a single log cabin block, a feature fabric square, or a small pieced unit. Each surrounding border adds size and changes the visual emphasis, making this variation suited to statement quilts and larger finished scales.
Construction difficulty depends on the center and border arrangement. A simple square center with straight, even borders is manageable for an intermediate quilter. Multiple pieced rounds, narrow strips, or mitered borders demand more accurate cutting and joining. Coordinated solids create a traditional progression, while geometric prints in graduating scales can give the medallion an Art Deco direction. Romantic fabrics and increasingly decorative borders produce a softer result.
Plan the borders before cutting
Sketch the quilt to scale and record the finished width of every round. Check each border unit for square corners before attaching the next one. A rotary cutter, a reliable ruler, and a large cutting mat support consistent strip widths. Press each border unit flat, then measure the center before joining it, since excess length can create waviness.
Arrange the fabrics around the center on a design wall. A strong print may look balanced in a single square but overwhelm the design when repeated on all four sides. Place fabrics in their intended order, check value from a distance, and align the grain on long borders. Measured joins matter more as the medallion grows.
Machine capability also affects the plan. A standard sewing machine with a consistent feed system handles the piecing, while a walking foot can help manage long seams during quilting. A large top may be easier to finish with long-arm quilting, particularly when repeated borders need steady quilting movement. The Portland Community College log cabin pattern documents a large-format example with 14-inch finished blocks, a 14.5-inch unfinished size, a 6 by 6 block layout, borders, and an approximately 98 by 98-inch quilt.
An in-person B-Sew Inn class can provide guidance on medallion construction and border techniques. The store team can also discuss long-arm options and finishing support before the quilt top is complete.
8. Log Cabin Sparkle
Log cabin sparkle uses metallic, glitter, foil, or lamé strips as controlled accents within an otherwise familiar block. The construction remains recognizable, but reflective surfaces catch light along the frames. A small amount of shimmer can define the center and directional movement without making the entire quilt visually noisy.
Holiday quilts often pair gold or silver accents with deep solids. White-on-white fabrics with silver sparkle can suit a wedding quilt, while black and silver strips can create sharp shadow-like geometry. Specialty fabrics should be treated as design accents first and structural materials second. Too many slippery or heavily coated strips can make pressing and feeding difficult.
Specialty fabric needs a test block
A size 80/12 metallic needle is a practical starting point for metallic work, but the correct needle depends on the fabric and thread combination. Polyester thread can provide strength and a smooth appearance. A walking foot helps feed the strips evenly, and reduced presser-foot pressure can limit stretching on delicate surfaces.
A scrap test should check tension, stitch length, needle penetration, and puckering before the quilt strips are cut. Some metallic fabrics benefit from stabilizer on the wrong side, especially when the surface is loosely woven or prone to distortion. Heat should also be tested because foil and coated surfaces may react poorly to excessive pressing.
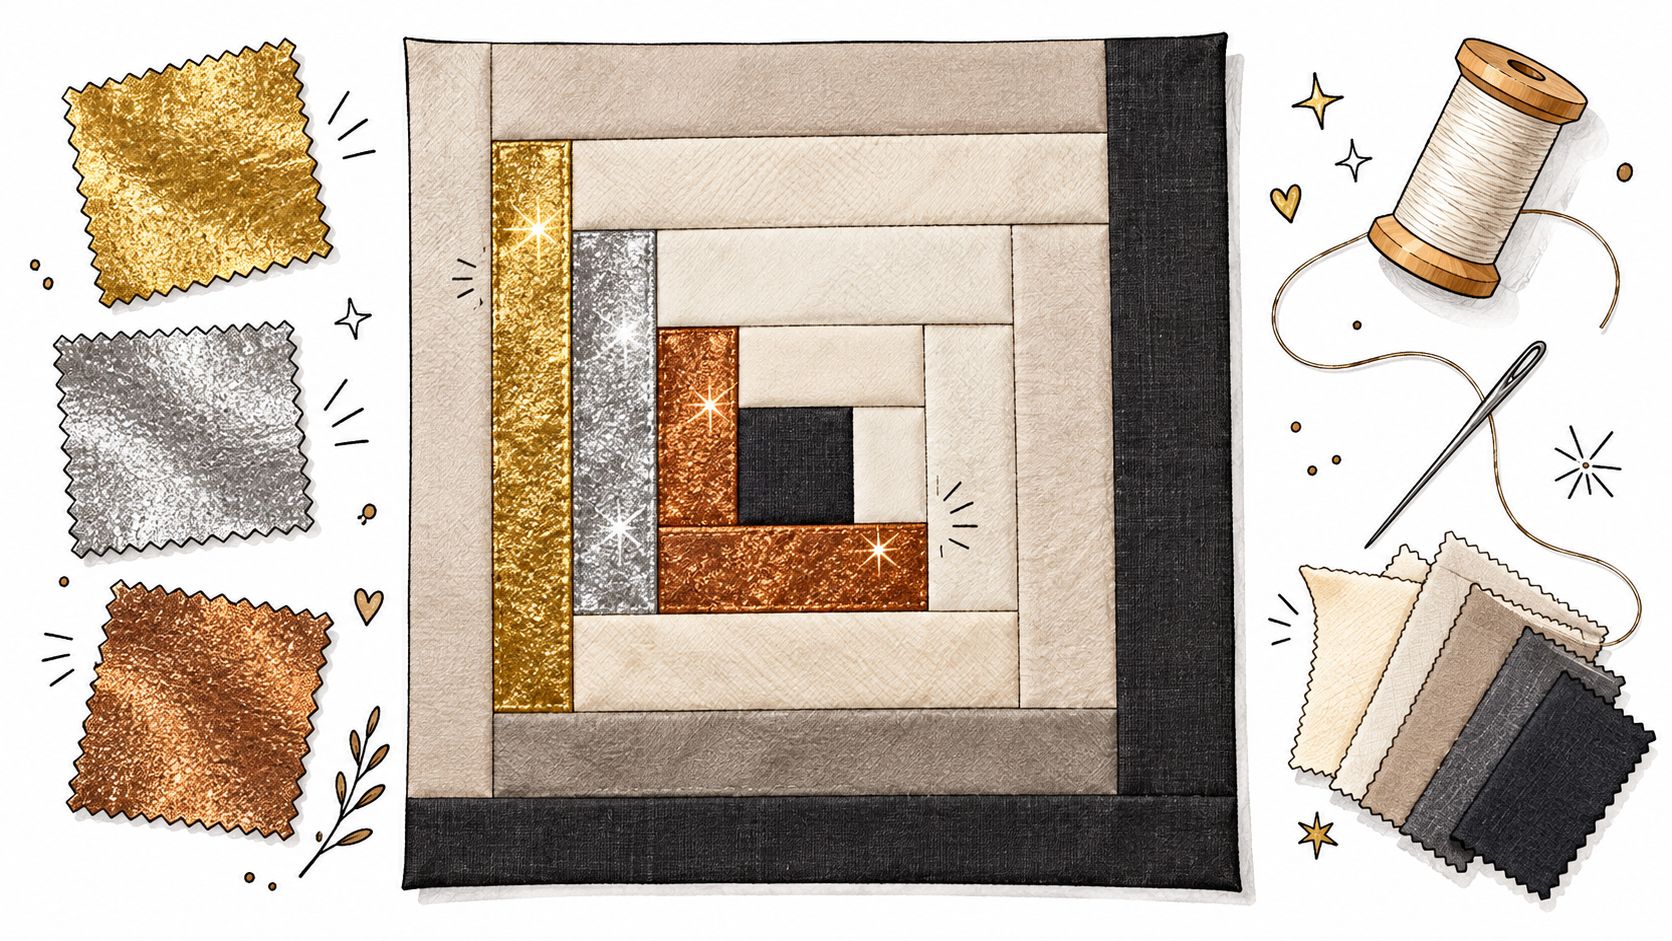
Machine settings vary, so B-Sew Inn staff can help match a needle, foot, thread, and pressure adjustment to the specific machine model. A machine with dependable feeding and adjustable settings is more valuable here than a long list of decorative stitches. For an embellished finish, the right stabilizer and careful pressing matter as much as the sewing speed.
8-Pattern Log Cabin Quilt Comparison
| Pattern | Implementation Complexity 🔄 | Resource Requirements ⚡ | Expected Outcomes 📊 | Ideal Use Cases ⭐ | Practical Tips 💡 |
|---|---|---|---|---|---|
| Classic Straight Log Cabin | Low, simple spiral seaming; beginner-friendly | Moderate, quilting cotton, rotary tools, 1/4" foot, moderate time | ⭐⭐⭐⭐, Clean geometric movement; versatile scale | Learning, scrappy quilts, traditional or modern projects | Maintain a consistent 1/4" seam; press as you go; use a walking foot |
| Courthouse Steps | Moderate, paired strips require sequence and precision | Moderate, pre-cut strips per round, spray starch, walking/1/4" foot | ⭐⭐⭐⭐, Crisp rectangular frames; strong architectural look | Ombre or directional fabrics, precision-focused quilts | Cut strips for each round first; press seams outward; check block size often |
| Pineapple Log Cabin | High, diagonal seams and intersecting points; often paper-pieced | High, more fabric, foundation paper, angled rulers, extra time | ⭐⭐⭐⭐⭐, Highly dynamic; creates striking secondary patterns | Advanced projects, gallery quilts, color-play statements | Use foundation paper piecing for accuracy; trim after piecing; practice on small blocks |
| Asymmetrical Log Cabin | Moderate, design decisions on strip widths and balance | Low–Moderate, assorted scraps, design wall, varied threads | ⭐⭐⭐, Modern, unique, conceals minor errors | Contemporary designs, scrap-busting, one-of-a-kind quilts | Sketch layout first; vary strip widths (1"–2"); use a design wall to preview |
| Double Log Cabin | High, nested spirals demand precise alignment | High, larger blocks, more fabric, precision rulers, time-consuming | ⭐⭐⭐⭐⭐, Deep dimensionality; sophisticated visual complexity | Showpieces, advanced color-contrast quilts, gallery work | Finish inner cabin before outer; press meticulously; use precision feet |
| Offset / Wonky Log Cabin | Low, intentionally imperfect, relaxed technique | Low, scraps acceptable, minimal planning, fast construction | ⭐⭐, Rustic, folk-art charm; casual aesthetic | Beginner projects, primitive or modern-wonky quilts, scrap quilts | Cut strips by eye; embrace size variation; trim minimally to keep organic feel |
| Log Cabin Medallion | High, center-out construction at large scale; careful planning | Very High, extensive yardage, large rulers, long-arm finishing, big workspace | ⭐⭐⭐⭐, Strong focal point; formal, dramatic display quilts | Bed quilts, focal-point designs, showcasing special center fabrics | Sketch to scale; plan border widths; use a large design wall and long-arm finishing |
| Log Cabin Sparkle (Metallic) | Moderate–High, specialty fabrics require careful handling | High, metallic/glitter fabrics, metallic needles, stabilizer, polyester thread | ⭐⭐⭐⭐, Eye-catching, contemporary shimmer and dimension | Holiday or celebratory quilts, modern art quilts, evening-themed pieces | Use metallic needles (80/12), reduce presser pressure, test tensions, use stabilizer |
Turn a Pattern Choice Into a Finished Quilt
The right log cabin pattern depends on what the quilt needs to become. A first project usually benefits from Classic Straight Log Cabin or Courthouse Steps, where consistent strip widths and clear value placement make errors easier to identify. These patterns also scale well, from compact blocks to larger repeatable layouts. The published cutting references show how center-square size, strip width, and round count affect the finished block, so a quilter should select one chart and keep its measurements together (Quilted Haven block chart).
Pineapple and Double Log Cabin are better choices when the maker wants precision practice. Pineapple adds diagonal points and foundation paper piecing, while Double Log Cabin demands careful nesting and pressing. Neither pattern rewards rushing. A dependable quarter-inch foot, sharp rotary blade, accurate ruler, suitable thread, and a machine that feeds multiple layers evenly will reduce frustration, but those tools won't replace a clear cutting plan.
Asymmetrical and Offset Log Cabin designs offer more freedom. They're useful for modern palettes, scraps, and fabrics that don't fit a strict light-and-dark division. Their flexibility still needs editing. A design wall helps the quilter decide which blocks belong together before the rows are sewn.
Medallions and metallic variations call for a more specialized finish. A medallion may need a large-format design wall, careful border measurement, and long-arm quilting support. Metallic strips need a test sample, the correct needle, controlled presser-foot pressure, and thread that behaves well with the fabric. The same planning principle applies to other project types, including 50th anniversary quilt ideas, where scale, symbolism, and finishing method need to work together.
Finish before cutting: Decide whether the quilt will be machine quilted on a domestic machine, sent for long-arm quilting, or completed with another finishing method. That choice affects block scale, seam bulk, pressing, and the amount of handling the quilt top can tolerate.
B-Sew Inn carries sewing, quilting, and embroidery machines from Baby Lock, Bernina, Bernette, Brother, and Janome, along with sergers, longarm quilting machines, thread, stabilizer, notions, cabinets, and cutting tables. The retailer doesn't manufacture machines or create custom machine designs, but its staff can help quilters compare available equipment, test feeding and quilting features, and choose accessories that match a specific project.
Quilters can see, handle, and try machines at B-Sew Inn stores in Tulsa, Oklahoma City, Springfield, Humble, and Fayetteville, rather than relying only on specifications viewed online. In-person machine mastery sessions, repair and service support, trade-ins, and in-person classes also make it easier to continue a project after the purchase. That support matters when a quilt moves from piecing into borders, basting, quilting, and binding.
The next practical step is to choose one pattern, make a test block, and inspect the result under the conditions the finished quilt will face. Check the block dimensions, press the seams, test the fabric and thread combination, and confirm that the chosen foot and needle suit the machine. Then browse B-Sew Inn's quilting collection, visit a store in Oklahoma, Missouri, Texas, or Arkansas to try machines in person, book an in-person class, or contact the team about service and finishing support.
B-Sew Inn offers quilting machines, longarm equipment, presser feet, rotary-cutting tools, thread, stabilizers, notions, in-person classes, and service support for log cabin projects. Visit B-Sew Inn to browse the quilting collection, arrange hands-on machine time at a store, or get help choosing the equipment and finishing path for the next quilt.

